Hints on Working with Poser 6 Dynamic Hair
Part II - Creating Basic Hair
While each of these tutorials are different, the first few screen captures and information will be the same because they pertain to all of them. If you missed the first tutorial, Modifying a Skullcap, you can find it here: Part I - Modifying the Skullcap .
Part II will describe the basics in delineating the skullcap for hair and putting hair on it using Poser 6. However, it is useful to compare Poser 5 and Poser 6 hair especially if one has created hair in Poser 5. To start with, some of the basic hair creating equipment in Poser 6 is different than in Poser 5. The bases for the hair have been changed as well as the number of Guide Hairs and the way they are distributed. In addition, the calculations for the density of the hair seems to be different in Poser 6. I have found that these differences have caused me to modify the way I make hair in Poser 6. Although I follow the same basic pattern as I did in Poser 5, I have had to modify some of my methods.
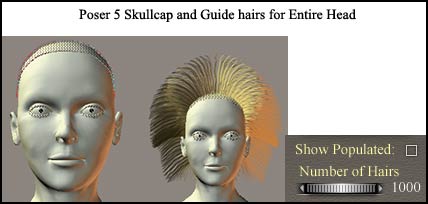
First, let's look at the Poser 5 default settings for the standard skullcap for Judy.
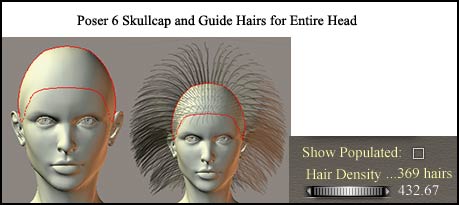
Next, look at the skullcap for Jessi in Poser 6.
Lastly, look at the Follicle Surface or Set for Jessi in Poser 6.
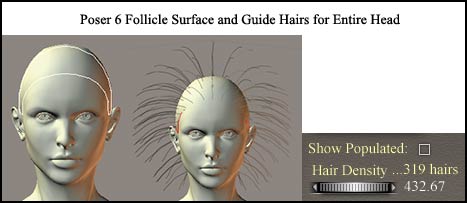
If you look at all of the screen captures, you will notice that there is a huge difference in the number of Guide Hairs as well as the shape of the different vehicles for growing hair. The shape of the vehicles can be modified, but I have not found a way to change the number of Guide Hairs by having the head have only one section or many sections. How one divides it, does make a big difference, of course, but not as to the number of Guide Hairs per "sprouting" area.
Even though the skullcap modified in the first part of this series is similar to the shape of the follicle surface, it has more Guide hairs, and I find it easier to use. Remember, it is illegal to create hair and sell it from a skullcap created in Poser itself.
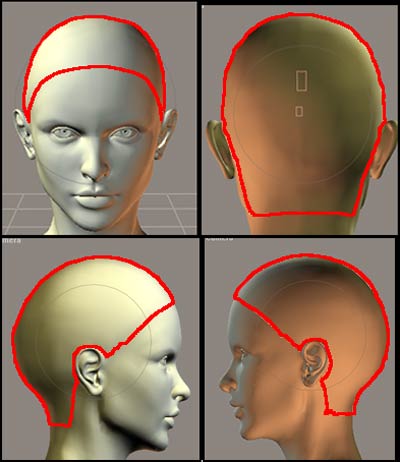
Step 1- Open Poser and select a figure. Add a skullcap from the Hair Category. Modify the skullcap if you wish according to the directions in Working with Dynamic Hair Part I . If you modify it and, then. eliminate the original skullcap as discussed in Part I, you are actually only marking an area on the head for the hair so you are not adding a texture (color) .jpg file to the skullcap. Make four poses as above for the four positions of the face. Make them about the same proportion as the picture below. Save this file. I suggest saving the files incrementally as you work, at least in the beginning. Name it with a name you can remember.
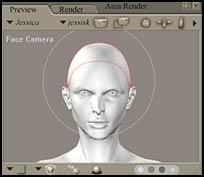
Step 2 - Open the Hair Room. You will see that under Current group, it says No Hair Group.
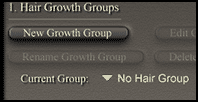
Step 3 - Click on New Growth Group. A screen will appear that says Hair_1. For this project, create 8 of these groups.
Step 4 - Now Click on Edit Growth Group to bring up the Group Editor. You used this screen in Part I to modify the skullcap by creating a smaller one.
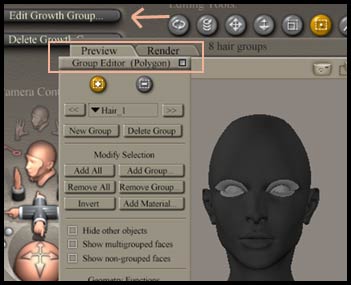
Step 5 - You will delineate a rectangle for each hair group. As you delineate it, the area will turn red. When the plus (+) button is orange it is active and when the minus (-) button is orange it is active. That way you can add and subtract from an area.
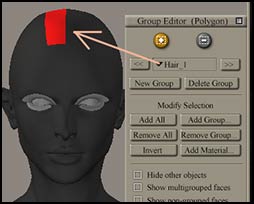
Step 6 - Mark 8 areas following the pattern below. When you have finished, click on the small white square in the upper right corner of the Group Editor to exit from it.
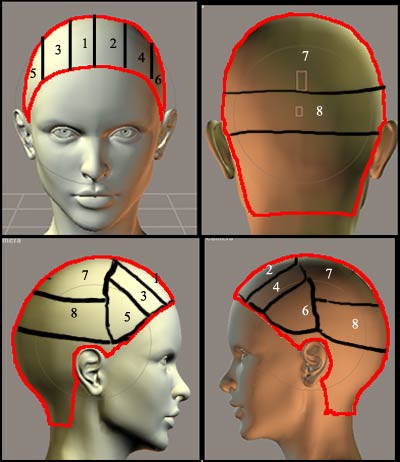 .
.
Now you are ready to start adding hair to the skullcap. Initially if you plan on following the directions, you will make straight hair and curl it. Below is a look at the final straight hair. The straight hair style has not been refined since I was planning on creating a curly style from it before refining it at a later date.
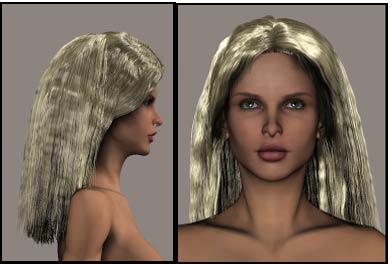
Below are a list of all the settings that I used.
| Front Sides 1 & 2 | Mid Sides 3 & 4 | Lower Sides 5 & 6 | Upper Back -Top 7 | Lower Back 8 |
|
|---|---|---|---|---|---|
| Hair Length | 0.25000 | 1.00000 | 0.90000 | 1.25000 | 0.90000 |
| Variance | |||||
| Pull Back | 0.00050 | 0.00250 | 0.00415 | 0.00100 | 0.00200 |
| Pull Down | 0.00005 | 0.00500 | 0.00500 | 0.00500 | |
| Pull Side | 0.00050 | 0.00500 |
Step 7 - Start from the bottom of the head which would be either Lower Side 5 or 6. I always work from the Left to Right so I started with area 5. In the beginning, all you will do is type in the numbers for the area and do some slight modifications which I will mention as we go along.
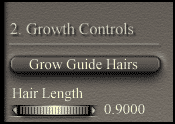
The first thing you will need to do is grow the first set of Guide Hairs. Set the dial above and click on Grow Guide Hairs.
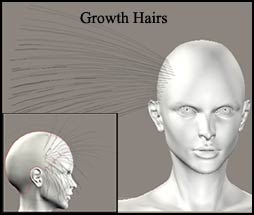
Notice how they go straight out from the head. You will change that by pulling those hairs back by 0.0050. Turn the Pull Back dial.
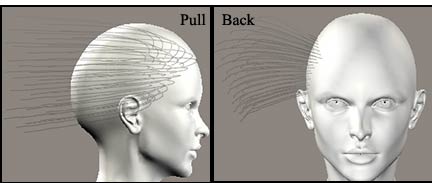
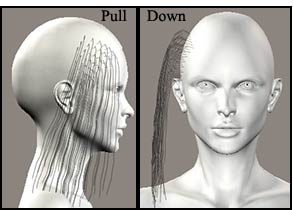
Step 8 - Select the Hair Style Tool, the one in the row of tools second from the right. (It looks like ears and standing up hair.) This will open the Hair Style Tool palette.
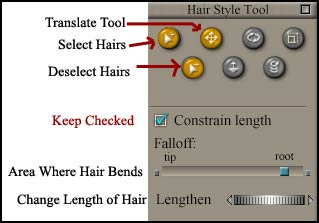
Make sure Hair_5 is selected as the current group. In the Hair Style Tool Palette, select the arrow plus circle. It is the Select Hairs Tool. Form a marquee around the hair. Yellow balls will appear to tell you that the hairs are selected. To learn another tool, we will deselect (arrow button with minus sign) the hairs that are already going toward the back so that just about half of the hairs are selected. Then access the Translate Hairs tool which is next to it and push those hairs back. Keep the Falloff slider toward the root so the hairs move from the root. Later you will use the slider at different settings.
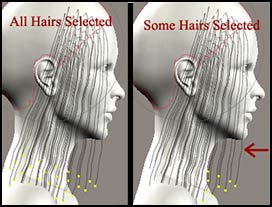
With each side layer, you will push the hair away from the eyes with the Translate tool. You will keep the Falloff slider positioned toward the root (of the hair) and you will select and deselect hairs so that you avoid clumping the hairs. You want the hairs to fall straight down and slightly toward the back.
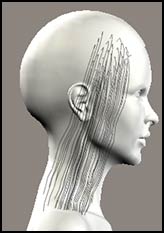
Step 9 - Select the next hair group, 3, and follow the same procedures as you did for hair group 5.
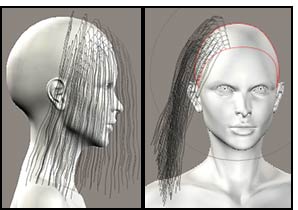
You will also want to move these hairs away from the face with the Translate tool.
Step 10 - Finally choose the last hair group on the side, group_1. However, this group will be a little different since the hair in this group is short and only used to cover the top and top sides of the head. Arranging the hair this way helps cover all of the scalp so that bald spots do not appear. The red marquees show where the number 1 hair group resides.
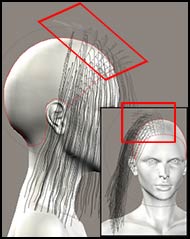
Step 11 - Select some hairs in the front with the Selection tool. Take the Translate tool and with the Falloff slider set near to the tip move from right to left curving the hairs slightly downward away from the center part and toward the side of the head. Do it just a little. Clear the selected hairs and select the next group working toward the back
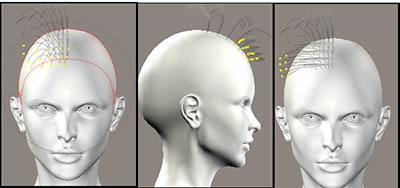
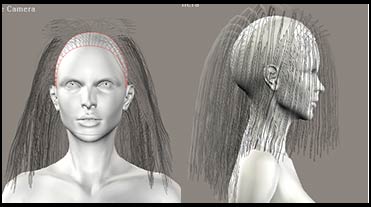
You will have to work from the front view and then the side view, going back and forth and selecting different hairs until you place them in a similar manner to the front hairs in the screen capture below.
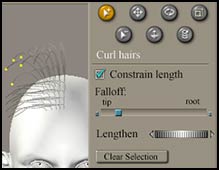
At this point, especially when dealing with hair on the top of the skull that also goes over to the side, it is helpful to spend some time on how to use and not use the Translate tool. Below is what you do not want to happen because it will create a bald spot. Look at the hair roots dissolving into the skull.
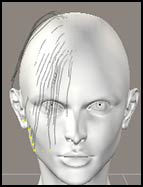
The following chart gives some hints on how to use the tool. The hair on top is longer than it is for this project in order to demonstrate how to use the Translate tool.
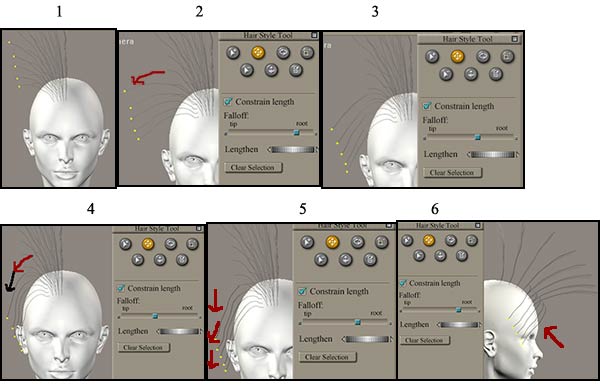
The arrows show the movement of the Translate tool. The same color means all in one movement.The idea is to keep the arches of hair on top of her head while the sides of the hair flow back and stay close to the head. Sometimes you will work with rows of hair, creating a marquee around a whole row and then either adding a hair or deselecting ones. Sometimes you may even work with one hair placing it in the correct place. Remember Guide Hairs spawn other hairs so their positions are important.
Step 12 - Now that you have placed hair on one side of the head, do it on the other side. Then go to section 8 and, finally, section 7. Even though the front view appears not to have hair in the model's face, when looked at from the side it does. One needs to keep looking at the head from all angles.
Go To Part III - Styling Basic Hair
![]()