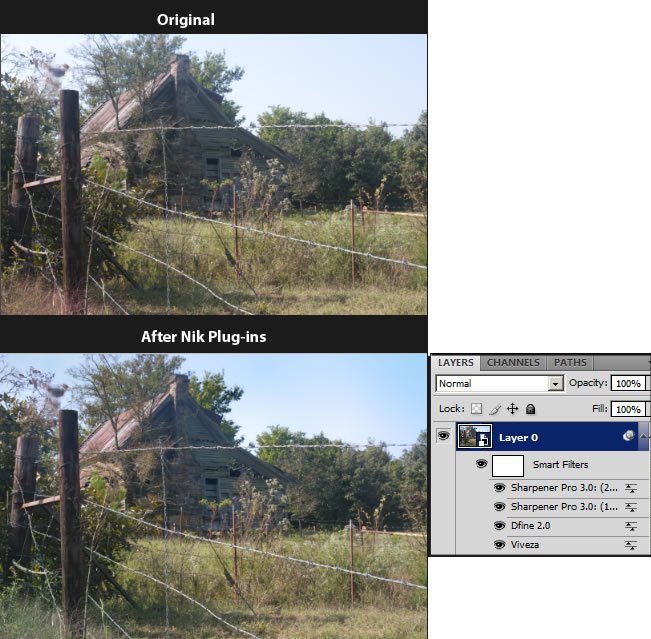
I'm starting this review in a totally different way. First we'll look at a before example and, then, an after one.
Before:

After:

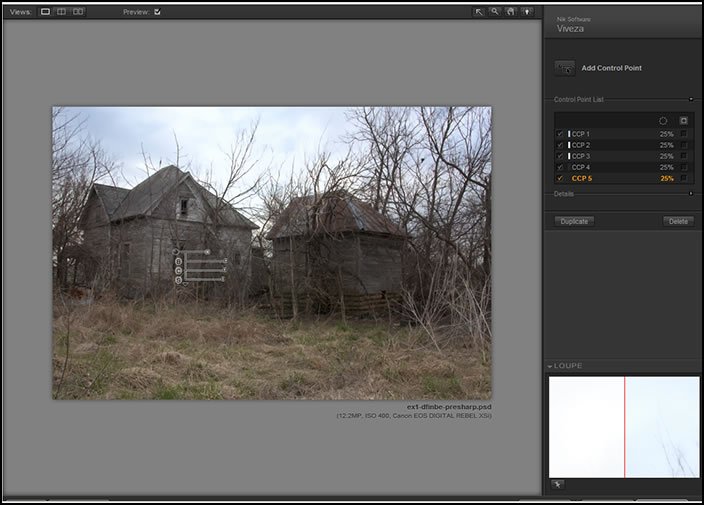
The positioning of some U Point® Technology Control Points changed this image. So, what does Viveza do? Viveza is a fast, easy to use and accurate plug-in for changing the light and color of an image. It can revolutionize how you work. If you look at the first image, it is dull and drab and the sky is practically useless. To add a new sky is, also, almost impossible because of all the bare tree branches. Before I used Viveza, this was a throw-away image. By adding the light to the ground and having it correspond to the sky above, I added a center of interest.
The U Point® Technology:
"The U Point technology powered Color Control Points let you identify and isolate objects within a photograph by placing a Color Control Point directly on the object or area to be affected. By analyzing the color, tonality, detail, and location, the Color Control Point automatically determines where and how to apply certain effects, based on your needs."
I need to to back track a little. Nik plug-ins share a uniformity of interface and controls. This makes learning them a lot easier although the curve will depend on the program and not, necessarily, in what order you learn them. Viveza is extremely easy to use and, yet, you can get both dramatic or subtle effects with it.
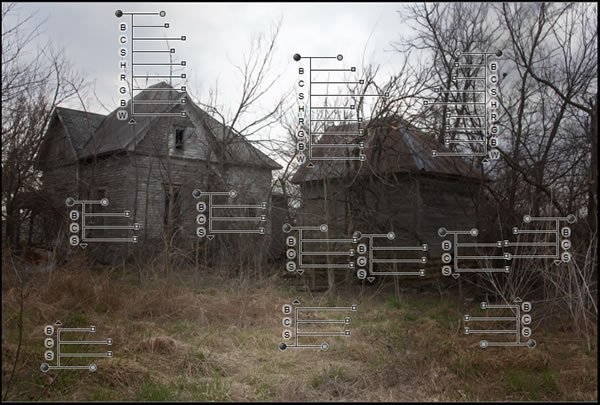
First, let's look at the interface and the right hand panel that controls it.
A closer look at the right panel will show some of the details and options.

I'm going to go over some of these controls in detail. If you use a number of the Nik plug-ins, you are familiar with how they vary even though the they use the U Point® Technology. The one for Viveza has the following controls. The Surface area takes into account the images's color and tonality. If you move it even slightly, there can be a difference. How much of a change can depend on the part of the image and the particular control.
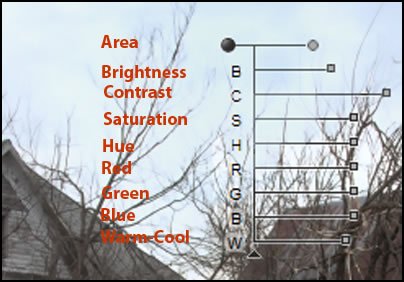
The best way to see how the Control Points are affecting your image is to put a check mark to the right of the Control Point on the right panel. You can turn these selections on or off by clicking on the box labeled above "Show or Hide Selections..."
The whiter the area, the greater the effect of the Control Point. To try this, turn this on and move the Control Points as well as change the circumference of the area circle.
In the above screenshot that identifies items on the right panel, notice that you can choose from different rendering modes. The User Guide on page 19 explains them as follows:
"The Rendering Method pull-down menu determines how all of the
Color Control Points are applied to the image. Each method utilizes
different algorithms optimized for different types of images. Viveza
contains one Method pull-down menu where you can choose from
one of the available methods. The different methods are:
Basic
The Basic method is the fastest and most direct method to apply the color control points from the current step to your image. This method is recommended for web graphics and illustrations.
Normal
The Normal method provides the best balance of speed and detail protection. This method is recommended for the majority of images.
Advanced
The Advanced method provides superior results when lightening shadows or working with images with a high level of noise or grain."
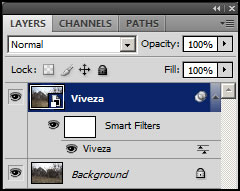
As do all of the Nik plug-ins that I have tested, Viveza also can be used as a Smart filter. I recommend this because you can, then, change the settings of your image as often as you please. The Smart Filter is non-destructive.
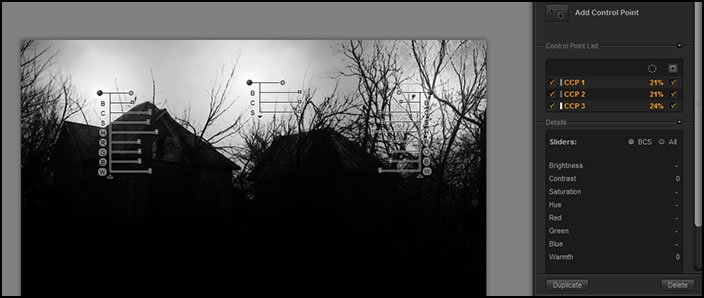
For the image that I have been using to demonstrate this fantastic plug-in, I used a lot of Control Points because I wanted a number of subtle effects. I played around with many variations and also liked a number of them that used fewer Control Points.
I changed the color of the sky by using mainly two controls. I used the Hue element on the Control Point as well as the Eye Dropper to choose and change the color of the grey portion of the original sky. By applying different Control Points and varying the Hue, Saturation, Brightness, and the color selected by the Eye Dropper, I was able to add some variation to the bland sky.
Before I end the review, I want to give another example. This one demonstrates how precise the Control Points are. I took an image of a flower. In under 10 minutes, I had reworked the whole image using Control Points. Below is the original image.
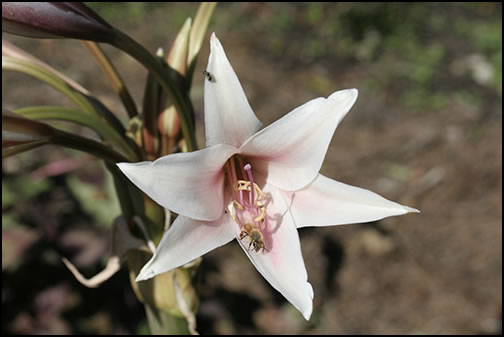
The changes I chose to make were very subtle. One included slightly increasing the brightness of the flower and its saturation. Notice when I selected the flower and checked the Show/Hide Selection...., there is no tonality or color spill over. It picked up the same color and tonality that was selected by the placement of the Control Point.

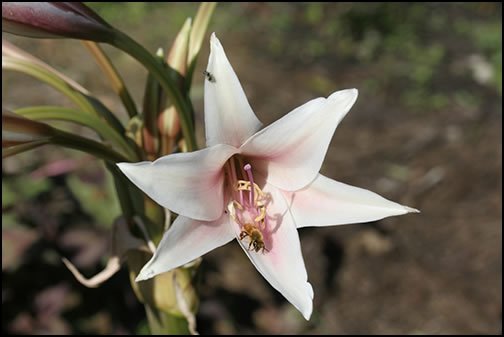
The final rendition kept the original pretty much as it was; it just changed tone, brightness, and saturation of some of the components. This will speed up any workflow without the loss of quality.
Well, I thought the photograph of the flower was the last one. I had tried many photographs of this old house, but the sky never cooperated. I had given up on using it as a relatively straight shot until I used Viveza. This plug-in is more than worth every penny of its cost!
The requirements are:
Windows
|
Macintosh
|
|
** Nik Software product filters are developed to integrate seamlessly into many popular image editing applications that support the Adobe plug-in architecture and there are numerous software applications that accept Adobe plug-in compatible filters. Please consult your image editing application’s documentation for compatibility and installation instructions for 3rd-party plug-ins. |
||
For more information, go to the Viveza product page. Viveza regularly sells for US $249.95. A the time of this review, April 4, 2009, you can purchase it for $100.00 off the retail price. I strongly suggest downloading a demo. I know that I will be using this program continually. It will save me a lot of time since for many images I will not have to make as many selections nor paint as detailed masks as I do. For information on Nik Software, go to the Nik Software site.
You can purchase the plug-ins separately or in different bundles. I will be reviewing all the programs in the Complete Collection:
"The Complete Collection includes all of Nik Software’s latest award-winning plug-in software titles for Photoshop®, Lightroom® and Aperture™ including: Dfine® 2.0, Viveza™, Color Efex Pro™ 3.0, Silver Efex Pro™, and Sharpener Pro™ 3.0."
Viveza is intuitive and easy to use. It, also, can save dull bland images. This is a must for any toolbox. I plan to go through a lot of discarded images because I know I can save many of them, especially those with bland skies. This is an exciting plug-in!
Nik Software products Reviewed: