The purpose of Nik Software's Sharpener Pro 3.0 is to sharpen an image according to certain criteria. You don't just choose an overall sharpening adjustment, but you do it according to the intention of the output. Some programs for enlarging images also use similar types of criteria. This program incorporates special algorithms designed for digital photography. It is geared toward photographers. It offers two types of sharpening, Raw Presharpening and the Output Sharpening. It is designed for Output sharpening; Display (what you see on the screen) is a type of Output. It is very exact as to type of paper, printer dpi, etc. I will go into this in the review. Nik Software advocates either a 1 or 2 step process. They state that most photographers will only use Output Sharpening. They advocate using this method or, for finer results, adding Presharpening to it. If you are starting with Presharpening, which you can only do with camera raw images, you turn off the sharpening in Camera Raw, for example if using Adobe Photoshop, as well as in your digital camera. Then, you and apply a small amount of sharpening to the image after converting the RAW file and after any noise reduction has been applied. The greatest amount of sharpening is applied right before output using specific criteria.
Nik plug-ins share a basic uniformity of interface and type of controls. This lessens the learning curve a lot although it doesn't eliminate it when using the different programs. I will be treating each of my reviews on Nik Software plug-ins individually so there probably will be some repetition of features. One of the basic features is U Point® Technology which relies on Control Points. Using these Control Points, you can determine how much or little you affect the localized area.
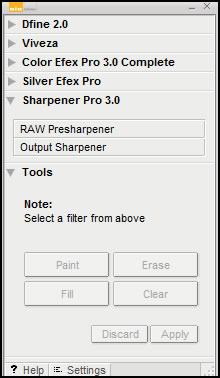
Depending on how many of the plug-ins are installed, this box will vary. You can set up the parameters so it will open whenever you open Photoshop. To access the Sharpener Pro 3 screen, click on the word Sharpener Pro 3. The other Sharpener Pro 3 options will be explained later in the review. This plug-in can also be used as a Smart Filter and there is a lesson on the Nik website on how to do this.
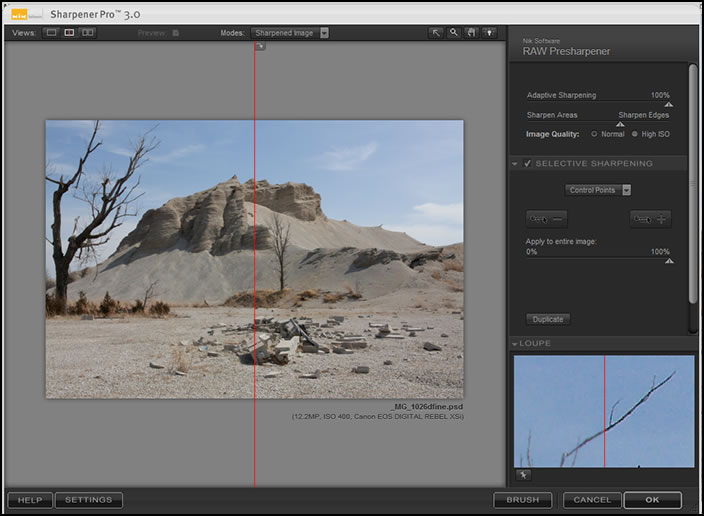
Below is the interface showing the Raw Sharpening features. Notice that there is Global and Selective.
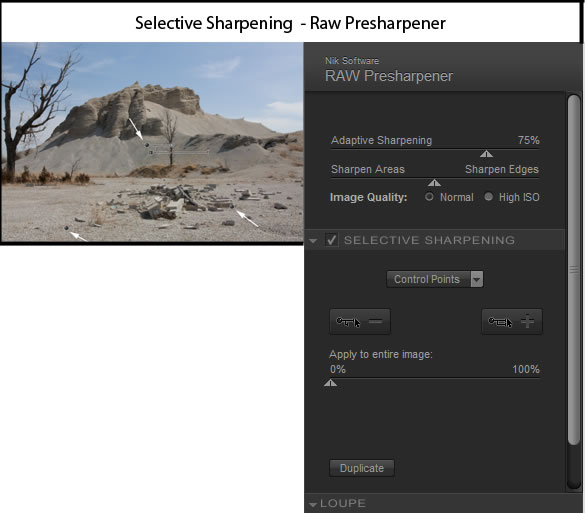
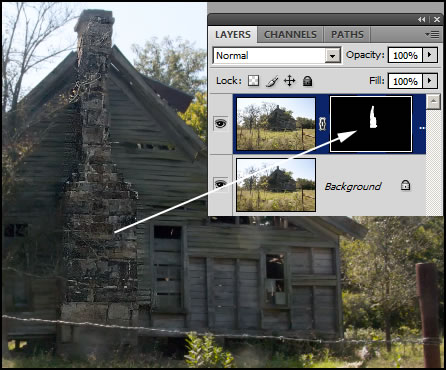
Below shows the same image with added Selective sharpening by means of Control Points. Both, according to the instructions, are to be used judiciously since the Output sharpening is the key to this program.
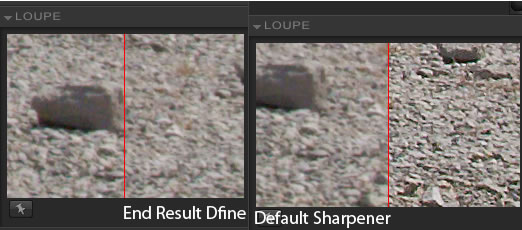
Below is an image that first went through Dfine 2 and, then, just the global setting for the Raw Sharpening in Sharpener Pro 3.
The Opacity sliders determines the amount of sharpening you will be applying or eliminating. The U Point® powered Control Points for Output sharpening are more complicated and there are more of them.
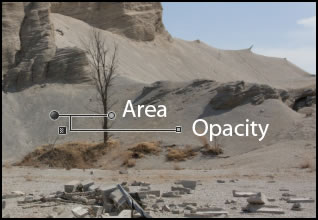
In Selective Sharpening, the Control Points override the "apply to entire image" sharpener. For example, if you choose an opacity of 0%, you will eliminate any prior global sharpening for that specific area.
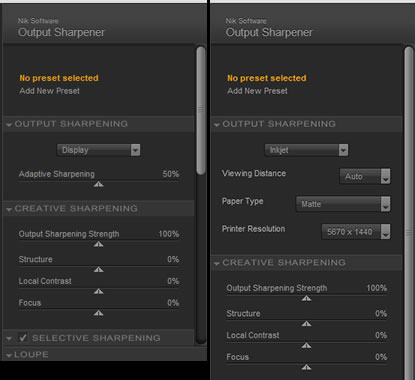
As stated earlier, Presharpening is an option that Nik Software believes will only be used by a few photographers while the emphasis should be on Output sharpening. Below is the interface to the Output Sharpening Option.
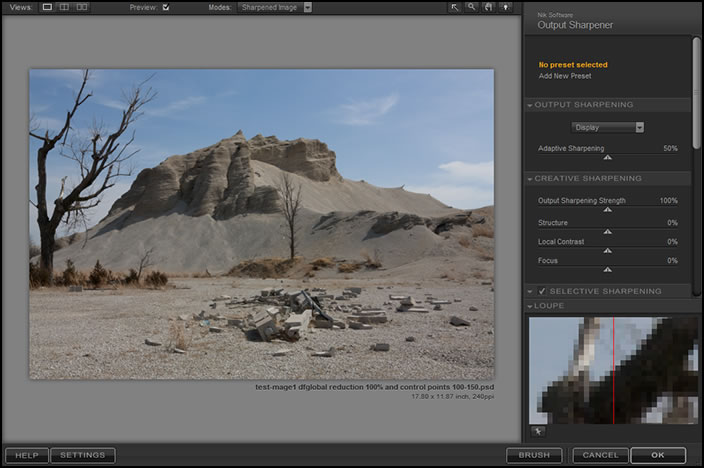
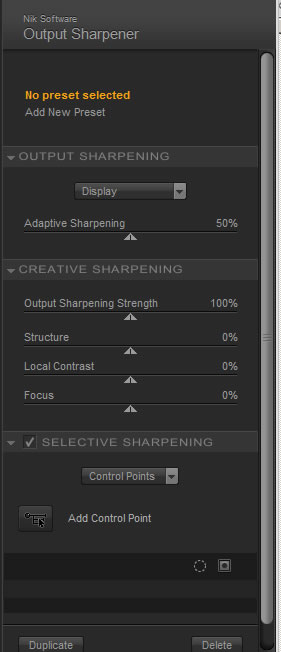
Below is an enlargement of the right panel. Notice the words in orange "No preset selected." You can create a preset for all sharpening for a certain type of output and access it for quick results.
The first step to take is to decide on your output. Output stands for a visual representation.
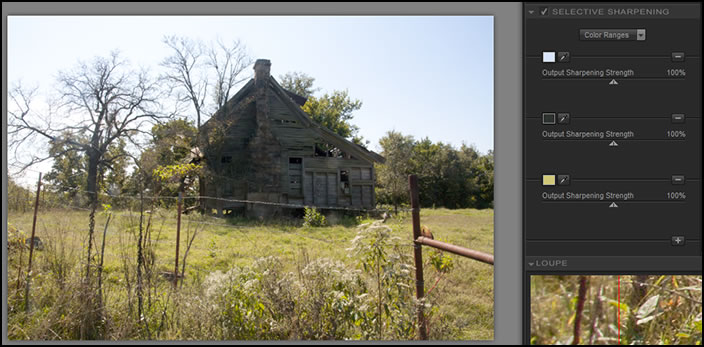
There are three types of sharpening available: Adaptive is overall sharpening; Creative gives many refinements to the Adaptive; and either Control Points or Color Range adds Creative Sharpening to certain areas. I will give examples of Color Range later. Below show a screen capture of the Control Points for Output sharpening.

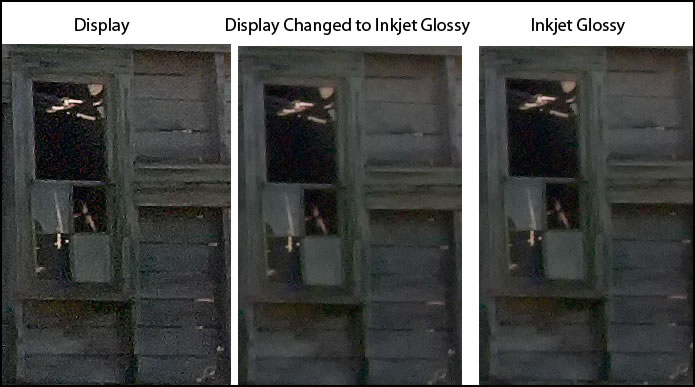
I created four different output images using inkjet as my output device. You will notice a difference in the sharpening of all of them. The one that is sharpened the most aside from Display is Inkjet Matte, then, Lustre and Glossy. The original images were set to a size of 100% and screen captures were taken of sections. Below I explain a little about sharpening of Display and of Output for the inkjet printer.
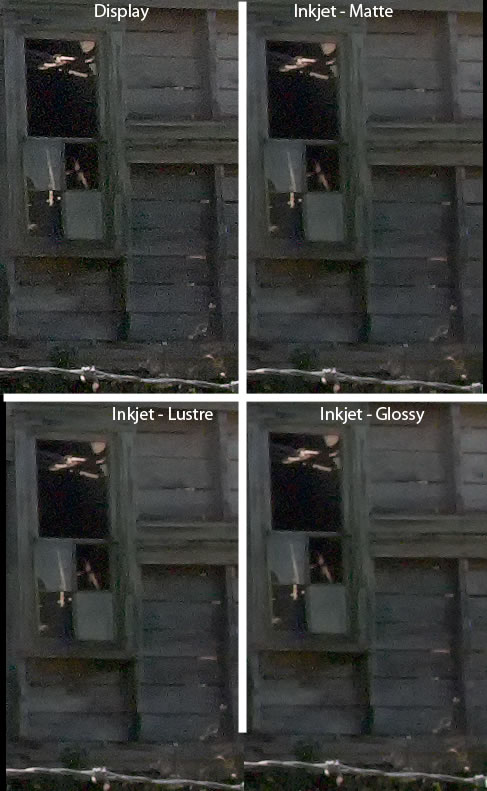
There is a little confusing when it comes to trying to see how these various output settings differ visually. You can keep a consistency when comparing different inkjet paper type outputs, for example, but when you try to compare the Display, using the same settings, you can't really. This is because when you set the Display, you set the Adaptive Sharpening, then the Creative Sharpening to modify it. When you set the sharpening for Inkjet, the Adaptive disappears and you use the Creative. Below are the setting I used. This does not present a problem for work, necessarily, but it does when I try to show how each will look under constants. The Display might seem over sharpened in the example above. I do not use that much sharpening when I output an image for display on the web.
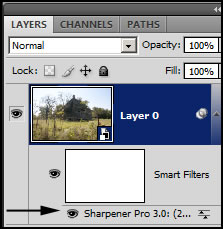
As stated earlier, the final sharpening will be determined by the type of output. I have a problem with this. I, often, use my work for multiple types of output. However, this can be solved by using the plug-in as a Smart Filter because you can go back into the filter and change the Output. below is an example of how this works. I need to emphasize the importance of using a Smart Filter if you want to change the types of output but keep Selective controls such as Control Points.
To go back into the plug-in, click on the layer with the arrow.
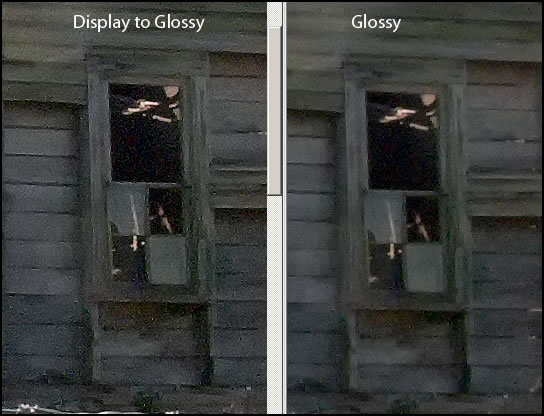
I decided to do some testing not using the Smart Filter Approach. I took an image with an output set at Display and re-opened it in Sharpener Pro 3, Output Sharpener. Then, I set all the controls to reflect 0% sharpening and set the output to inkjet-Glossy. There was a difference between this image (one on the left) and the true glossy output image. Thus, there is no easy way that I could find to change your printer, paper type within a printer or go from display mode to printing mode.
I demonstrated using Control Points, now I will show a screen capture using Color Range.
Tools are a category that allows you to apply sharpening to parts of an image by creating a mask. You select "Brush" in the interface and that takes you to Tools where you decide on the type of tool to use. You set the sharpening as you want it to be. It will only affect the area "brushed."
When you select a software plug-in from the list, if tools are available, they will show up on that menu. The menu was shown in the beginning of the review. The tools for Sharpener Pro 3 are: Paint, Erase, Fill, and Clear. When you use a Smart Filter, you can't use these tools.
To get the full benefit of the program, you must go beyond the lessons on the Nik website and delve into the manual. The interface is not as intuitive as it might seem. For example, in Presharpening there are two controls: Adaptive which is a global control and, then, when using Control Points, there is another global control. The manual gives very little space to discussing these options. They can be figured out by trial and error, but I would like to see more documentation on PreSharpening. In Output Sharpening there are three types as stated earlier- Adaptive, Creative, and Selective. To understand these the manual must be read. The manual deals well with Output Sharpening but is sketchy on PreSharpening.
The trend today seems to be away from just sharpening an image to sharpening it for specific output such as display or print and with print paper. It is obvious that a matte print needs more sharpening than a glossy one. To be able to change Outputs, you need to use the Smart Filter Approach. The only drawback to this is that the tools are not available. I, personally, like the Presharpening option a lot since I believe it gives me a good base from which to start. I will use this plug-in a lot utilizing the Smart Filter. Once you understand all the variations for sharpening, it is very powerful and definitely useful.
System Requirements |
||
Windows
|
Macintosh
|
|
** Nik Software product filters are developed to integrate seamlessly into many popular image editing applications that support the Adobe plug-in architecture and there are numerous software applications that accept Adobe plug-in compatible filters. Please consult your image editing application’s documentation for compatibility and installation instructions for 3rd-party plug-ins. |
||
The software sells for $199.95 with upgrades from prior versions 1 and 2 available through the Online-Store. You can download a 15 day full working demo.
You can purchase the plug-ins separately or in different bundles. I will be reviewing all the programs in the Complete Collection:
"The Complete Collection includes all of Nik Software’s latest award-winning plug-in software titles for Photoshop®, Lightroom® and Aperture™ including: Dfine® 2.0, Viveza™, Color Efex Pro™ 3.0, Silver Efex Pro™, and Sharpener Pro™ 3.0."
You can find out more about Sharpener Pro 3 by clicking on it. You can, also, find out more about the many plug-ins produced by Nik Software by going to their website of http://www.niksoftware.com.
Nik Software products Reviewed: