FocalPoint is an Adobe Photoshop plug-in that lets you control focus after you have taken a photograph. So if your depth of field is too great so that too much of the image is in focus, this plug-in will allow you to correct this. It, also, can be used artistically for special effects. The placement of the "Sweet-Spot", the area that will remain in focus, is accomplished by placing and manipulating the FocusBug. You can also add vignetting to the image. All of the effects can be saved as presets. To control the effects you can manipulate the FocusBug or use the sliders which are on the right panel of the interface. However the FocusBug is not the only means for creating a "Sweet-Spot"; read on to find more ways in this new and excellent version of FocalPoint.
FocalPoint works by means of the FocusBug - a little bug with legs and antennae. You position the body of the bug where you want the picture to be in focus. Then, you move the legs to define the width and height and the antennae to control the blur as well as the hardness of the edge. To see the review of FocalPoint 1, click on the link. After I read about the new features of FocalPoint 2, I was very excited to try them out especially since I loved FocalPoint 1
What does FocalPoint 2 do?
- Hides distracting backgrounds - puts the viewer's eye where you want it.
- Uses unique FocusBug control that works just like adjusting a lens.
- Recreates the look of popular lenses including selective focus, fast aperture and tilt-shift lenses.
- Affords ultimate defocus control after the shot is taken. You control the amount, feather, and type of blur.
- Creates presets for a fast and consistent look.
- Easily adds realistic vignettes to your image.
What are the features new to FocalPoint 2?
- Multiple FocusBugs.
- An updated blur algorithm so that it mimics camera lenses more closely.
- Built in lens presets including those that produce bokeh.
- New Focus brush to brush on focus, blur, or erase.
- Addition of a highlight bloom tool to control the strength of highlights in the bokeh or blurred area.
- Ability to use as a Smart Filter.
- An onOne Panel in Photoshop for quick access.
While you can control depth of field in Photoshop by using gradient masks, layer masks, and filters, it can be very time consuming. ( I never found the Photoshop sharpen or blur brush to be very effective or efficient.) FocalPoint 2 allows you to do this quickly and easily. The addition of the multiple FocusBugs is great as is the ability to control the area using a brush.
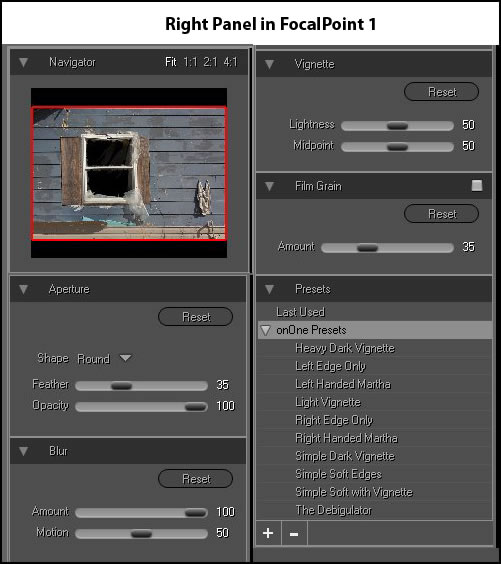
The changes from FocalPoint 1 to FocalPoint 2 are huge. Just look at the screen capture of the right panels in FocalPoint 1. (This panel was cut in half for the purpose of this review and pasted side by side.).
Now compare it to some of the options available in FocalPoint2. (This panel was cut into thirds so that it would take up less space on the page.)
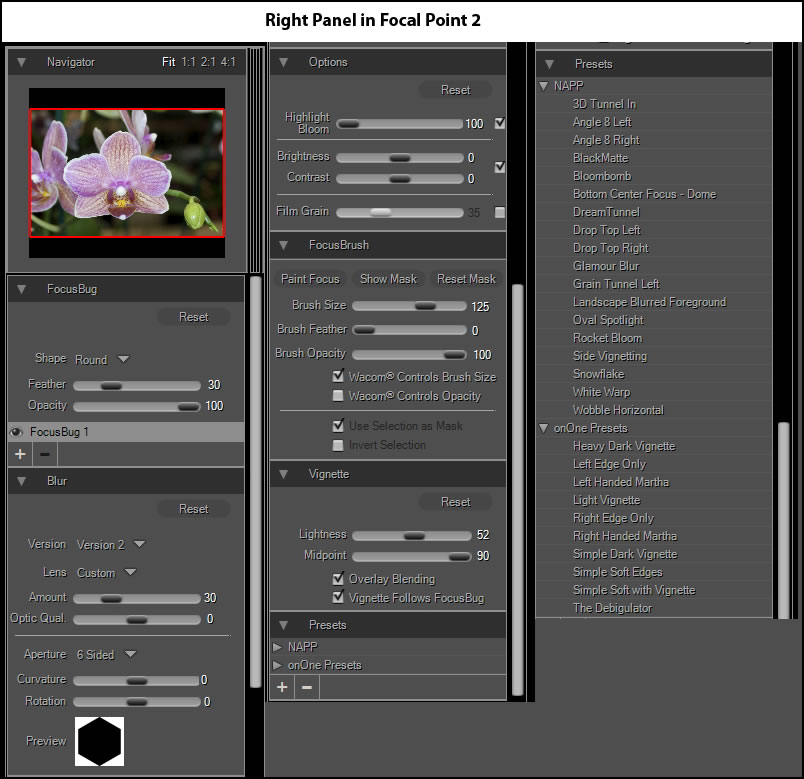
These are not the only options available. Under FocusBrush, notice "Paint Focus". By clicking on that button, you can change that to "Paint Blur" or " Erase". Everywhere there is a darker gray oval under type, there is an option or options. You, also, have a choice of camera lenses for the bokeh or blurring effects.
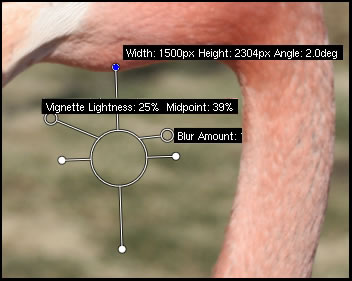
The FocusBug has six controls: 4 are to adjust the width of the bug, 1 is to set the vignette (lightness and midpoint), and 1 is to set the blur (amount and feather).
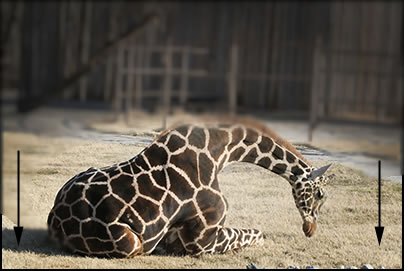
Below is a simple use of FocalPoint 2. I just used basic controls. There is a little blur on the left and right front on the image on the right.

I removed it by painting on "focus" with the FocusBrush.
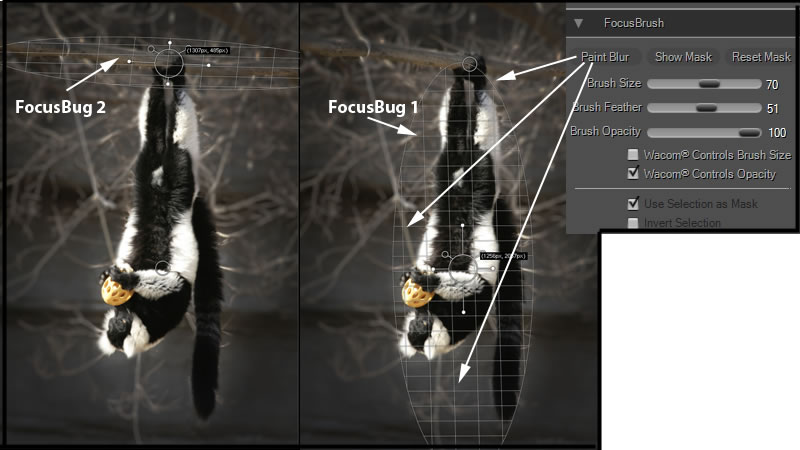
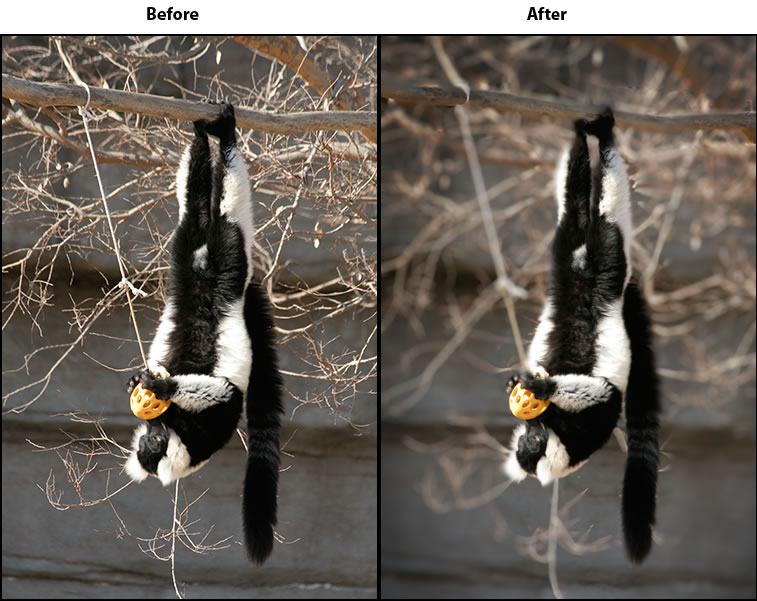
Below I used two FocusBugs and the FocusBrush to paint on "blur."
Here are the before and after images. I redid the image so that the outcome would be a little lighter than what is shown in the above.
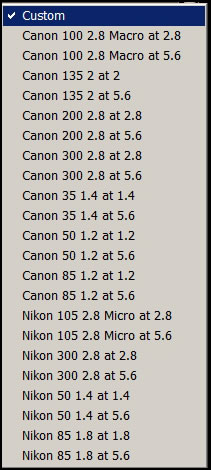
I like to use custom lens configurations so that I have more control of the blurring even though the FocusBug controls that as well. The specific lens will initially regulate how the image is blurred. You can control that by manipulating the controls under the Blur panel. This panel is the one that has the fly-out for the choices of the camera lens. I find that I like to manipulate it anyway.
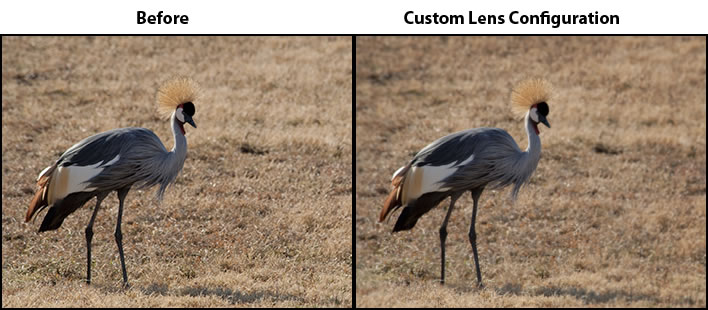
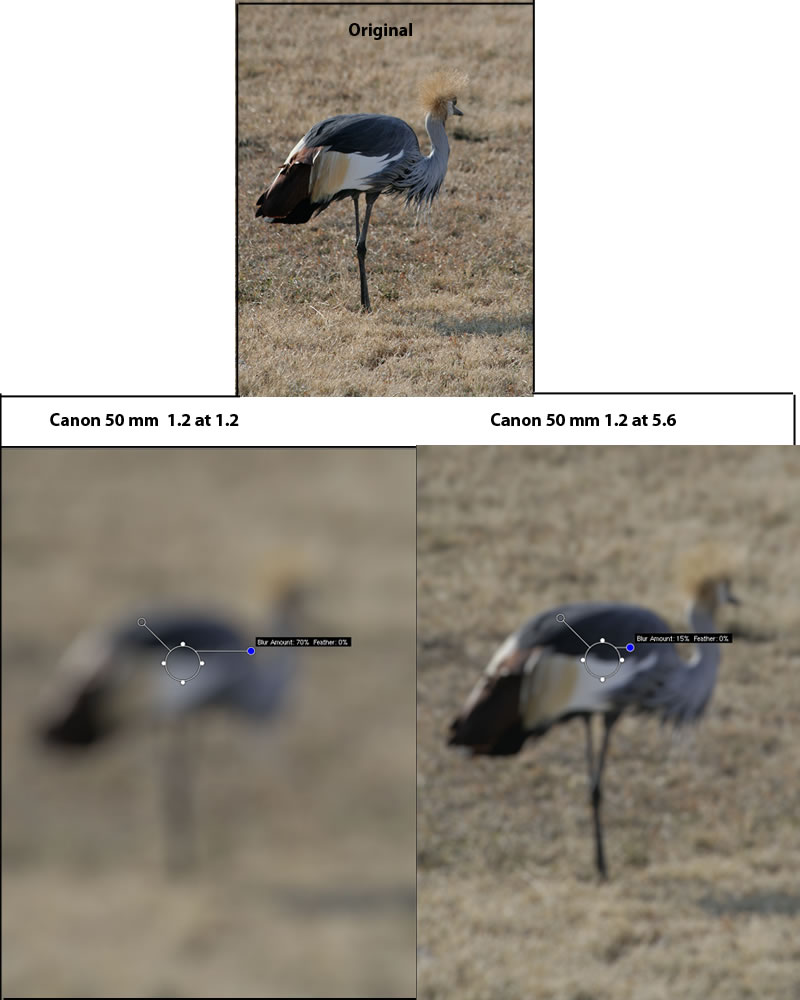
Since the FocusBug determines vignetting and area of blur around the image, it interacts with different lenses differently and changes according to which lens is selected. I left it in one position and used different lenses to see what they would do. While it is not too clear from these images, the choice of lens "moves" the blur control on the FocusBug. Below are examples where I left the lenses at their default and did not use the BlurBrush to blur the areas near the bird's legs. The FocusBug is placed in the center of the bird's body. Since the FocusBug has two shapes - oval and planar - it is often necessary to use the blur brush to continue the blur near the object in focus. You can control the intensity of the blur by controls and by setting options if you use a Wacom tablet.

Here is a better example of how the lens determines the settings on the FocusBug. Remember, you can change all of these and are not locked in to any. I arranged the FocusBug so that no part of the image was in focus (collapsed the legs and antennae). Notice the differences in the amount of blur and the position of that control on the FocusBug as I changed lenses. At f 1.2 the iris is wide open and at f 5.6 it is partially closed. You can try this for yourself using your camera set at manual.
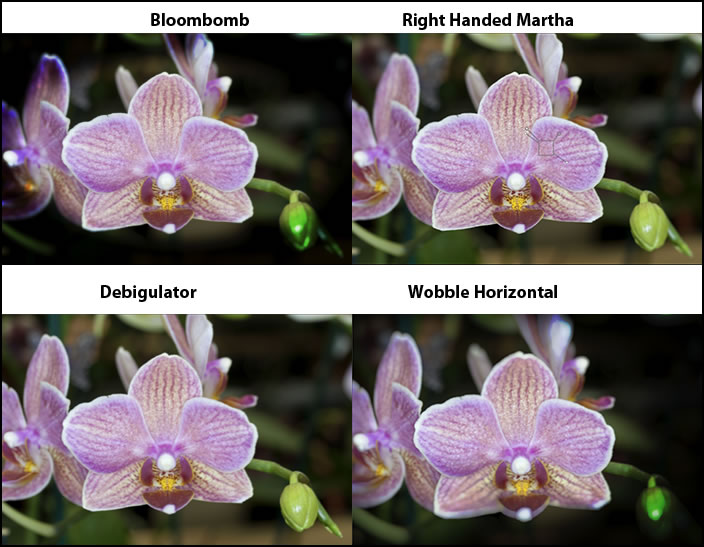
FocalPoint 2 comes with quite a few presets. The following are some examples of using them without any modifications.
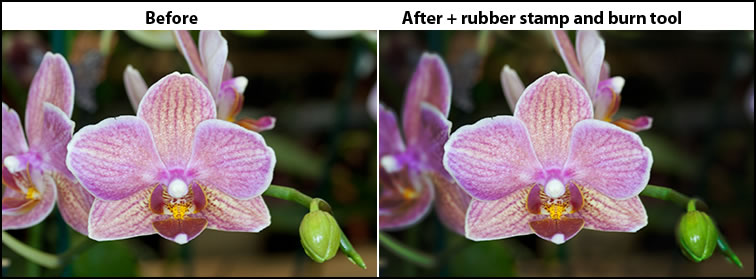
You can use a preset as a base and then modify it with the FocusBrush as well as afterwards in Photoshop. Without FocalPoint 2, the effects would take a very long time and not be as smooth.
Requirements:
Latest Version |
Apple Mac OS X
|
Microsoft Windows
|
| Operating System |
|
|
| Computer Processor |
|
|
| Computer Memory |
|
|
| Display |
|
|
| Required Host Application |
|
|
| Optional Host Applications and Integration |
|
|
| Other |
|
|
| Language |
|
|
The full version of FocalPoint 2 costs $159.95 with an upgrade price of $99.95. You can download a 30 day trial. For specifics on FocalPoint 2 click here for the onOne software link. Don't forget that this is a member of the Plug-in Suite 5 which is a great value. That review can be found here as well as other links to the products that are contained in Plug-in Suite 5.
I loved FocalPoint 1 and this new version is incredible. While some of the effects could be accomplished in Photoshop, they would be very time consuming involving creating layer masks, etc. Think of hours instead of minutes. It is so easy to create, change, or modify how you use depth of field in an image using FocalPoint 2. The additions of multiple FocusBugs as well as the FocusBrush where you can paint in focus or blur or erase adds another dimension to this plug-in. Whether you are doing portraits, flower shot, butterflies, landscapes, etc., this program can make a good image great!