Review of OnOne Software's FocalPoint 1
When I started out as a photographer in the ice age, I always used depth of field. I would look at my lenses which had depth of field indicators on them for critical focus or just use my knowledge of how depth of field varies with fstop, length of lens, etc. When I finally switched from film to digital, I found that even though I had a DSLR camera, I couldn't control depth of field as easily, and I found that too many of my images were in focus from foreground to background. Of course, I could remedy this in Photoshop using the gaussian blur filter, layer masks, etc. Now with FocalPoint 1 it is a snap to change the image from what was to what you imagined it to be.
FocalPoint 1 is an Adobe Photoshop plugin that lets you control focus after you have taken the photograph. So if your depth of field is too great, too much of the image is in focus, this plugin will allow you to correct this. It, also, can be used artistically for special effects. The placement of the "Sweet-Spot", the area that will remain in focus, is accomplished by placing and manipulating the FocusBug. You can also add vignetting to the image. All of the effects can be saved as presets. It can be used with Photoshop or Photoshop Elements. I tested it on a PC using Windows XP although I also put it on my Vista (Ultimate) laptop where it worked perfectly. To control the effects you can manipulate the FocusBug or use the sliders which are on the right panel of the interface.
FocalPoint works by means of the FocusBug - a little bug with legs and antennae. You position the body of the bug where you want the picture to be in focus. Then, you move the legs to define the shape and the antennae to control the blur as well as the hardness of the edge.
As always onOne Software provides an excellent interface and many tutorials to get you started. It definitely has the user in mind and wants to make its products very user friendly. When you first open it, either by going to File>Automate or using the onOne heading on the top toolbar, the program opens with an excellent set of 9 help screens. These can be closed at any time.

First, let's look at the FocusBug itself and see its various parts. The Bug can either be round or planar in shape. The white letters identify the various parts while the black letters describe their function.

The shape of the "round shape" can be varied from round through oval; the width and angle of the Planar shape can modified, but it basically will go from end to end of the image.
There are a few ways one can manipulate the FocusBug. One can either place it over the entire image, but some background will be in focus, also; or one can place it on most of the image and remove the unwanted blur from the image by using the masking layer. Both methods are very simple to do. Below is the original image.

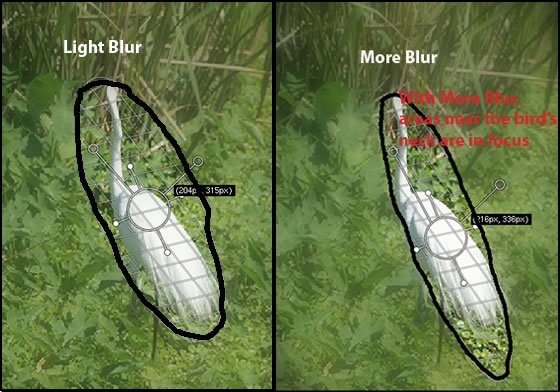
In the images below, I changed the blur factors. Notice, in the one on the right a little of the background near the neck is in focus. It is hardly noticeable on the one on the left because the blur factor is small.
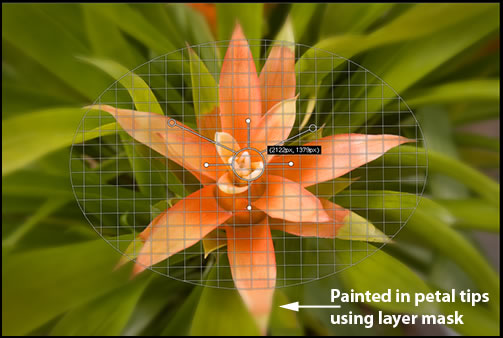
However, using the built in Layer Masking ability of FocalPoint, I can change this so that no background is in focus and the image is sharp. The trick is to place the mask over only the part of the image that you want in focus and, then, with the layer mask bring the rest into focus.
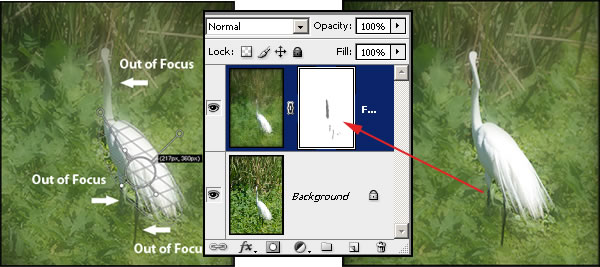
By painting on the layer mask in black or shades of gray, I can bring into focus the neck, head, and legs of the bird. The "Blacker" the black, the more of the image will be brought back. If you take off too much, just paint it back using white.

This is an incredibly flexible program that allow users to create the blur as they envision it to be.
One can also add a vignette around the image controlling the position of the vignette as well as how dark or light you want to make it. I chose for the image below just a hint of a vignette

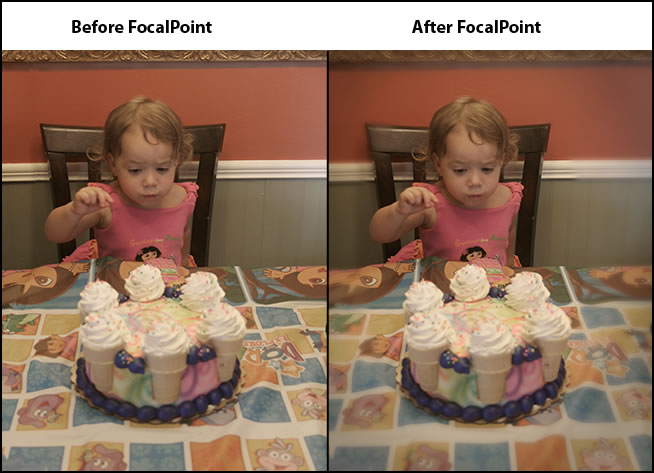
These pictures were from a birthday party for a very special 2 year old. I believe that FocalPoint added a lot to the one on the right by diminishing the background and highlighting the figures.
 .
.
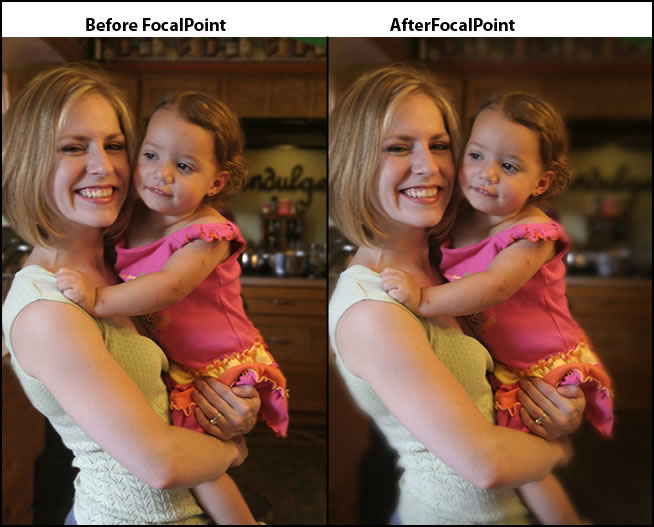
Below is another before and after picture. In this instance, the soft background and foreground were not used to mask anything but to just create a soft effect. The slight vignetting was used to bring the eye to the center of the image. The images above and below were taken with available light.
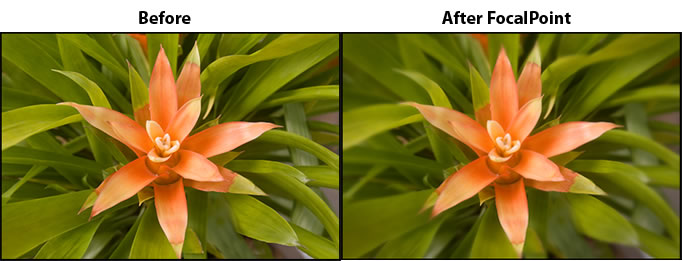
I take more "Portraits" of birds and flowers than I do of people. Below on the left is a flower with most of the image in focus and on the right is the one to which I applied FocalPoint. Notice how the flower stands out since the leaves are slightly blurred.
And lastly is a screen capture of the FocusBug placement.
The system requirements are:
Mac OS X
- Version: 1.0
- Mac OS X 10.4.8 or higher
G5 or Intel Core Processor(s)
Universal Binary - Supports PowerPC & Intel Processors
OpenGL capable video card with 128MB VRAM (256 recommended) at 1024x768 or higher
Windows
- Version: 1.0
- Windows XP with SP2 or Vista
Microsoft .NET 2.0 Framework or higher - OpenGL capable video card with 128MB VRAM (256 recommended) at 1024x768 or higher
Common
- Version: 1.0
- Photoshop CS2 or CS3
Photoshop Elements 5 or 6 (Windows)
Photoshop Elements 4.01 or 6 (Mac OS X)
1 GB of RAM (2 or more GB recommended)
50 MB disk space
Adobe Flash Player 9
Internet Connection for auto-updates
FocalPoint 1 sells for $159.95 and can be downloaded from the onOne software site. This page also lists other options for purchasing this software. Don't forget, you can download a demo of this excellent product.
This is a great product and a must for all photo enthusiasts who like to do portraits be they of people, animals, flowers, etc. It is also a great way to highlight important areas of a non-portrait image, especially with the layer mask capabilities. FocalPoint performed perfectly, has an easy interface to use, and has immediate help both in the form of a guide and short videos which can be accessed from the interface.
Also, as stated before, onOne Software has videos on its website as well as webinars, and other forms of help.
To see a list of all their products go to the onOne Software website.