Review of Auto FX Photo/Graphic Edges
The Auto FX Photo/Graphic Edges consists of 3 CDs and cannot be purchased as a download although a demo can be downloaded. There are 10,000 Edges, 1,000 Matte Textures, 175 Frames, 230 Effect Brushes, and 210 lights.
Using Photo/Graphic Edges, you can add edges and frames, thus setting off your image. But this is not a program that just supplies presets; after choosing the "look" you want, you can then manipulate both the background and the frame. You can change the image radically by the addition of an edge or a frame or you can simply add an edge or a frame to just enhance the image.
System Requirements:
| OS | Memory | Free Space |
| Windows 98/NT/2000/ME/XP/Vista | 128 MB | 30 MB |
| Macintosh Power Mac - OS 9.0 or higher | 256 Min | 30 MB |
| PGE runs native in OS X or higher | 512 Rec |
"For Windows we support Windows 98/2000/NT/ME/XP/Vista. We include both the Mac and Windows Photoshop plugins and stand-alone version of our products with each purchase. We also work as a Photoshop CS3 plug in, Photoshop CS2 plugins, Adobe Photoshop CS plugins and Adobe Photoshop 7 plug in . In addition we work as Photoshop Elements 2 plugins, Photoshop Elements 3 plug ins, Photoshop Elements 4 plugin, Photoshop Elements 5 plug ins and Photoshop Elements 6 plugin." This is from their home page dealing with various products.
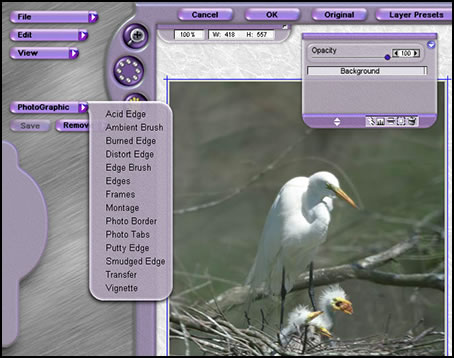
Let's look at the interface. The fly-out (PhotoGraphic) shows the effects' categories available. Notice the dots in the circle. These are called memory dots and give the users the ability to store an "Effect" they have created while they work. Thus, you can keep different configurations active and choose which one you like the best. Any can be made into a preset which I'll discuss later.
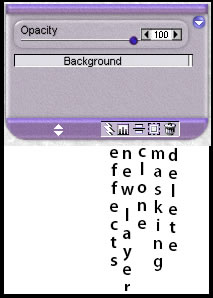
There are the same controls and tools available in other Auto FX Software such as Smart Layers™. You can combine them and change the look of the object. Using the same filter and changing its settings, especially color and opacity, on the Smart Layers™ gives some great effects.The various tools to be used for creating photo layers, masking layers, image layers, etc. are shown below.
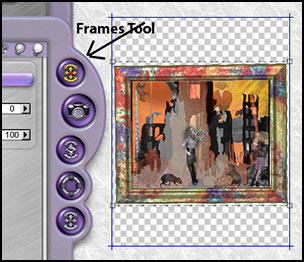
In the screen capture below, I chose Frames from the Photographic Slider.
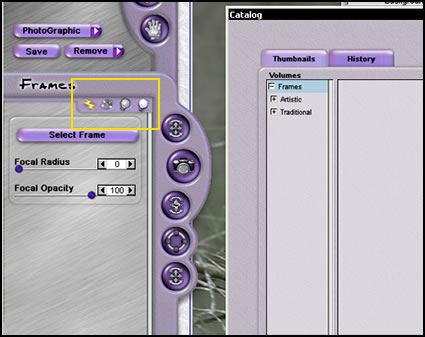
Notice the yellow rectangle. In it are tools for manipulating the PhotoGraphic Effects such as Frames or Edges.
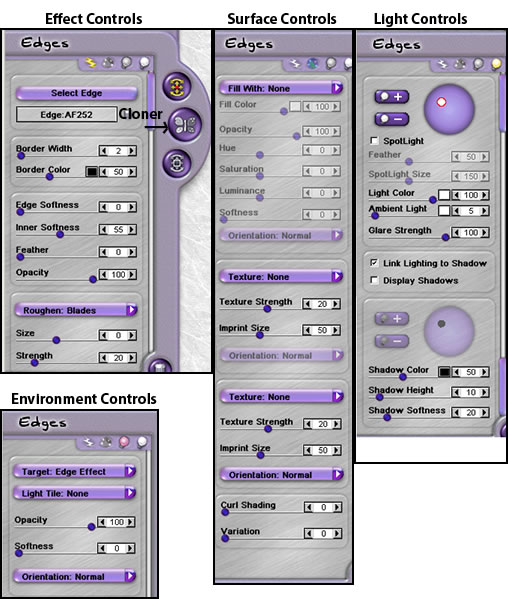
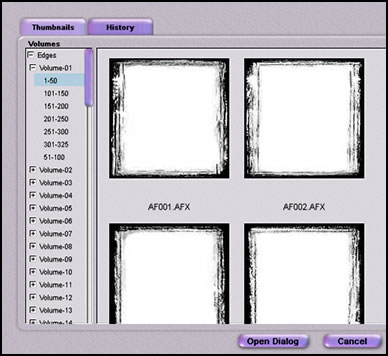
These controls pictured are for a specific Edges choice. Each volume contains a number of Edges. The only problem I had was that I had to access each volume and subset to see the presets. I would have liked to be able to download a catalog showing all the options at once. There are just so many to choose from.
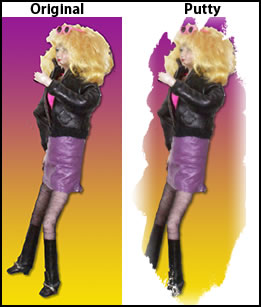
As stated before, there are so many effects to choose from that it is easy to forget the ones you want to use over and over. Here is where the Saving as a Preset is so useful. You can just save selected presets that you like and when you access the type of effect, for example Putty Edge and click on the fly-out presets, it will be there.
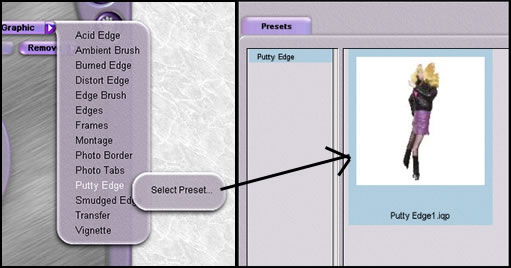
Below is just an example of a randomly chosen Edge preset.
Below is an image I wanted to Frame. The first time I tried to add a frame to my image, I had some problems because I did not understand how to use all the tools. Every time, I expanded the frame to meet the initial size of the image (background), the image also stretched. It turned out that it did work very well. So I thought I would present how I did it. First I accessed PhotoGraphic and chose Frames and, then, clicked on Select Frame to access the different types of frames. There were two General Presets - Artistic and Traditional. Below is the actual picture. Notice its orientation.
(Just a note: I added a round frame to another image and did not have to make any changes. I am not sure why, but the following mini-tutorial will help if the frame does not fit automatically).

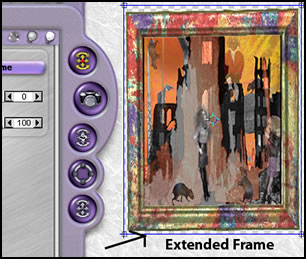
When the frame came onto the canvas, its shape was the same, and part of the picture was cut off.
There are two steps. The first is to enlarge the frame. Enlarge it with the Frame Tool until it meets the blue edges of the box. Don't worry if the image (background) is distorted. As you place either the Frame Tool or the Transform Photo Tool, little arrows, etc. will appear so you can reposition the image's or frame's current position shown by the dotted lines
The next step is to resize the image. You will notice that it extends beyond the frame. See the dotted lines.
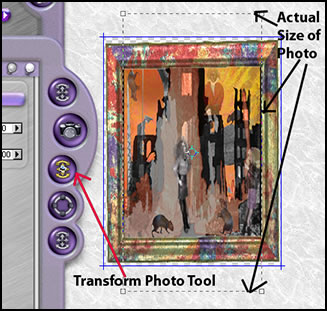
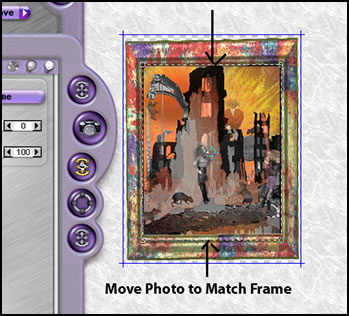
Resize it so it just fits inside the frame.
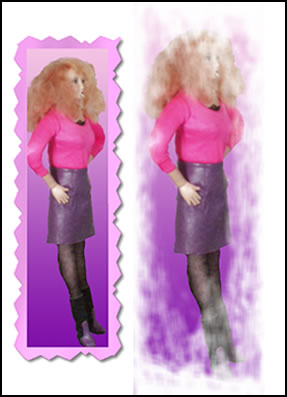
Before proceeding to examples of PhotoGraphic Effects, I wanted to present another "trick" I discovered. If you make your image two layers as in the picture below and add Vignette or Smudge Edge or other PhotoGraphic Effects to the layer with the image on it, the edges will come out transparent. You do not have to uncheck the bottom layer. If the image were on one layer, the outermost edges would be white although some PhotoGraphic Effects allow for a border to be placed around the PhotoGraphic Effect and it will take the shape of the edge.
![]()
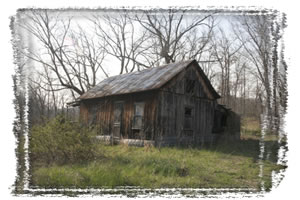
Below are a series of examples of different PhotoGraphic effects such as Putty Edge, Vignette, Edges, etc. They are all labeled as to what effect I used.
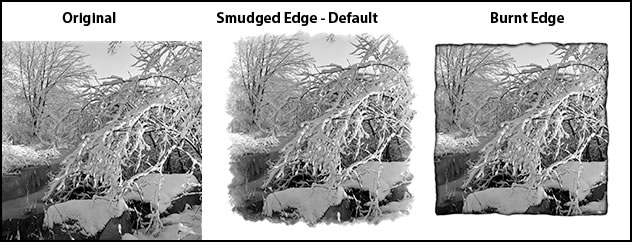
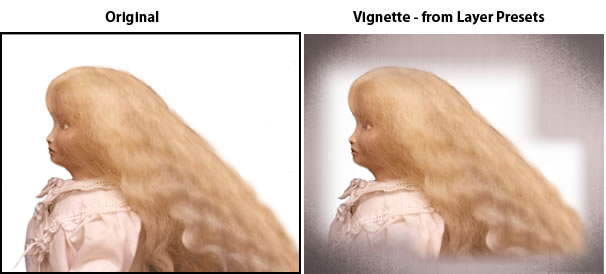
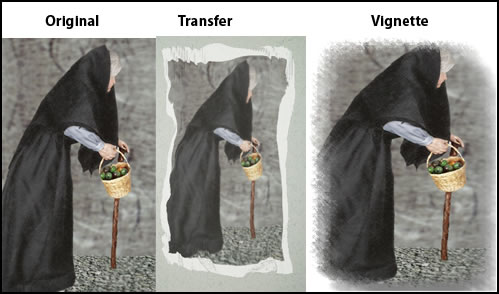
There are many examples on the Auto FX page Photo/Graphic Edges of all the PhotoGraphic Effects as well as brief descriptions of how they work.
The cost for Photo/Graphic Edges is $179.00
To see more of the Auto FX software go to: http//www.autofx.com In addition, you can become a member of Auto FX and download textures and fonts.
This is a powerful program with tremendous variety of uses and extreme controllability by the user. It does not only produce traditional edges or frames, but gives the user the capability of actually changing the look of the image through the presets and/or controls. I know I will be using it a lot especially for creating collages. It is an excellent product for adding to your "Graphic Toolbox."
For reviews of other Auto FX Software products go to the following URL's.
Auto FX AutoEye2
Auto FX DreamSuite Bundle
Auto FX Mystical Lighting
Auto FX Tint Mystical Tone and Color