Filter Forge has advanced a lot since I first used and reviewed version one. It has become a very popular program for creating textures as well as manipulating images through filters. There are 7522 (that was when I started this review). Now there are 7552 filters generated by users that are available for free download, and the number keeps growing. Filter Forge is a node based software program. This means that I can construct filters using many variables such as brightness, hue, noise, etc. or I can modify filters and, thus, an image. Throughout this review I will demonstrate how to accomplish these different functions. When I first reviewed Filter Forge, there were very few tutorials. I even wrote a very elementary one which is still relevant. You can find many tutorials on the Filter Forge website as well as a few on the Geekatplay website which gears its tutorials to creating materials for e-on software's Vue.
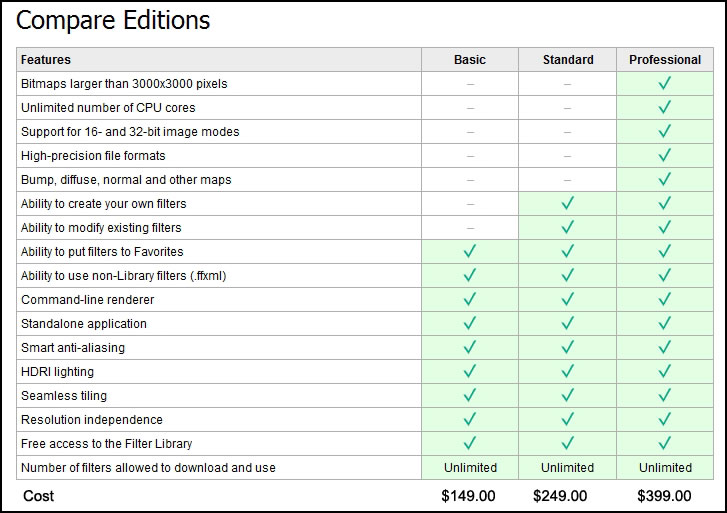
Filter Forge can come as a plugin to a number of hosts including Adobe Photoshop CS5 as well as a standalone. You can load the the plugins and standalone at the same time. With Filter Forge 2 you can do seamless as well as non-seamless tiling. You can create bump and normal maps which are great for use in creating textures for 3D programs. The filters are resolution independent since they are procedurally generated so you can render the filters in different resolutions. The professional edition supports both 16-bit and 32-bit image modes. All editions support HDRI lighting. All previews are adaptive and all filters come with previews so you can get an idea of the results. Each filter has one or more presets. You can modify these presets and save them. These are only some of the features. For a full list click on features.
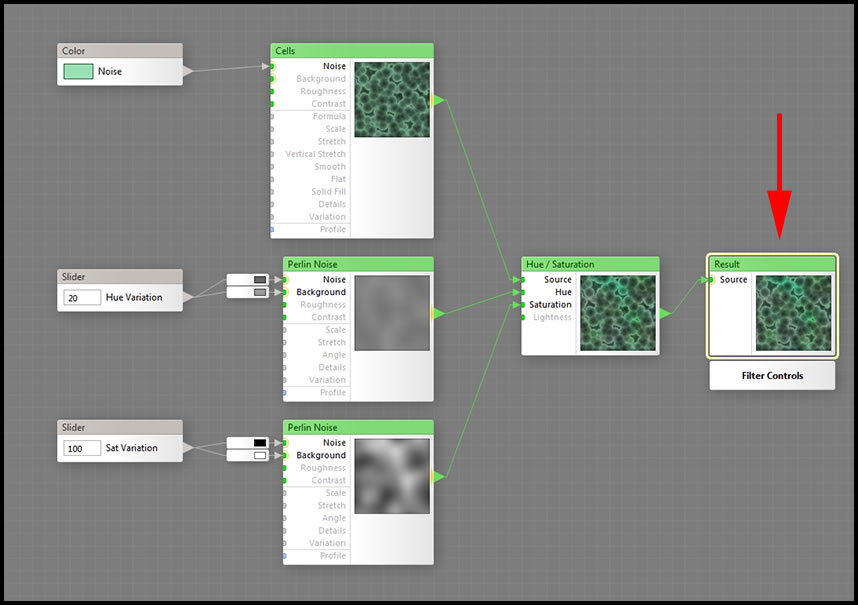
Below is an example of a default filter. Notice all the elements you can control.
You can download a trial of Filter Forge 2 and decide what elements you need before you purchase it. It is fully functional for 30 days.
There have been many major new features added to Filter Forge 2. These should sound familiar to those users working in 3D.
- Shadows via Ambient Occlusion
- Point/Area Lights
- New Lighting Options
- Full HDR colors across the entire rendering pipeline, from input images through components to rendered results
- Color Inspector
- Bomber Component - ability to spray multiple image particles
- Transform Components (Scale, Rotate, Flip, and Lookup)
- Polygon and Ellipse Components to generate n-gons and stars
- Free Gradients and Shapes
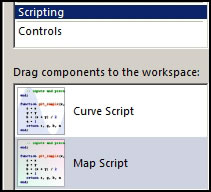
- Lua Scripting
- RGB Math Components
- Instant Filter Search
- Medium, Minimum, Maximum, and Percentile Components
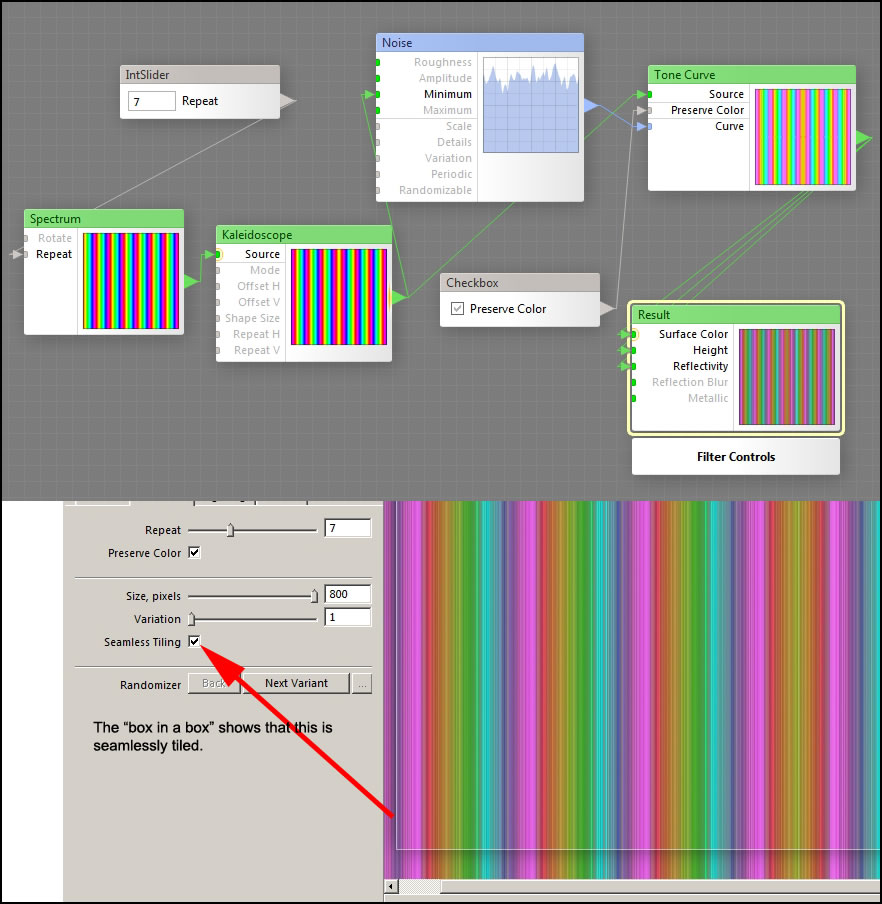
- Non-Seamless Filters.
While you can read about all of these on the Filter Forge website under New Features, I will discuss some as well as test a number of them.
I create images through photography and through using e-on software's Vue 8.5 Infinite. Then, I bring them into Adobe Photoshop and like to add "painterly" effects to them. These are not meant to look like oil or watercolors. In fact, I usually mix many styles. I have used some excellent programs to do this including Alien Skin's Snap Art and Corel's Painter. I found that Filter Forge 2 offers me a huge choice of "painterly" filters and other relevant effects. You can work on selections, layers, or a whole image. Whatever is on the topmost visible layer in Photoshop will be the layer modified by Filter Forge. All I do is go to the Filter's page and do a search for the type of filter I want. Instead of the life preserver, if you put an image on the screen, it will change with the filters. If you are using the standalone version, your image must be a BMP, TIF, JPG,.... but not a PSD. When you work from Photoshop, you can use a PSD.
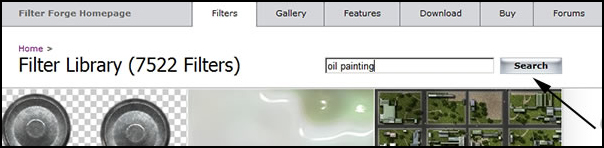
Step 1 Access Filter Library.
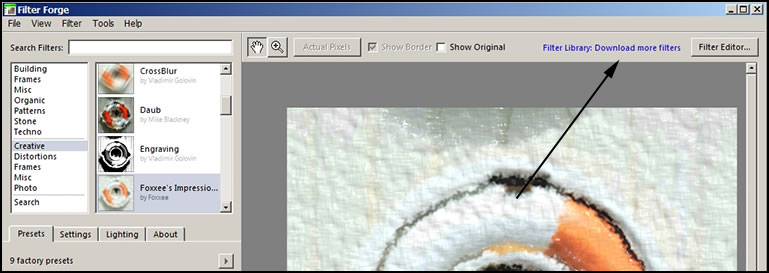
Step 2 Search for a type of filter.
Step 3 Download the filter. When you download a filter it will appear in Purple so you don't run the risk of downloading it twice. This is a very handy feature.

I spent time showing these steps because on the most elementary level, you can use the filters in Filter Forge 2 as plain filters if you like.
Step 4 Click on Open this filter in Filter Forge.
Step 5 Access the filter. Once downloaded, you will get a preview on your screen. Here I did not have an image, so it defaulted to Filter Forge's default image.

Here are some screen shots to show how you can manipulate the filters without changing nodes or modifying their construction. Once again, anyone can do this easily because in the window "What You See is What You Get."
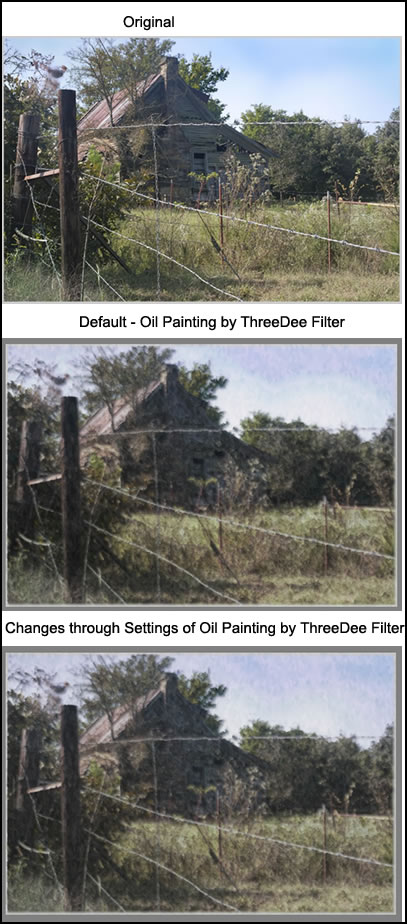
Below are the settings that correspond to the two images above that I modified. Notice some of the differences. The changes were more obvious when the images was bigger.
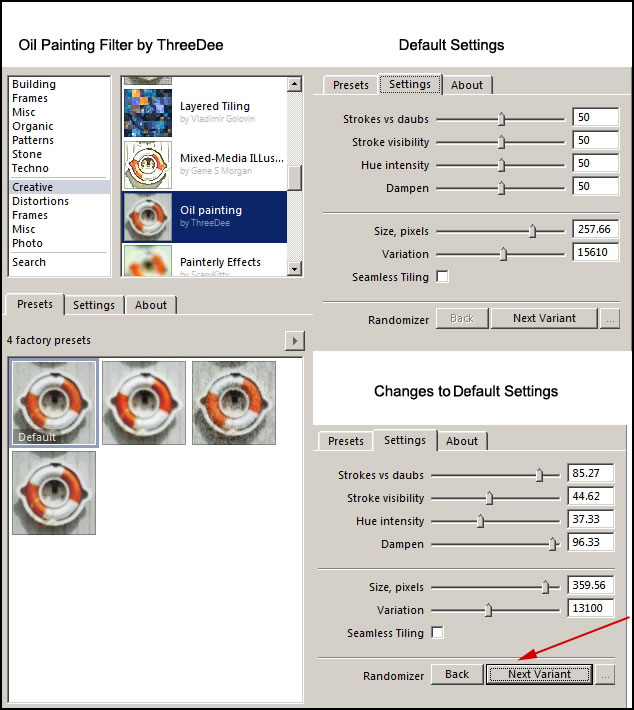
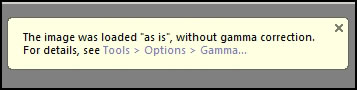
By clicking the "Next Variant" button, you can create random changes of the settings. You can, also, control the gamma of the image in the window. A screen will appear when an imaged is opened that looks like the following.
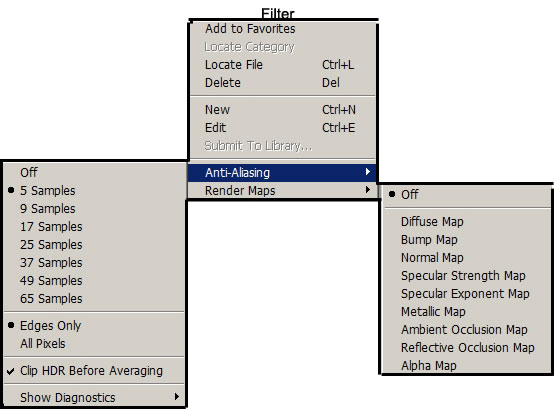
Anti-aliasing and map creation are elements in Filter Forge accessed from the top toolbar under "Filter."You can choose the Anti-Aliasing settings as well as create different types of maps for use in 3D programs.
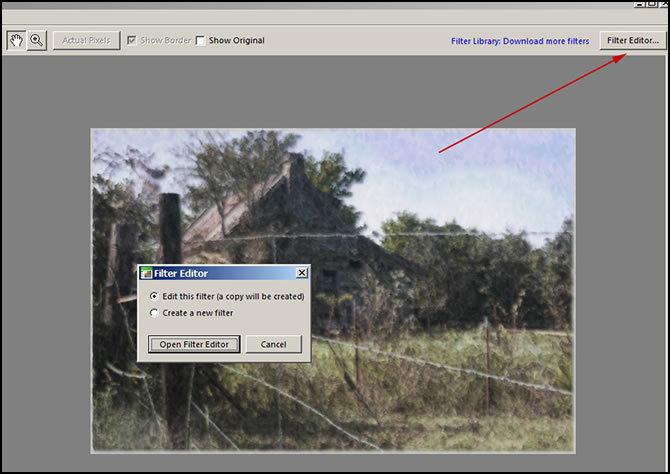
You can create a new filter or modify one you have downloaded. Click on Filter Editor. Once you do, a screen will ask whether you want to modify this filter or create a new one. I chose modify.
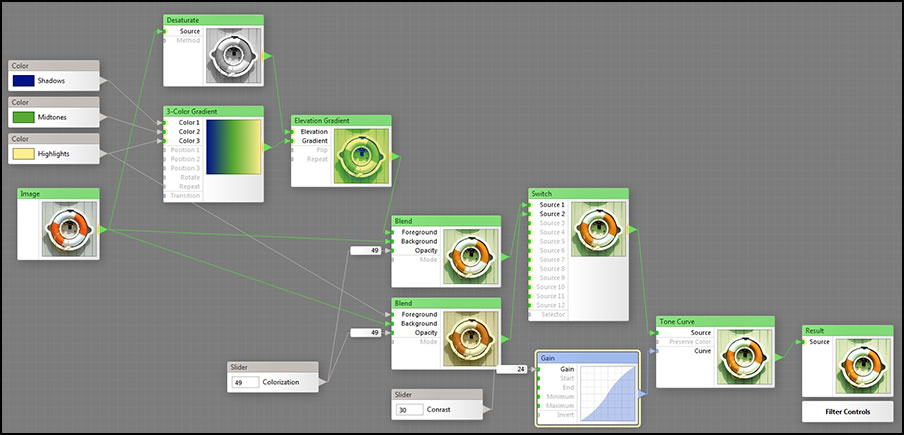
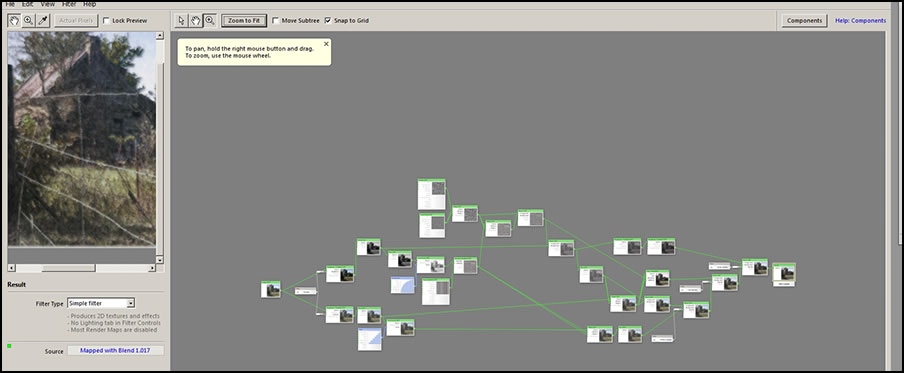
Below is a screen capture of the relationship of components and how they are attached by nodes to each other for this filter. It is a good idea to study other filters before you make your own to get a sense of the "rhythm" of creating them.
You can earn rewards by creating filters. You submit them to Filter Forge. You can, also, submit images to the Filter Forge Gallery and state what filters you used.
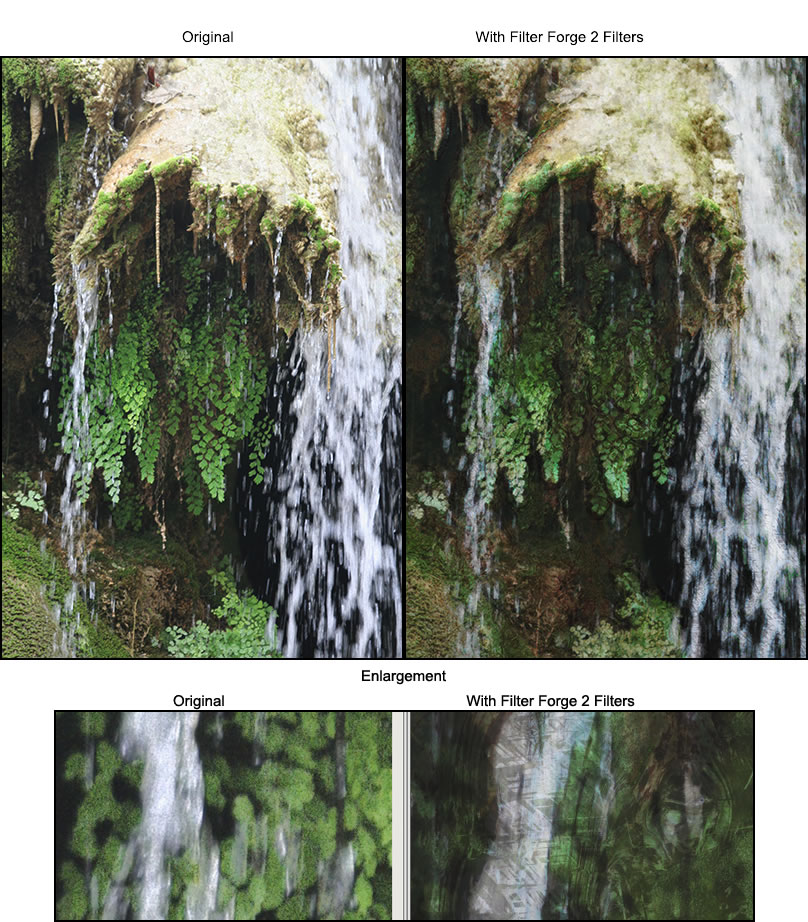
In the following I created three images using different filters and, then, blended them together in Photoshop CS5. The filters I used were: Smeary Oil Paint by ThreeDee, TechnoPuzzle by Vladimir Golovin, and Artomatic by Carl. Unfortunately, all the changes can't be seen clearly when the image is reduced to a size for the web. The character of the image has changed radically from one of intense highlights to a softer and more textured image.
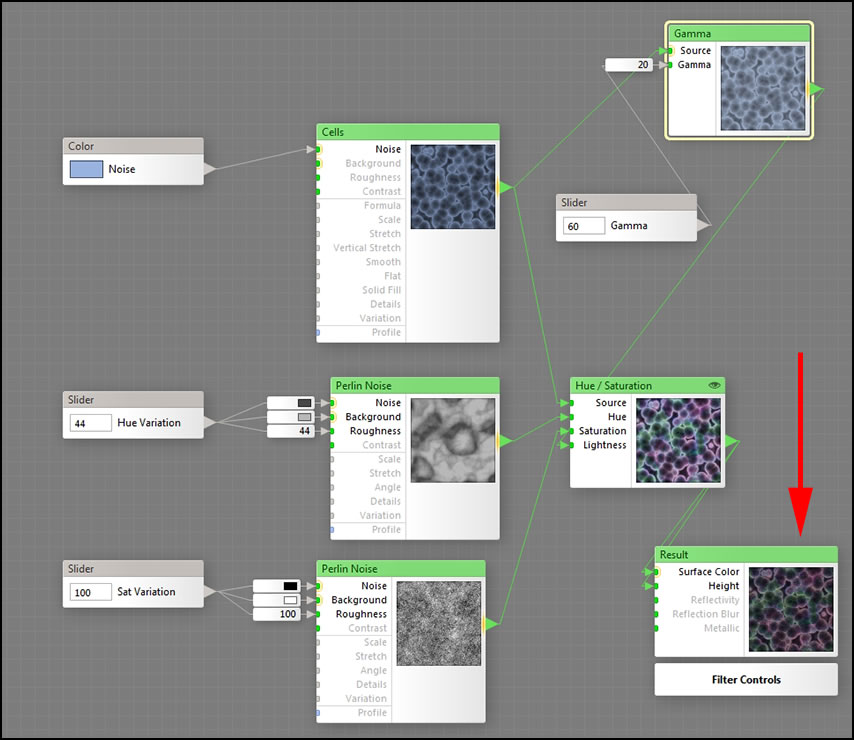
Creating textures is easy in Filter Forge 2. The basic principle is the same as it is for using the filters to modify images. You can start with a blank canvas and create your own filter or use one already created. You can modify this by manipulating the settings or go into the Filter Editor and modify it using the different components and settings. As I have stated previously, in Filter Forge 2 you can manipulate the lights. I will discuss this in the next part of the review under New features.
Below is an original filter by Vladimir Golovin called Bacteria. Here, you can see more clearly how the components have nodes and are attached to each other through these.
Below is a list of the types of components used to create filters.
I decided to just play around with Bacteria and add some new components and change others.
When I added other components, if they were not compatible, Filter Forge warned me. Without much effort I got a workable filter which shows anyone can do this. And it is a lot of fun! If you put in an incorrect control, an exclamation point will appear. When you click on it, a dialogue will tell you what is wrong. You can, also, access the help for that particular component which is on the lower left. You basically can't make a mistake. It is very easy to create a simple filter from scratch. I chose patterns and created this surface filter. It is almost hard to not turn this review into a tutorial because it is so exciting to demonstrate all that can be done with Filter Forge 2. As you learn more, you can increase the complexity of what the filter can do and control its outcome more precisely.
Having described the basics of Filter Forge 2 and some of the key features, I want to describe some of the new features; the number and type are impressive.
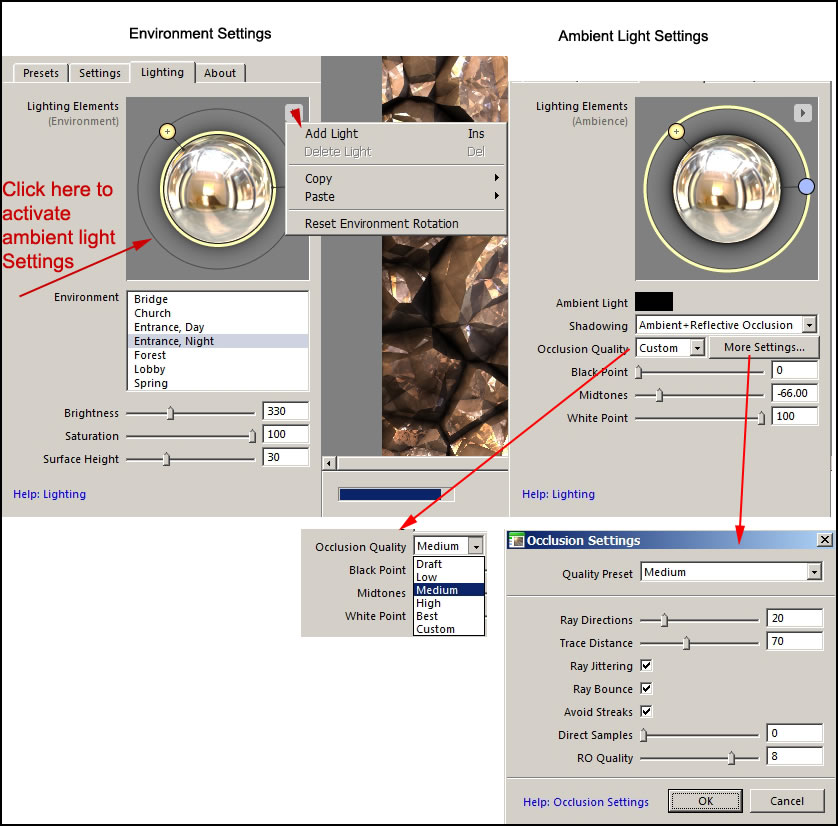
Using 3D programs, I am aware of different lighting models. Ambient Occlusion is one of them. I'll give the definition from the excellent help menu that is part of Filter Forge 2:
"The Ambience section allows you to adjust the color of the ambient light and the parameters of ambient and reflective occlusion. Ambient occlusion is a shadowing technique that calculates how much environmental light can reach a certain point of a surface, and darkens that point accordingly by filtering the incoming diffuse light. In addition to ambient occlusion which deals with diffuse lighting, Filter Forge can calculate reflective occlusion which removes excessive specular reflections from shadowed areas. To access this section, select the Ambience band around the environment sphere."
Below are Lighting settings from Filter Forge 2. Notice how you can add Point/Area lights and specify their characteristics.
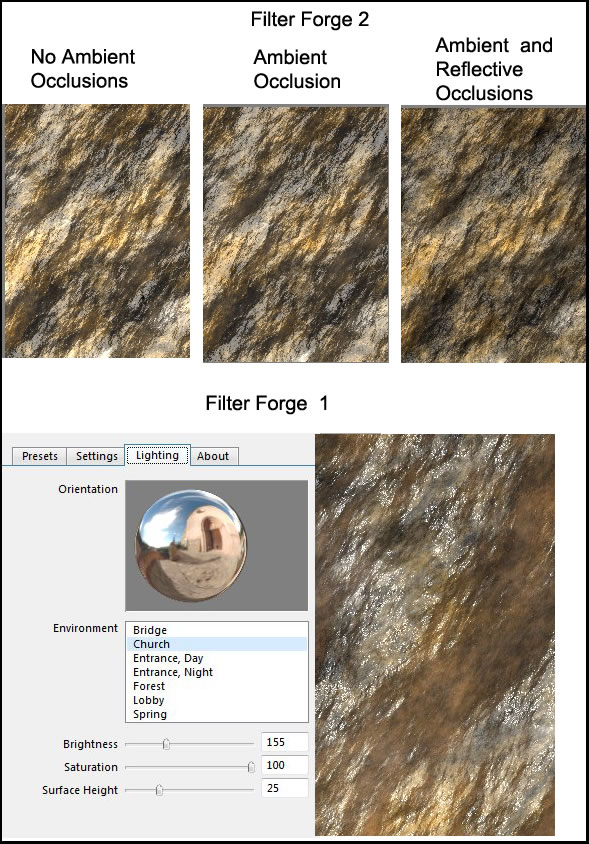
Here are three examples of the different Ambient Occlusion settings including none as well as a screen capture from Filter Forge 1 where the Lighting tab has much fewer options. My favorite setting for this illustration is the straight Ambient Occlusion one because for this texture, to me, it is more realistic. These new features are a huge step forward for the lighting models. I always look at any of these models in two ways: While they can create more realistic textures, they also can create more fantasy oriented textures!
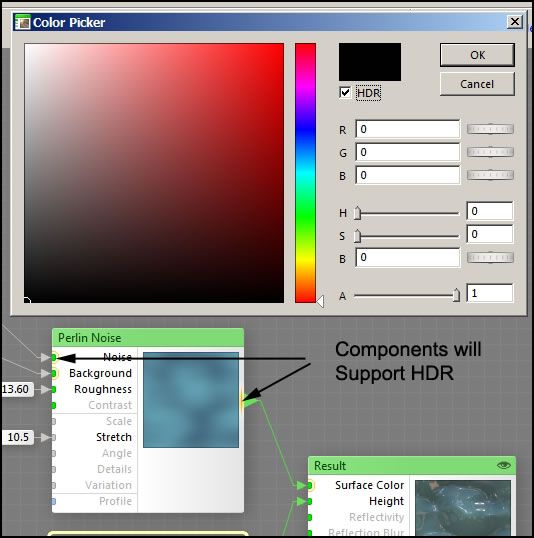
HDR colors are supported if there is a yellow box on inputs and a yellow line on outputs.
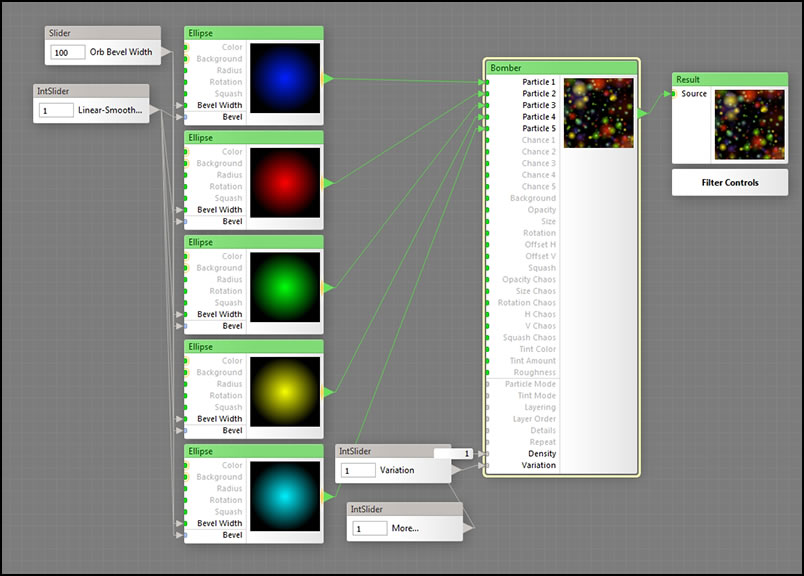
The new Bomber component is pretty complex. It allows for the controlled spraying of particles. This one is Orb Bomber v2 by SteveO
Lua Scripting allows you to generate your own code. This makes creations infinite. However, I do not know scripting. All I can say is that it looks fabulous.
I wanted to add a note to this review. It was something I found out after I had posted it. If you want to find out where your computer stores your filters after you have downloaded them, right click on the filter and it will show the location as well as other information. I found this out from the informative forum on the Fuilter Forge site.
I could go on and on describing the new additions which make Filter Forge 2 a very exciting and wonderful plugin.
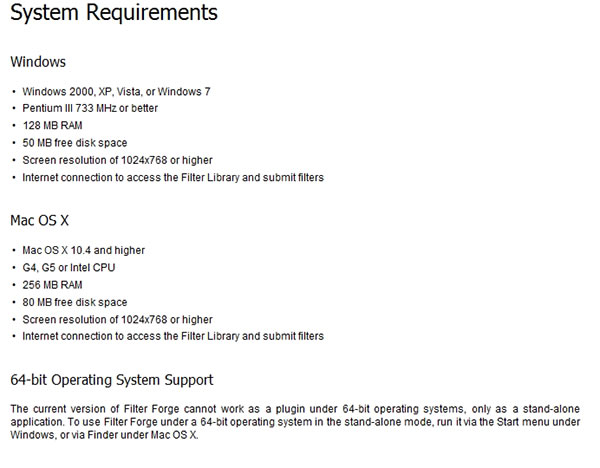
The requirements are:
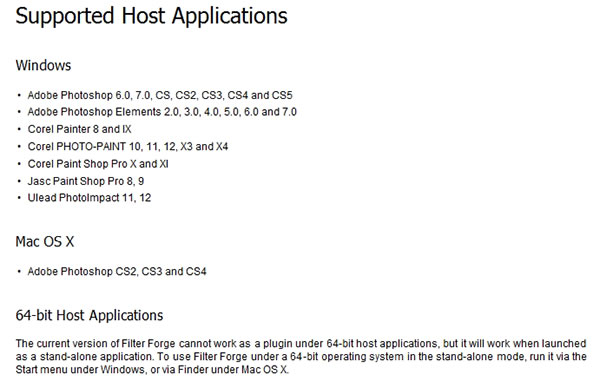
 And the compatible hosts are:
For more information and to try out this program, which I highly recommend, go to the Filter Forge 2 website. For creativity in creating materials as well as filters to modify your artwork, it is a must for everyone's toolbox. Take it for a test drive and choose the version that suites you. Let me just warn you: Filter Forge 2 can be addictive. You can go crazy downloading filters. There are so many great ones produced by Filter Forge users. And the number keeps growing!