Tutorial on Creating Filters in Filter Forge
I will start out by saying that I have been only using Filter Forge a short while. I really love it and have produced both filters and textures with it starting from scratch. I thought I would write a short tutorial on how to produce a simple filter. This will just discuss basics and will be aimed at new users.
If you are familiar with 3D programs that use functions and node based editing of materials and Photoshop that uses blending modes, adjustments such as levels, etc., you should feel right at home. If you are not familiar with all of these, don't worry. Rather than describe what you do, I will build a simple filter.
Below is the User Interface of Filter Forge. This shows a filter I built previously. On the left is the image and the various filter settings. In the middle is the Main Window, I like to call it the stage, where you construct your filter. To the right are the components.
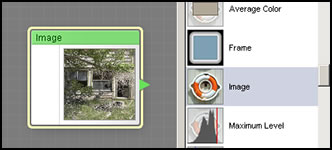
In the middle notice the pointer, hand, and magnifier. The mouse wheel will control the magnifier as well as the traditional way of making it smaller and larger (same as in Photoshop). The Components will appear and disappear by clicking on their name. You can see All or just the individual ones. I suggest, in the beginning, looking at all until you get a feel for the program. We'll talk more about components later.
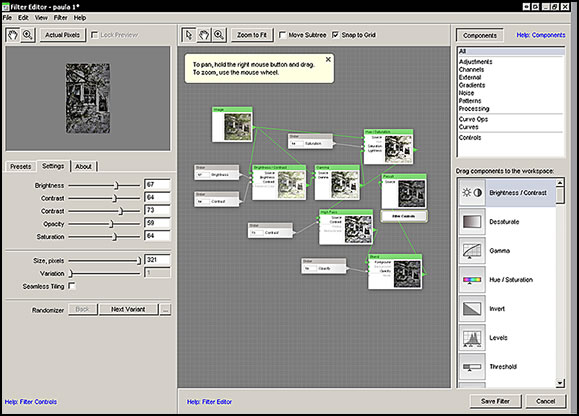
In the above screen on the left, the sliders Size, pixels and Variation will not be active unless they are a part of the component.
To create a simple filter, I first opened an image in Photoshop and activated Filter Forge.
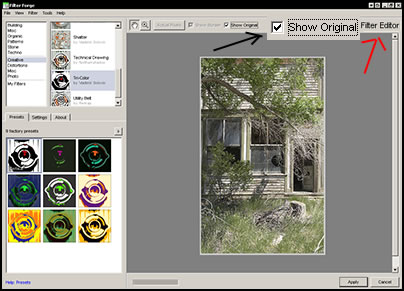
1 - In Filter Forge I clicked on Show Image so my original image would be visible. I find that this is the easiest way to work when I want to create a COMPLETELY NEW filter.
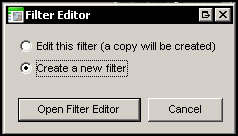
2 - Next I click on Filter Editor which is on the far right on the upper toolbar. Notice the red arrow.
3 - This will open the Filter Editor and I can decide whether to modify or create a new filter.
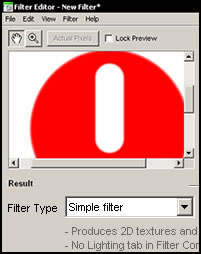
4 -The last step in preparation for creating my filter will be to decide whether I will create a surface filter such as a texture which will basically replace an image and stand on its own or create a filter to modify an image. Here, I will create a Simple filter (to modify an image).
5- Now the fun begins......... Make sure Components are open (click on the word if you have to). Select Image and either drag it or double click it so it is on the Main Window or stage.
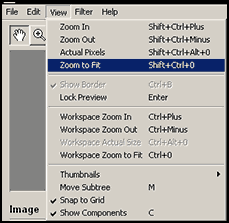
Next go look at the left panel, and on the top toolbar click on View>Zoom To Fit. This makes work just easier. You will see the whole image as it changes and not just a part of it. Then you can zoom in or out as you please. In one of the screen captures in Step 6, you will see how the image fits in the left panel by doing this step.
Lastly, look at the stage and see what is on it now. You will have two components: the Image and the Result. Now the fun begins to create the filter or to add the components that will change the original image. The idea is to create a consecutive string of components, one affecting the next until you reach the Result. As you click on one down the chain, you will be able to see the image change. However, along the line, you can add individual controls by means of sliders and, of course, they will modify the components in different ways. Before proceeding any further, if you have not looked at completed filters, do so. It is really helpful to see where and how others have placed the components. Then come back, and start with Step 6..
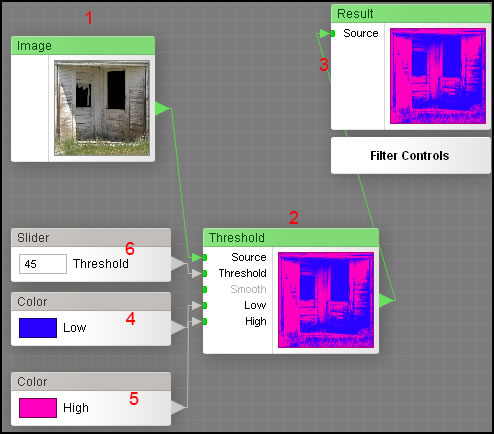
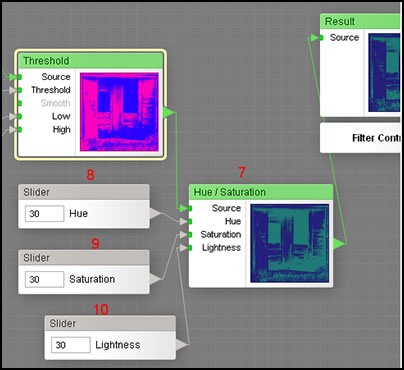
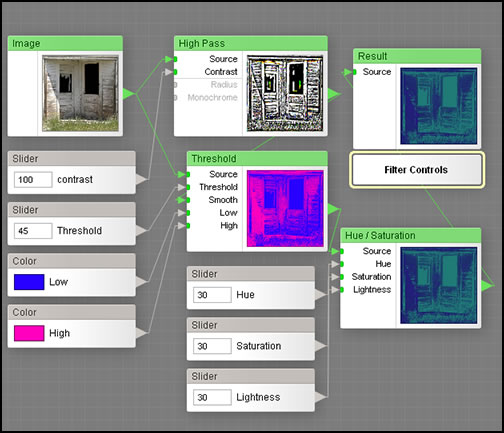
6- Let's begin creating a filter. We will start by making a very simple filter and then build on it. We will turn an ordinary picture into two colors using the Low and High threshold on the Threshold component. Notice how the Threshold is attached to the source node of the Result component. The Result component will always open automatically on the stage when you go to build a filter.
The left panel will look like this:
7-Next I added a Hue / Saturation component and sliders.
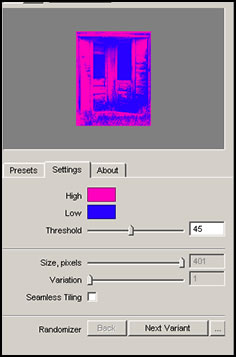
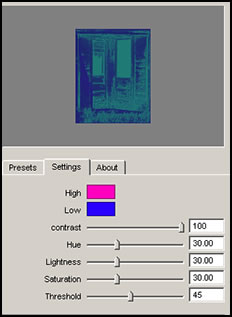
Below are the filter controls available to the user. See how they have grown.
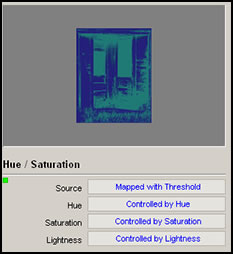
When you look at the settings on the Hue / Saturation component, you will notice that you cannot control the source aspect because that is controlled by the Threshold component. See the image a few above.
If I had not included the sliders, I would only have been able to manipulate the image for those areas in the filter building stage.
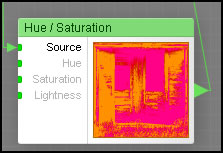
Now lets investigate a component. Notice the component below. I removed the sliders from the Hue, Saturation, and Lightness nodes. I can control these, as I stated, while I create the filter, but the user can't afterwards. They will not be dark unless attached to some kind of control such as a slider or attached to another component..
If you look at one of the first images which shows the Threshold component, the Smooth component can only be controlled while building the filter.
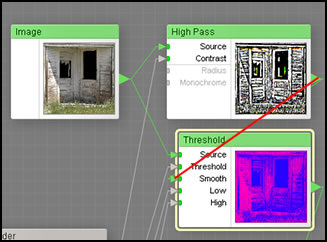
8- The last component I decided to add was High Pass. Notice that is is connected from the Image. More than one component can be connected from a component but not to the same node of another component. The red line just shows that High Pass is connected to the Smooth node of Threshold. Notice the Smooth node is now dark.
All the components look like this:
And the User Controls look like this:
These are just some basics. I am also learning how to use this program. If you would like to download this filter and play with it, please feel free to change it anyway you like and use it as a learning tool. Download 2Color Filter
Also in the near future, look for a review of Filter Forge. I do love this program. If you would like to see reviews of other graphic programs and tutorials as well as my art, please go the home page of my website.
For more information on Filter Forge go to their website.
![]()