Making Beards in Poser 6
This tutorial will give the directions for creating a small beard for James. The principals can be used to create side burns and any hair anyplace on any figure, object, etc. directly from Poser and without needing any other 3D modeling program. This, of course, can be done using other programs and then bringing the newly created mesh into Poser 6.
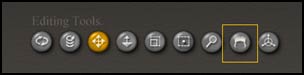
1 - It is very useful to become familiar with all of the Editing Tools. These tools are usually found above the stage in the Pose Room. Select the Grouping tool which will open the Group Editor. The Group Editor allows you to select or create polygons.

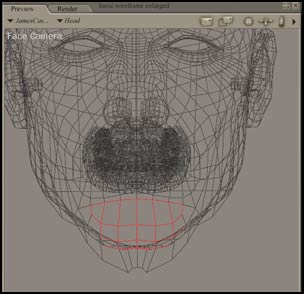
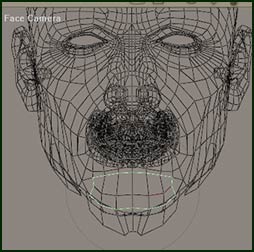
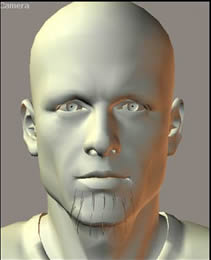
2 - Select James's face in wireframe mode. On the main tool bar choose: Display>Document Style>Wireframe. You will be alternating between Wireframe, Smooth Shaded, and Smooth Shaded Lined.
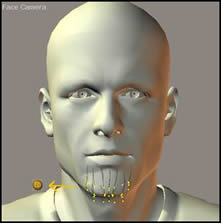
3 - Choose the Face Camera. Also, choose the right Camera and left Camera enlarging the face only. Put the magnifier on the face and click as many times as needed to enlarge the face. Save your work with the three faces enlarged.
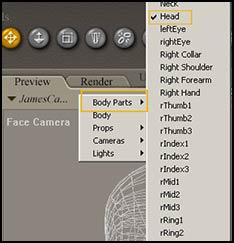
4 - With the Group Editor open, select the head of the person. If there is a problem, navigate to body parts, and select Head.
Then select New Group and rename the new group Smallbeard and click OK . You now should have two names in the top window of the Group Editor - Head and Smallbeard. Select Smallbeard so it shows in the window.
5 - Now that there is a new group, the new group has to be delineated. Here is where you will start to work with the three enlarged faces. Look at the two top buttons in the Group Editor. One has a plus sign and is an add polygon button; the other has a subtract sign and is a delete polygon button. To add or select a polygon, you click on it with the "add" button. To delete a polygon, you click on it with the "subtract" button. When selected, each polygon will appear red.
6 - Look in the Group Editor above and notice the three boxes: Hide other objects, Show multigrouped faces, Show non grouped faces. When you first start to work with the head as you are forming the beard, you can check the Hide other objects and you will only have the head visible as above.
7 - After you have created the beard, you need to save it as a prop.
8 - As a prop, it can then stand alone. Now after it has become a prop, when you check Hide other objects, all that should show is the beard. If it doesn't change from the initial head shot, uncheck the box and recheck it. This is like a "skull cap" for the chin.

9 - However, it is easier to work if the face is visible so uncheck this box. Since the smallbeard is a prop, it will not show up unless the cursor comes near it. It will also not show up red.
10 - Move to the Hair Room.
11 - Click on New Growth Group. Call it Hair_1 or anything else. It will be the only hair group.
12 - Click on Edit Growth Group if the Group Editor is closed. Since you are still using it, it is probably still open.
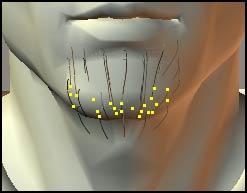
13 - With Hair_1 selected, marquee over the polygons that form the smallbeard.

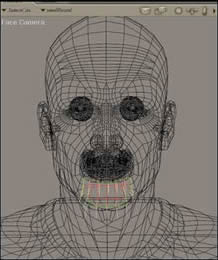
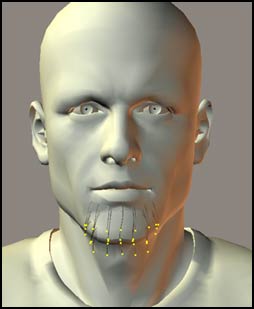
14 - Go to the Growth Controls and set up the length for the Grow Guide Hairs.
15 - When you click on Grow Guide Hairs, hair will appear. It might be hard to see in wireframe mode, so switch to smooth shaded display. You are now finished with the Group Editor, so close it.
| Wireframe View | Smooth View |
 |
 |
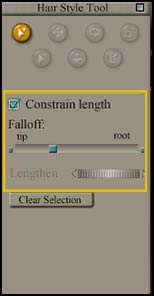
16 - Open the Hair Style Tools by clicking on the tool, the one in the Hair Room on the tool bar shaped like a head of hair.
 |
 |
17 - Arrange the hairs so that you have three levels. Lengthen the top two levels similar to the picture below. This helps prevent bare spots. You can accomplish this by rotating the dial to the left. Keep the length constrained. To see the difference, try it both ways.
To select the top two rows, select the top left tool and marquee abound all the hairs.Then, with the bottom left tool selected (the Deselect Hairs tool), click on the hairs you do not want in order to deselect them.
 |
 |
18 - In the Hair Style Tool Palette, take the tool on the top row on the right and highlight it to select it. It is the Scale Hair Tool. When dragged to the left, it will draw the hairs to the center.
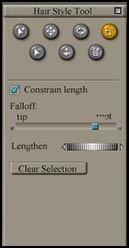
19 - Select all the hairs with the Select Hairs tool. Move the Scale Hairs tool to the proximity of the beard and draw it to the left. Keep the blue dot, under the word "Falloff," near the root. This will start the movement of the hairs from the root of the hair.
 |
 |
20 - Each hair style requires certain settings. Sometimes they mirror reality and sometimes they don't. Since beard hair is coarser than most head hair, I initially made the root and tip a lot heavier. However, I found that by doing this the image looked too coarse. By making the beard wavy, it filled in bare spots and looked fuller. Look at Kink Strength and Kink Scale.
21 - Move into the Material Room to set up the Material settings. Under Object, choose Hair_1. This is important. Even though I could reduce the time for rendering by reducing the number of populated hairs by using Opaque_In_Shadow, that setting did not look good. Also, keep the root and tip color fairly constant unless your desire is to have a very multicolored beard. Also, set specular to black. Try to use fewer than 20,000 hairs. The fewer, the better the rendering time.
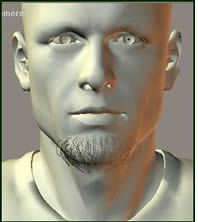
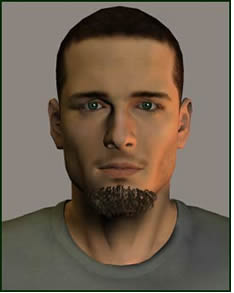
| Shadow Preview | Fire Fly Rendered (mid level) |
 |
 |
![]()