MAXON BodyPaint 3D Release 2.5
I recently reviewed MAXON CINEMA 4D 9.52. I will be reviewing the module version of BodyPaint 3D R2.5. BodyPaint comes as a stand-alone product and as a module to CINEMA 4D. While both are on the CD, the serial number will only apply to one of the products. This new release of BodyPaint 3D is R 2.5.
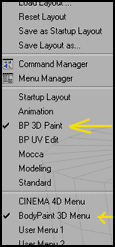
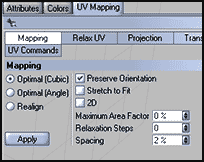
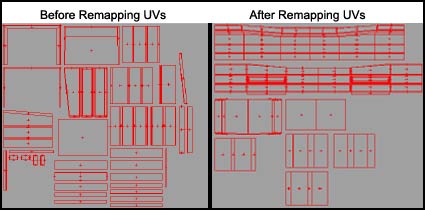
While one can do wonders with materials in CINEMA 4D without BodyPaint, this module can add so much more. An example that is used all the time is the addition of a tattoo, but think instead of just being able to create fine lines on a surface and place them where you want them.Of course, one can configure the interface of CINEMA 4D to use with BodyPaint both for the painting aspect as well as the UV portion. The UV tools give one the ability to remap the polygons so that they are contiguous and do not overlap.
It is easy to set up BodyPaint with the Paint Wizard. BodyPaint has a number of unique modes for painting and/or texturing. Basically in the correct context, these terms can be used synonymously.
- Normal 3D Painting Mode
- Projection Painting Mode which takes into account the shape of the 3D object and lets the user paint on more than one object at a time
- RayBrush Render Mode allows the user to paint in a pre-rendered view in realtime and in 3 dimensions. One can view many material channels such as bump, color, luminance, etc. simultaneously.
One can paint in three modes and switch back and forth. These are: 3D, 2D, and raytraced 3D. You can also paint with multi-channels all at one time.
Since there is not space to discuss all the new features in BodyPaint 3D R2.5, I have included the list from MAXON's web site. My goal is to give new users an idea of Bodypaint 3D as a whole and highlight some of the new features. Some of the features that are listed as new in BodyPaint 3D R2.5, you will recognize as being new in CINEMA 4D R9.5
New in BodyPaint 3D R2.5:
· Interface and Handling
– Improved Material Manager
– Easier navigation in editor
- handle highlighting
- configurable camera rotation
– HeadUpDisplay
– Extensively configurable viewports
– New display modes (e.g. constant shading)
– Detachable menus
– Advanced search tool
– Improved support for WACOM tablets
– Active Tool Manager merged into Attribute Manager
– Hierarchical shortcuts; for quicker access of functions
– Full screen mode; have more space while you paint
– New Content Browser; catalogues 3D files and more
· Features and Functions
– Support and creation of Normal Maps
– Baker; 3-click baking (incl. Light, UV and Normal maps)
– N-gons supported; for a better overview of geometry
– Layer manager; imports/manages PSDs with layer sets
– 16 new blending modes
– Detach Projection Plane
– New Layer Shader
- Easy image compositions within BodyPaint 3D
– New Spline Shader
- Projects splines onto surface
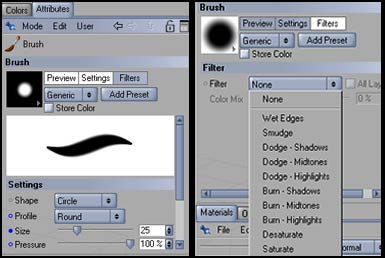
In release 2.5, the Active Tools Manager has been merged with the Attributes Manager. Double clicking on the Brush icon in the left tool bar will activate the brush modifying tools.
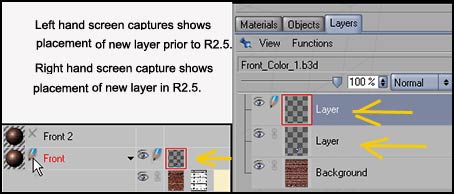
In addition, layers are now created and accessed through the Layers Manager.
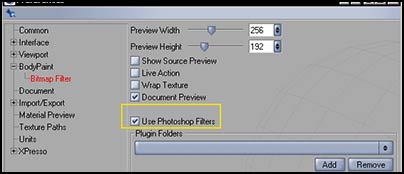
BodyPaint 3D R2.5 tools are similar to many in Photoshop, thus reducing the learning curve. Also Photoshop filters (if Photoshop is installed) can be accessed in BodyPaint 3D R2.5. This allows users to accomplish all the steps in one program and, thus, increases their productivity and workflow. To install the filters, go to Edit>Preferences> BodyPaint>Bitmap Filter.
Photoshop users will be familiar with the Layers Blending Modes. There are 24 blending modes.
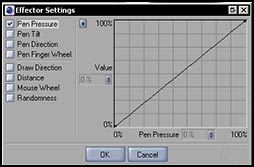
Support for the WACOM tablet has been improved and there are many settings that can be manipulated.
3D objects do not have to be created in CINEMA 4D to be able to utilize BodyPaint 3D R2.5. 3D objects can be exported from other programs such as Maya, 3DS Max, Lightwave, and Softimage XSI. Also, objects can be brought in as OBJs from Poser. Here the particular plugin used to bring the images in and its settings can be critical. While most plugins will bring the OBJ files from Poser into CINEMA 4D, they will not always work properly with the BodyPaint 2.5 Set-up Wizard. However, since my goal was not to test in an exhaustive manner and I used Demos, I cannot categorically state that I used up all the options. Thus, it is best for each individual to download demos and try them out if they are going to do Poser importation. For the tests below, I also used strand based hair I created in the Hair Room in both Poser 5 and Poser 6 which did not import well with the OBJ import plugins I tried and the settings I used.
Below is a Poser 5 figure that I imported and set-up with the Set-up Wizard to demonstrate how I can touch up an imperfection. The number ones (1s) indicate where I selected color to paint over the imperfections on her chest. I used the Eye Dropper which is one of the painting tools to select the color. As you can see, it was an exact match.
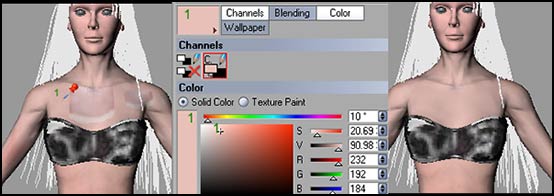
One can paint with one channel, or if there are many, with multi-channels at one time. The gold colored arrow points to the icon for multi-channel painting. Presently it is disabled.
Not only can you paint with colors, but you can paint on designs. The following was done in Projection mode. Since this is not a tutorial, I am not discussing any of the intermediary steps.

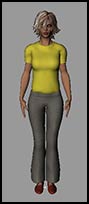
Notice that transmapped hair worked well with the BodyPaint 3D R2.5 Set-up Wizard. Again, the settings on importation on the Set-up Wizard do seem to matter. The image is Jessi from e-frontier's Poser 6.
BodyPaint can be divided into two parts that are intertwined - painting and UV mapping. Both are stout and work well together. BodyPaint can be used to correct flaws, completely paint a model, or add designs such as delicate tattoos. In addition, if you bring in a model whose mapping is not exactly correct, you can automatically fix it or do it manually, or use both methods
 .
.
The UV section of BodyPaint 3D R2.5 is very powerful. If you have to adjust the UVs manually, this release has added new tools for that purpose.
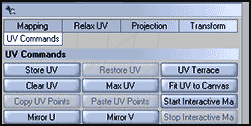
While you can remap all the polygons so that they do not overlap, if seams show afterwards when painted, you can also fix those seams at that point from the UV Command Menu.
BodyPaint 3D R2.5 is an excellent and a very complete package. Release 2.5 has had many improvements added to make the workflow faster as well as give more variety and flexibility. For more information, go to the MAXON web site and click on the link for BodyPaint 3D R2.5.
3DKiwi has written an excellent tutorial on BodyPaint 3D R2.5. It can be downloaded from C4D Cafe . In it he also compares R2.5 to R2 which should be very helpful to those who are upgrading. He also has written many other excellent tutorials.
My negative comment about BodyPaint 3D 2.5 is the same as it was for CINEMA 4D R9.5. It has to do more with documentation and tutorials than it does with content, which, I guess, is good because it can be more easily fixed. The tutorials do not match up with the changes in BodyPaint 3D R2.5. One has to basically keep a list of the new features because one will not find them in the online help, nor are they necessarily spelled out in the R2.5 addendum documentation. I spent forever trying to look for the Active Tool Manager because it was pictured in the tutorial. I finally gave up because I didn't need it to accomplish the task. I used the Attributes Manager, only to find it had become a part of it.(unfortunately, I had forgotten that change.)
The BodyPaint 3D R2.5 module for CINEMA 4D R9.5 is $495. With a printed manual for R2 it is $50 extra. For the upgrades, see upgrades. The stand-alone product is $745.
There is a demo available from the MAXON web site.