Sharpening using Photoshop's Unsharp mask
When I change the size of an image, often there is a degradation in quality. I have found a few ways to minimize this effect.
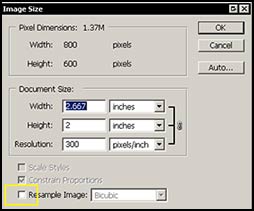
1 - I enlarge in small increments. Let's say I had a web image that was 800 x 600 pixels at 72 dpi and I wanted to print it at 300 dpi. The first thing I would do to get an order of magnitude is uncheck the Resample Image button and type in 300.

Since many of us think linearly, in the U. S. in inches, we now know that our starting image, in its now changed state, is 2.6" x 2".
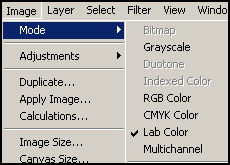
2 - Go into Image>Mode>Lab. Your color space is now Lab color.

3 - Start by resampling the picture using Bicubic as your choice since you will sharpen later. Possibly change the 2" height to 3".
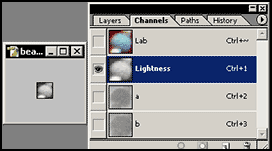
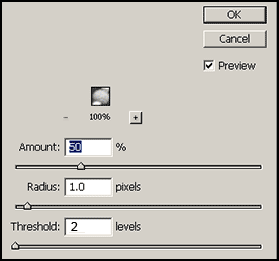
4 - Now go into channels in your layer menu and click on the lightness channel. You will sharpen looking at an image that is not in color. Go to Filters>Sharpen>Unsharp Mask.

5 - Repeat these steps until you are satisfied. Also, sharpen conservatively. You might consider the amount from 50-100% per step; the radius from 1 to 2, and the threshold depending on the subject. Photoshop Help has a good discussion on the Unsharp Mask

6 - When you are finished, click on the top of the channels, where it says Lab (in color) and go back to Image>Mode>RGB. Working in the lightness level, helps prevent any haloing of colors.