Sometimes it is hard to decide what atmosphere to use because you have in mind a certain fog/haze look that you want. You might want to use Spectral atmosphere, but the look can only be gotten if you use a Standard atmosphere because of how the fog and haze components work. I am not speaking of realism, necessarily.
Very few tutorials have been written on working with these components. Chipp Walters has written an excellent one that deals with Standard and Volumetric atmospheres. I am not going to try to explain how these different atmospheres work. To better follow the examples I've presented, go to the Help menu in whatever version of Vue Infinite you are using and start with Atmosphere. In the Help Menu for Vue 7 Infinite read pages 239 and 240, and then pages 250-254. I have taken the various atmospheric models and made changes to demonstrate how some of these variables work. I used the quick preview to illustrate the changes.
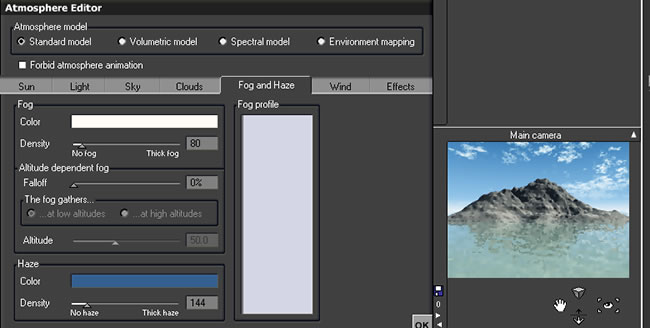
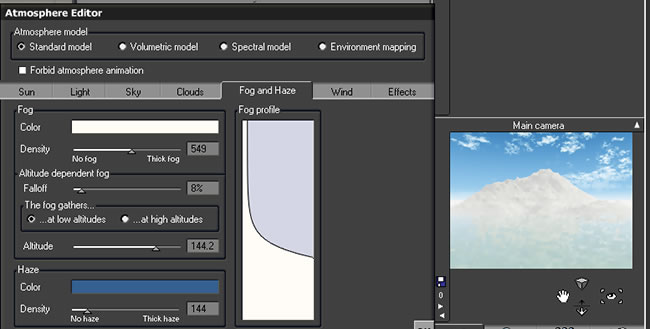
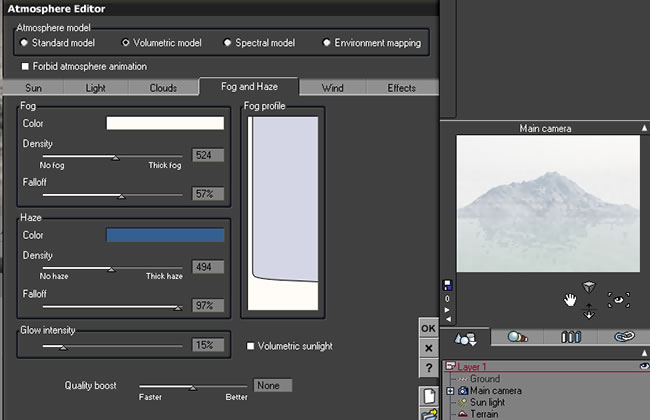
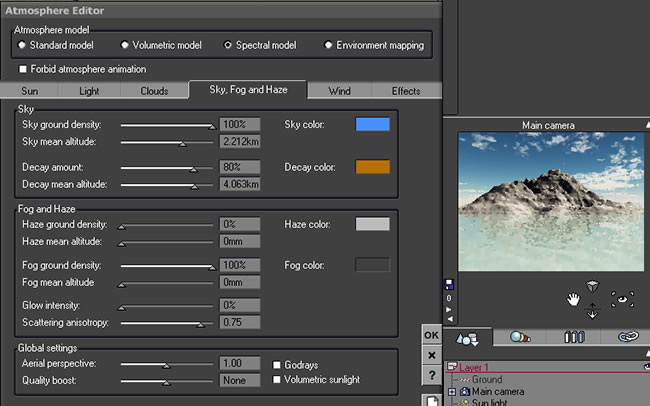
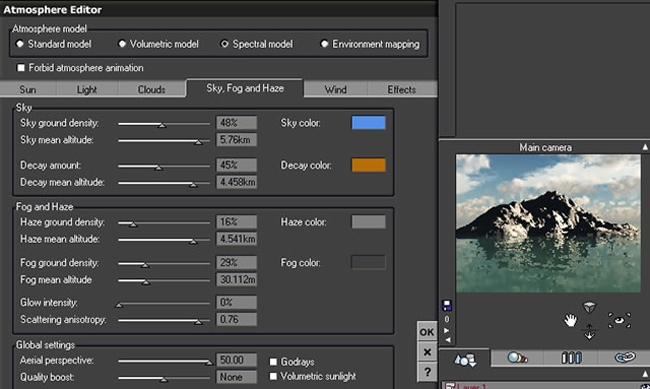
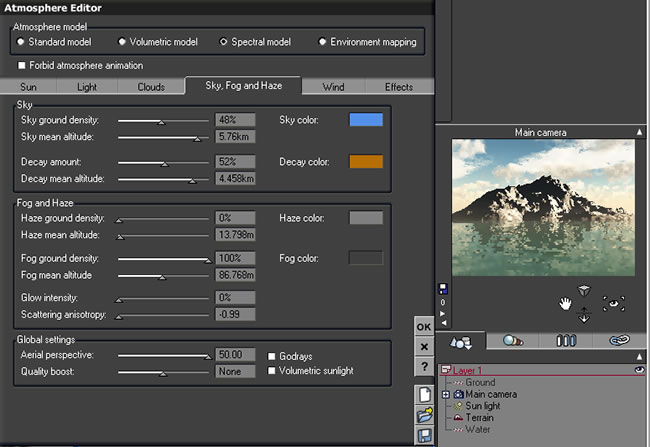
The first group of illustrations are from the Standard atmospheric model. With this model it is very easy to create a layer of ground fog as well as fog that envelopes mountains, for example. In the examples below, I mainly manipulated fog density and falloff. Notice that I, also, could have selected whether fog accumulates more at high or low altitudes. In all the examples, I chose low.
I added falloff to the image below. This, also, activated the altitude slider.
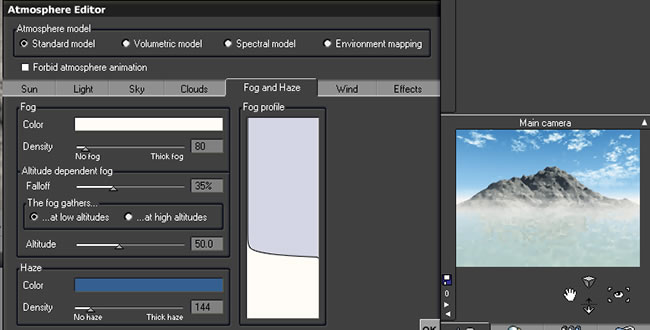
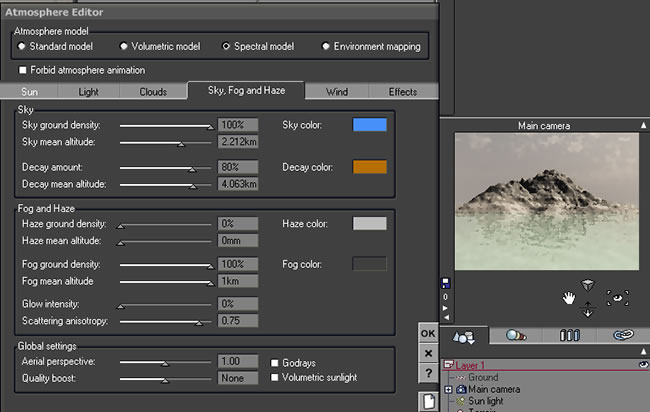
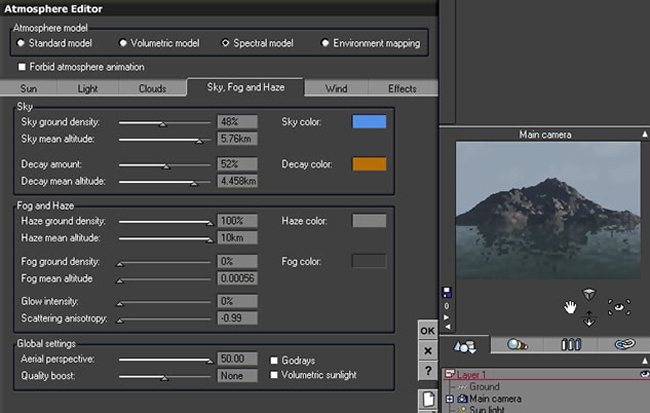
Below, I increased the altitude and decreased the falloff. The fog line isn't as harsh now.
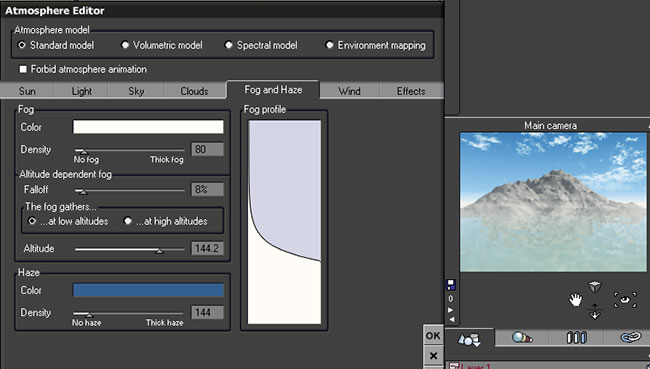
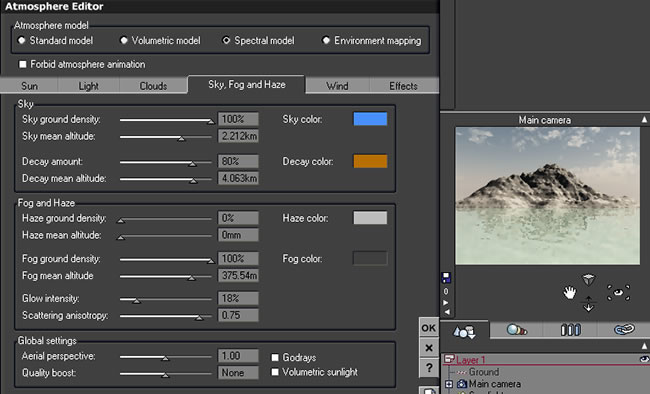
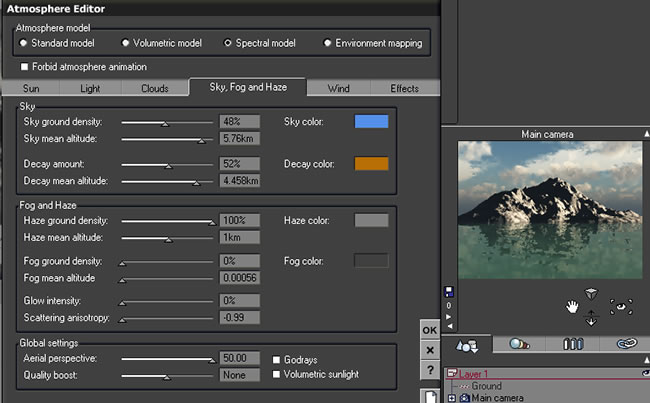
By increasing the fog, I basically blanketed the mountain in fog. Notice how at these settings the sky is relatively untouched.
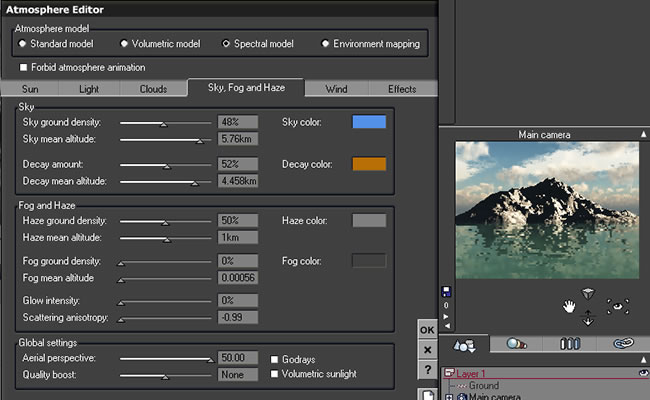
The next model that I selected was Volumetric. For this I took a Standard model and changed it to Volumetric. Obviously, it looked vastly different. With the Volumetric model, the sky is more affected by the changes in fog and haze settings than any objects such as the mountain. However, you can blanket an object in fog, but you also will be affecting the sky as well.The settings for the fog and haze falloff were critical to bring out the clouds in the image. You cannot create a ground fog using the settings for Fog and Haze.

By adding falloff, I brought back some of the clouds that were in the Standard model of this atmosphere.
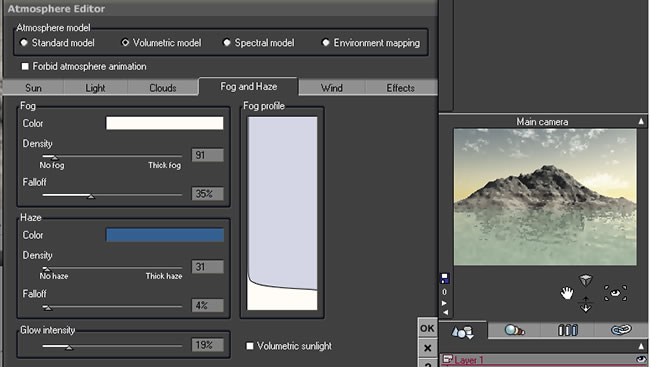
Adding a slight haze, made the sky a more uniform blue. But there are no clouds and little haze falloff.
Increasing the haze falloff, accentuated the clouds again.

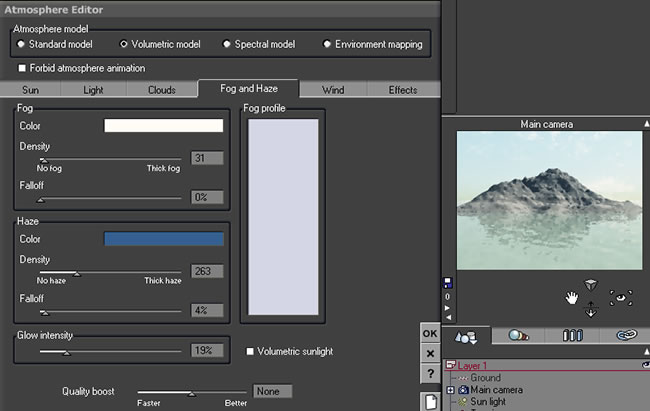
Adding fog and falloff are, once again, softening both the sky and the mountain; although the effect on the mountain is minimal.
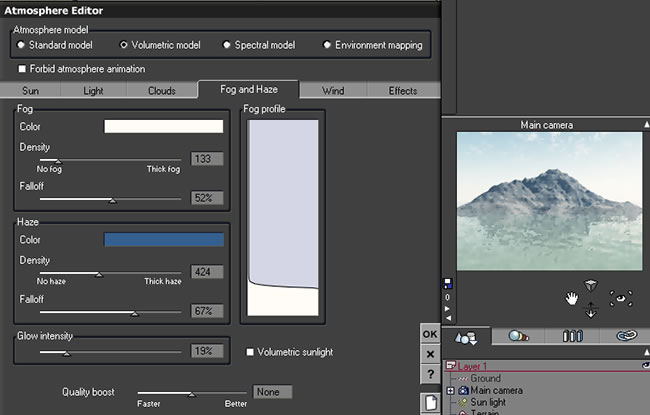
Below I changed the density of the fog as well as the haze falloff. Now the whole image is behind a wall of fog.
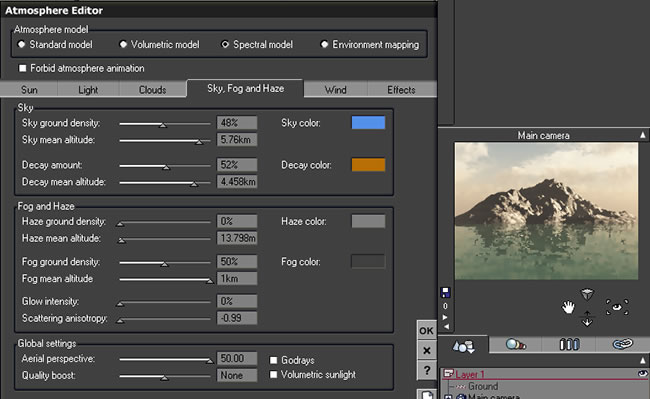
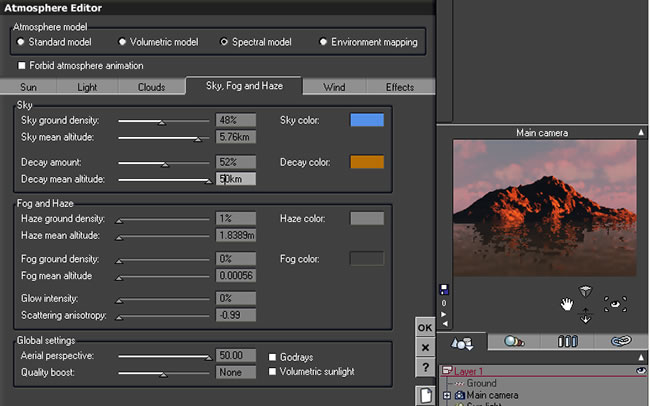
I used the same Standard atmosphere here, also, but just changed it to the Spectral model. The sky changes more than the objects as fog and haze are manipulated. You cannot really blanket the mountain in fog using the Sky, Fog and Haze tab.
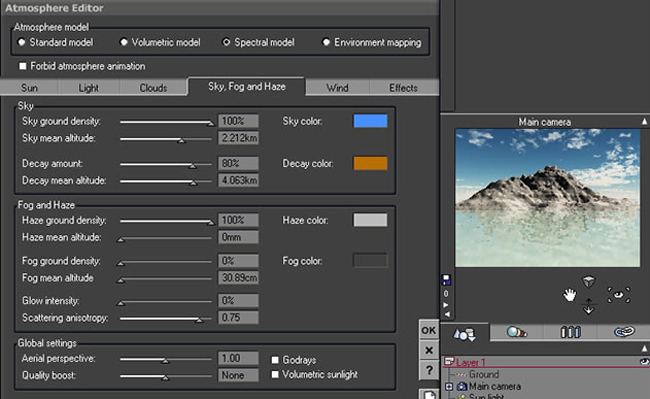
Changing the haze mean altitude by about 1/2 didn't change the image much.
Here, however, it made the sky a darker shade of blue.
Substituting fog ground density for the haze ground density, also, didn't change the image a lot. See the first in this series of images.
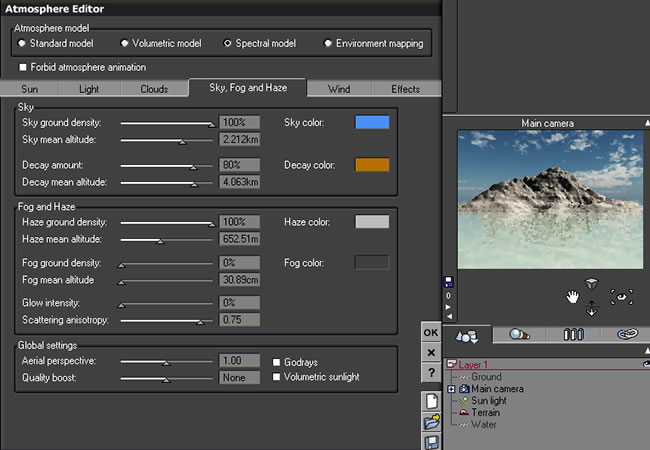
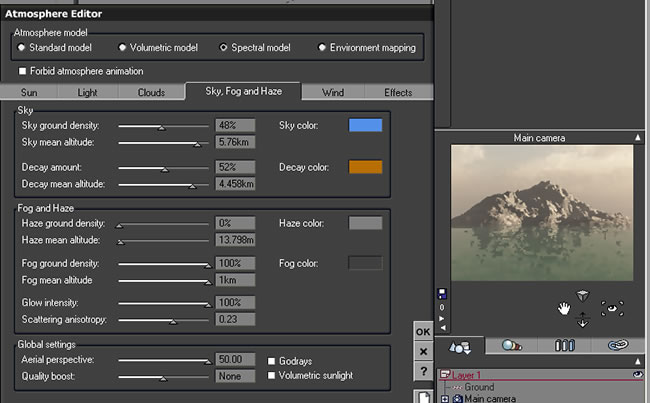
However, raising the mean altitude made a tremendous difference. Notice, though that the mountain is still pretty sharp even if the sky is covered by the dark gray fog.
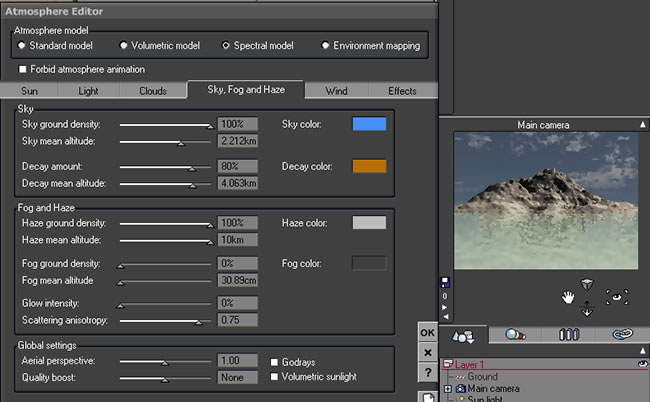
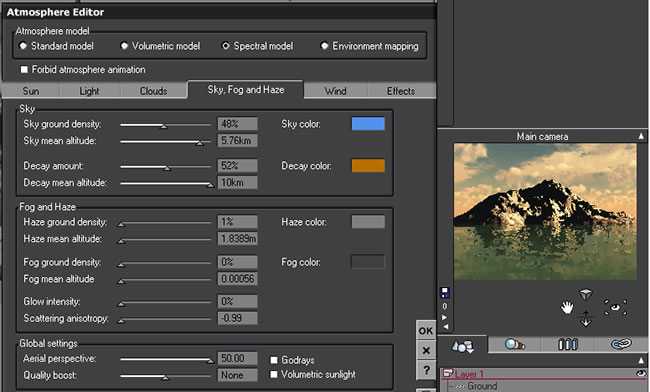
Below the fog mean altitude was lowered and the glow was activated.
Haze is now activated in addition to the fog. Again, no matter how the fog and haze are set, the mountain changes very little.
For this last group, I used a Spectral atmosphere called Bisbee. I will, also, note the changes made to the different images.
In the next one I eliminated the haze and fog.

In the next there is no fog, but the haze was set at 100%.
Here the haze mean altitude was changed from the image above.
Here I reduced the haze ground density, but I kept the haze mean altitude.
Now, I started changing the fog settings and eliminating all haze. Here the mountain is a little softer.

In this next one I reduced Fog mean altitude but still kept the density at 100%.
Here, the fog ground density was reduced to 50%, but the fog mean altitude was upped. As a note, you can always increase the altitude and other numerical adjustments by typing in a larger number than by just moving the slider to the maximum distance.
The fog ground density is 100%, the fog mean altitude is the highest without typing in a number, and the glow intensity is now set at 100. The scattering anisotropy is a positive number. This is important. Again, the mountain appears a little softer.
Below the scattering anisotropy is a negative number and it changes completely the hue, tone, etc. of the image. It, also, makes the mountain appears the softest and fuzziest.

The next two tests strictly had to do with decay. Look at the decay amount and the mean decay altitude.
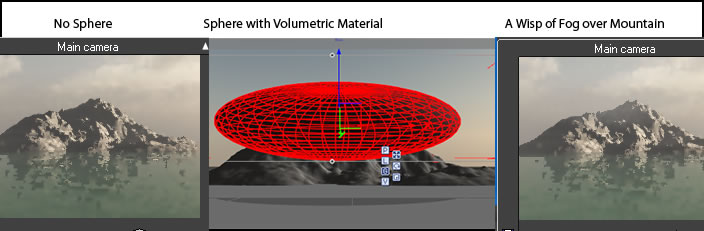
Now that we have seen some of what these different atmospheric models will do, how do we get a low fog effect that can be gotten using the Standard model or a fog effect just touching the top of a mountain using either the Volumetric or Spectral? What we have to do is create it outside of the atmospheric settings. There are a number of tutorials on how to do this such as Geekatplay.com's Ground Fog. Also, one can use such models as fog, smoke, etc. created by Wabe (Walther Beck) which can be purchased from Cornucopia3d.com such as his Bad Weather collection. Or one can create metaclouds and hang them over a mountain. Vue 6 and 7 Infinite contain volumetric materials which are semi transparent.
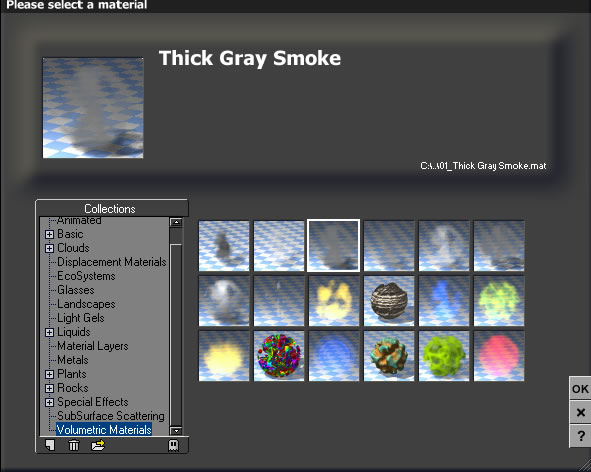
Below, I quickly created a sphere and just used a default volumetric material to demonstrate the possibilities. Using a metacloud or part of one, would have given a wispier effect. Also, one can accomplish a lot in the function editor manipulating the volumetric materials.