Before I start this tutorial, I would like to suggest you look at Section V, chapters 11 and 12 on working with Layers in the PaintSupreme help menu.
Below is a screen capture of the interface of PaintSupreme. Notice on the right panel the Layer Manager. This tutorial will discuss layers, why they are so useful, and how they are used in BrainDistricts's PaintSupreme.
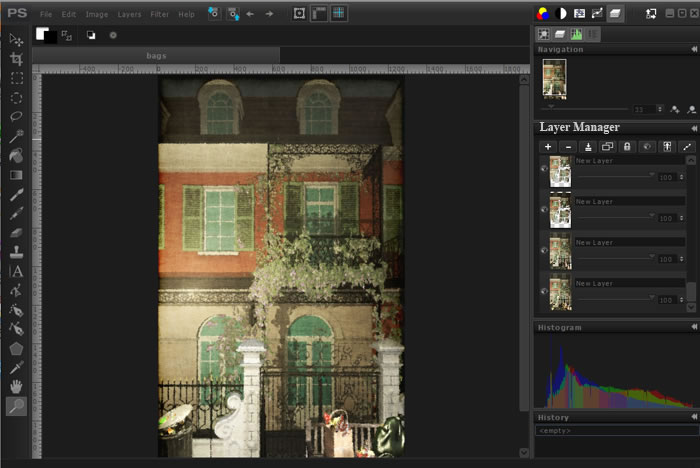
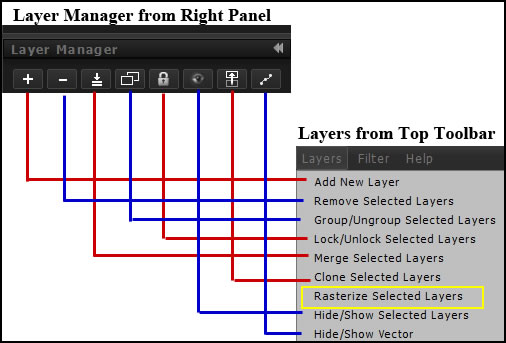
You can access the Layer commands three ways: from the Layer Manager on the right panel, from "Layers" on the toolbar, and by right clicking on a layer itself. The reason I have put a rectangle around "Rasterize Selected Layers" is that it is the only command that does not have an icon in the Layer Manager on the right panel.
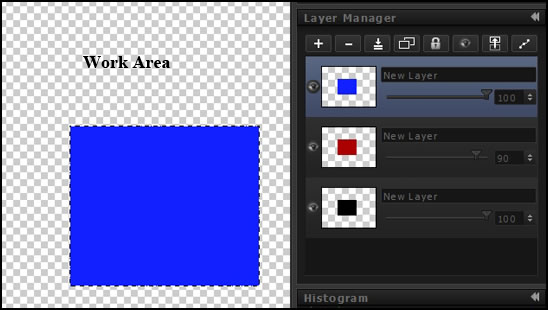
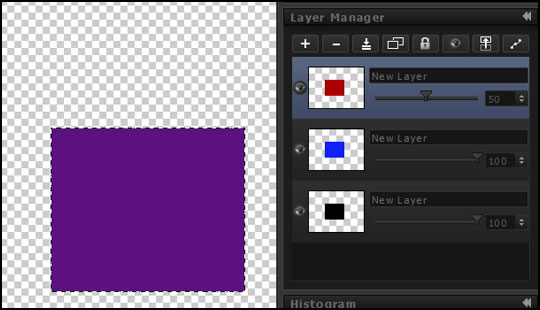
To start with I will create some layers of the same exact size in PaintSupreme. When you select a new image File>New, a new transparent layer will appear on your screen. I created a box with the selection tool and filled the bottom layer with black. Then, I clicked on the Add layer (+) sign and with the new layer selected (highlighted in blue) filled this box with red. Lastly, I added another new layer and filled it with blue. Notice the color on the screen is blue because the top layer box is covering all the others.
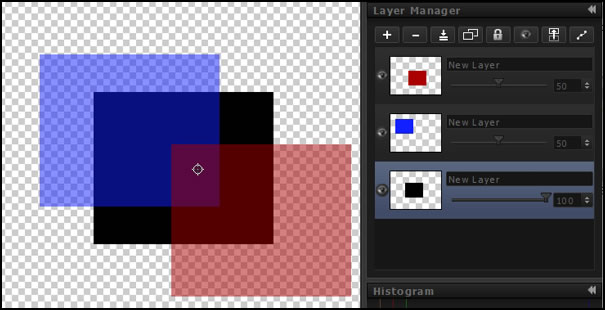
Now if I put my cursor on the red layer above and hold down the left mouse button I can move the red square above the blue square. You can change the order of layers for different effects. It is important that you don't place your cursor near the opacity slider or you will change the opacity. Look at the image below and you will see a yellow blob. That is where I positioned my cursor.
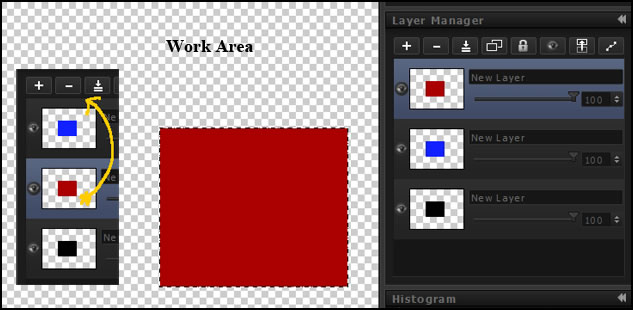
On the red layer, notice the slider on the layer to the right and the number 100. This means that the red layer's opacity is 100%. If we slide the layer to 50%, the red color will get less opaque allowing the blue color to show through.
Now I deselected all the rectangles Edit>Remove Selection and moved them around. The bottom black rectangle can be moved also. Then, I kept the red opacity at 50% and changed the blue to 50% also.
Let's apply what we have looked at with a photograph. Here you can practice creating selections and putting them on new layers and, then, applying some filters or adjustments to them. When I opened my photographs, some were already in psd format, some were jpgs, and some were tiffs. Since I shoot in Camera Raw, I had to convert the images anyway. I found that for some psds I had to duplicate the background image for it to show up in PaintSupreme. PaintSupreme didn't seem to like flattened psd files without any layers above the flattened background layer. PaintSupreme opened all the tiffs and jpgs I tried as well as layered psd or psds without a flattened background.
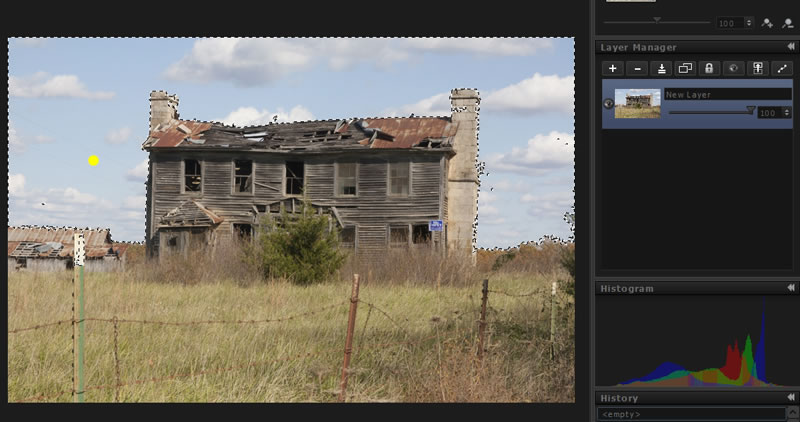
1 - Open an image in PaintSupreme. We are going to separate the sky from the house and foreground.
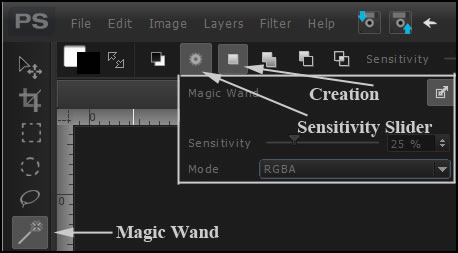
2 - Choose an area to duplicate. The easiest way is to use the Magic Wand tool and set its sensitivity to about 20 for this sky and click in the blue area. The yellow dot shows where I placed the Magic Wand.
The wheel-icon changes when different tools are chosen and offers choices of parameters.
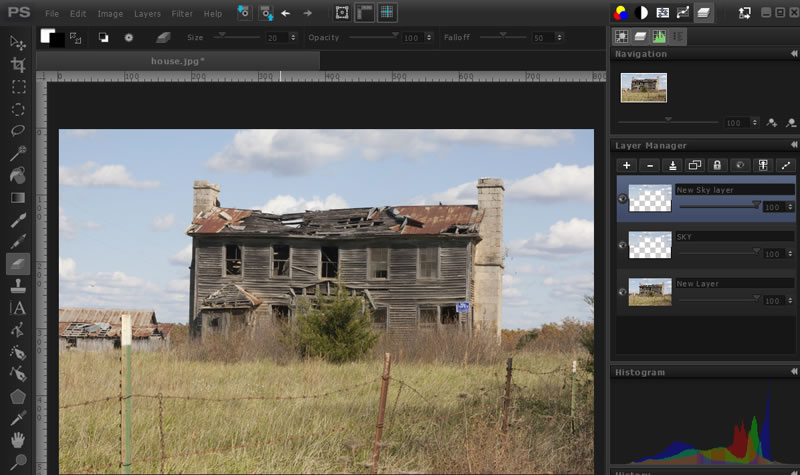
3 - Now we will copy and paste the sky to another layer. If you have only 1 layer as in the image above, when you do the command copy into new layer, a new empty layer will appear. Then, you select that layer and do a copy into current layer.
4 - Since the sky layer is separate from the bottom layer we can play with different techniques on the sky. If you are afraid of destroying it, just hit the Clone tool in the Layer Manager so you have two layers and can always throw one away.We will call it New Sky layer for the tutorial.
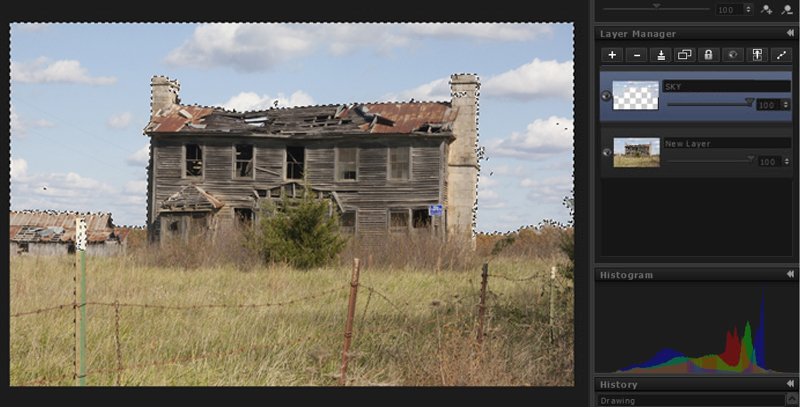
5 - Now look at the image without the house and foregrounsd. We can do this by clicking on the eye next to the layer with both the house and sky on it (the original layer).

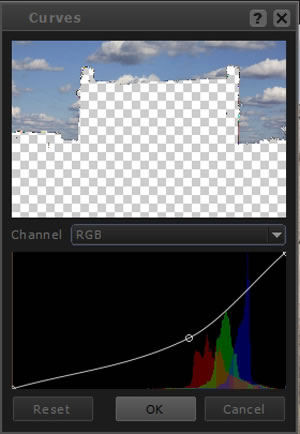
6 - Let's darken the sky. There are a few ways to do it. We can use, Hue/Saturation, Levels, or Curves. With the New Sky layer selected, we will select, Curves. Click on the Curves icon on the top tool bar.
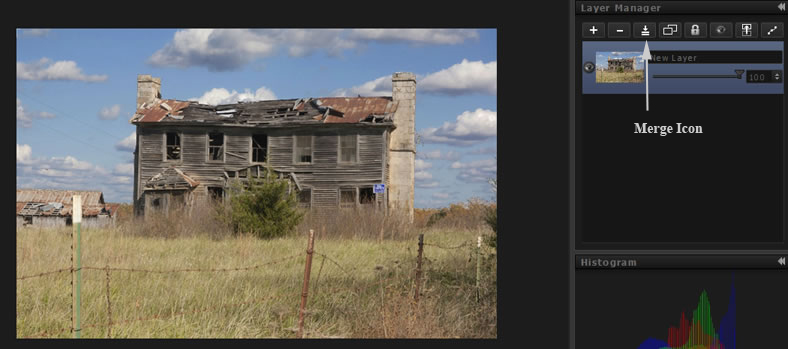
7 - Since the image looks good, we are finished. Now you can unclick the eye on the bottom layer so that layer shows. Click on all the layers to select them. Hold down the shift key when you left click to select a layer. Remember to click on the image in the layer to select the layer. Once all are selected, finalize by clicking on the merge icon.
You have seen how layers can be:
- reordered in the Layer Manager
- have their opacity changed
- used to act as non-destructive methods for modifying and creating effects
- have their hieracrchal position changed to change the way the image looks
For more information on PaintSupreme, go to BrainDistrict's website.