How to Increase Contrast in the Midtones of a Photograph
Use Overlay Blend in Photoshop CS3
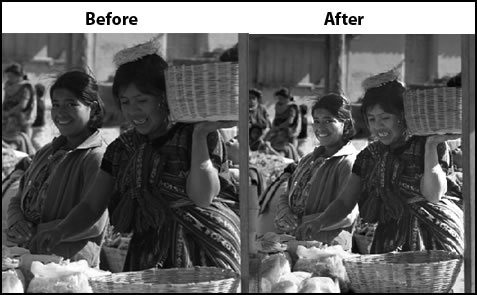
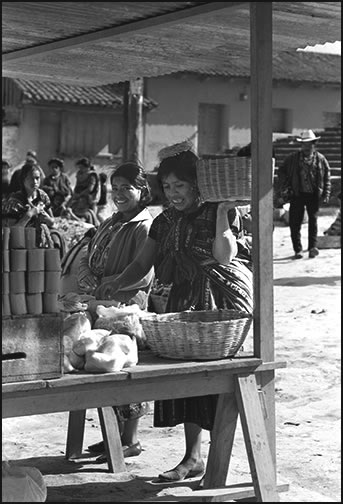
I have experienced a number of problems when working with my old Guatemala and Yucatán black and white photos. Some of the images had very little contrast and needed more. I tried to solve this in both Camera Raw and Lightroom 2 using some of the settings, but for certain purposes I was not satisfied. I had, also, tried using Levels and increasing contrast; but again I was not satisfied. To solve this, I used the Overlay Blend Mode in Photoshop CS3. Below are two pictures. One is before any work was done on it. As you can see the main figures are too dark with not enough contrast.
Step 1 - If you had used the figures without any alteration in the original image, the bright spots (highlights) on the image would appear too bright when you used the Overlay Blend Mode; so the first step is to make the highlights less bright. The highlight that was problematic was on the left figure's face. The one on the right figure's arm did not present a problem because it could be easily darkened afterwards. If there are no large highlights, then the image does not need any adjustments in the beginning.
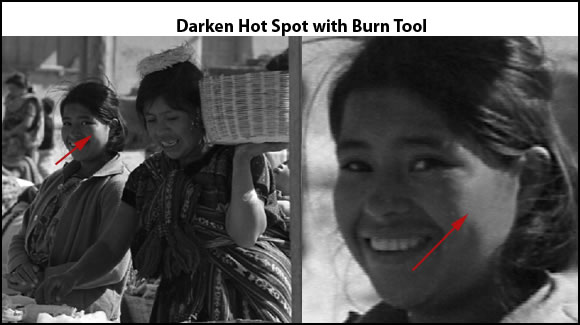
There are a few ways you can lessen the highlight. The easiest is to use the Burn tool at a low setting. Use a large soft brush so that brush strokes won't show. Start with a setting of 5 in the Highlight mode. You can also touch it up with the rubber stamp after you use the Burn tool. You still want the area lighter, but just not quite as light. You also need it to blend with the rest of the face.
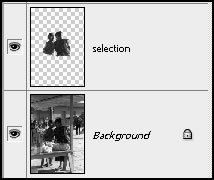
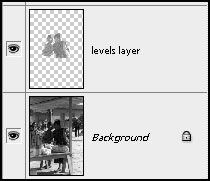
Step 2 - Make a selection of the two main figures using whatever way is the most comfortable for you. Then copy and paste the selection to another layer.
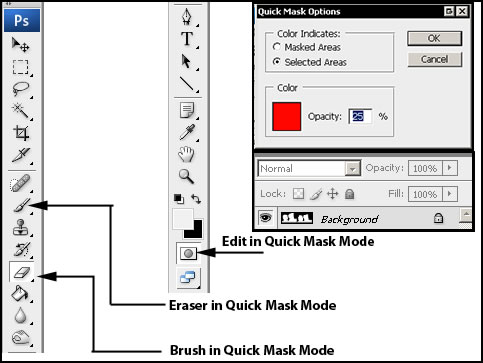
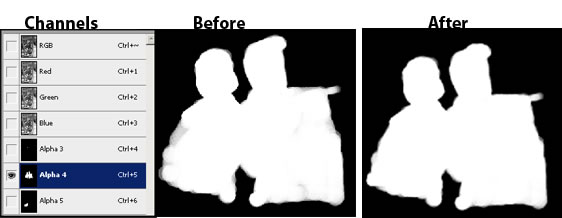
How to use Edit Quick Mask - In this black and white, I painted on my selection using the Quick Mask. If you don't know how to do this, click on the Edit in Quick Mask Mode button. If you look at the screen capture of the Quick Mask Options, notice that it is set for Selected Areas. That means that the red overlay will be on the selected area. I can't remember what the default setting is for Photoshop. This is how I work. To access this, just double click on the Edit in Quick Mask Mode button. With this set up, the Eraser tool works as a brush and the Brush tool as an Eraser. This might be opposite from the default setting. It doesn't matter which setting you use for this procedure. If Masked Areas is checked, then the Brush tool acts as a brush and the Eraser tool as an eraser.
Notice in the screen capture of the Layers' Panel that the layer is gray. That means that the layer is in Quick Mask Mode.
Once you have the selection covered in the red Quick Mask to your satisfaction, press the Edit in Quick Mask Mode button again to release it. Then, go to Selection>Save Selection. It is necessary that this selection is uniform in white and black. In the Channels' Panel, click on the layer; it will open. Take a brush with white color and paint over any gray areas. Now when you copy and paste the image to a new layer, all will be at 100% opacity. (The reason for this is that sometimes when you create a Quick Mask, not all the strokes will be of equal density even if you turn off the commands in the Brush Panel for density variation due to pen pressure and use a hard brush.)
Step 3 - Using Levels, make the selection a lot lighter.
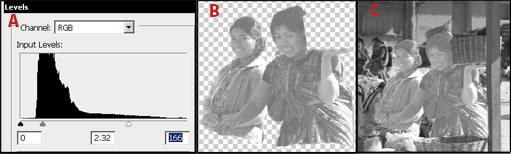
The image will now look like the ones below. A shows the Levels setting. B shows the selection with the background not visible. And C shows the image on the background.
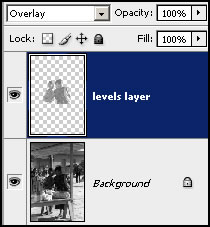
Step 4 - With the Selection layer highlighted (levels layer), change the Normal Blending Mode to Overlay by clicking on the arrow and selecting it.
Below is the finished image. Notice that the two main individuals are more contrasty as well as have more detail without loosing gray tones. I did a few other adjustments to the image, but not many.
You can, also, apply this concept to an entire image. One difference is that on the final image you might have to lighten some very dark areas with the Dodge tool once the image is flattened. Below shows the background image which is sort of dull.
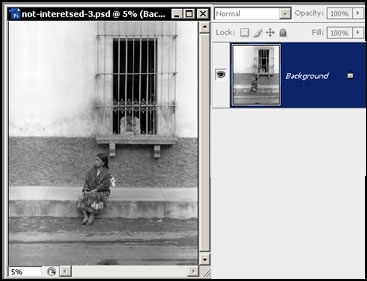
I duplicated the background layer so I could use it to create the Overlay Blend layer. I lightened it using Levels but you could use Curves as well.
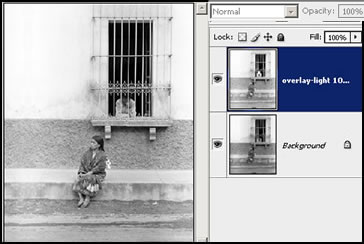
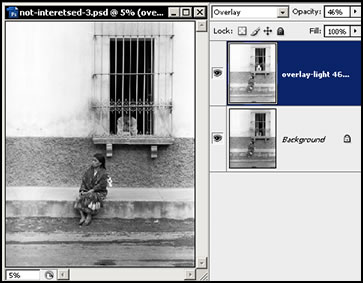
Then, I changed the Blend Mode from Normal to Overlay. The opacity of that Layer is 100%, and it makes the image too dark.
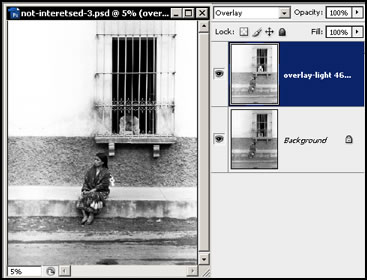
So I changed the opacity of the top (Overlay) layer to 46%.
Now the image has more character.