PhotoTune 3 is all about color correction. It allows you to:
- Get perfect tone and color for your photos in seconds
- Have an improved Wizard walk you through the process of enhancing your image in as few as two steps
- Use SkinTune color to correct portrait images in one click, just like using a gray card but for skin
- Intuitively convert color images to Black and White
- Use PhotoTune 3 as a Smart filter
One new feature of PhotoTune 3 is its Dynamic range enhancement that uses eye-fidelity technology to remap the tones in your image to look more natural, the way your eye sees them.
Other new features are:
- A professional interface for users who desire complete control of the output
- Lightroom /Aperture integration
- Ability to save recently use presets
- Ability to quickly launch PhotoTune 3 from a new onOne Panel in Photoshop
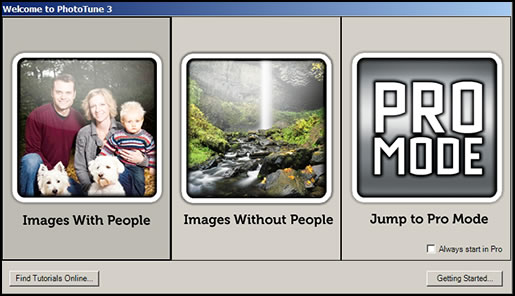
This is an incredibly versatile plug-in. You can use it in either a quick mode guided by a wizard or a Pro mode. The first screen you will see gives three options: image with people, image without people, and Pro mode.
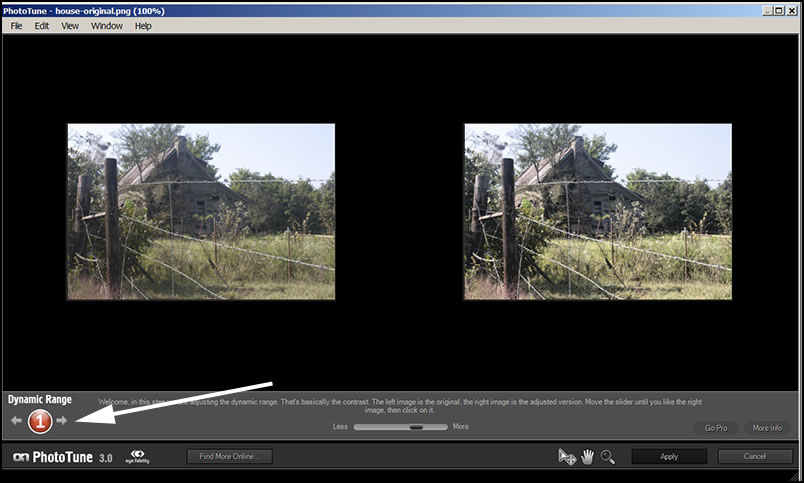
To start, I selected the screen "Image Without People." There can be as few as 2 steps or as many as 8 and a summary. (The number of Color Caste Removal steps can vary). I will show one of the the screens. Instructions come with each screen so you can't go wrong in understanding what you are doing. You click on an image to go to the next step. While working you are not using a before and after image, but you are comparing and choosing which image you prefer. You can change steps by clicking on one of the two arrows. The choices are: Dynamic Range, Auto Color, Brightness, Removal of Color Caste, and Sharpness. The More Info button gives even more instructions and explanation of what you are doing. The summary step will show the original on the left and the new image on the right.
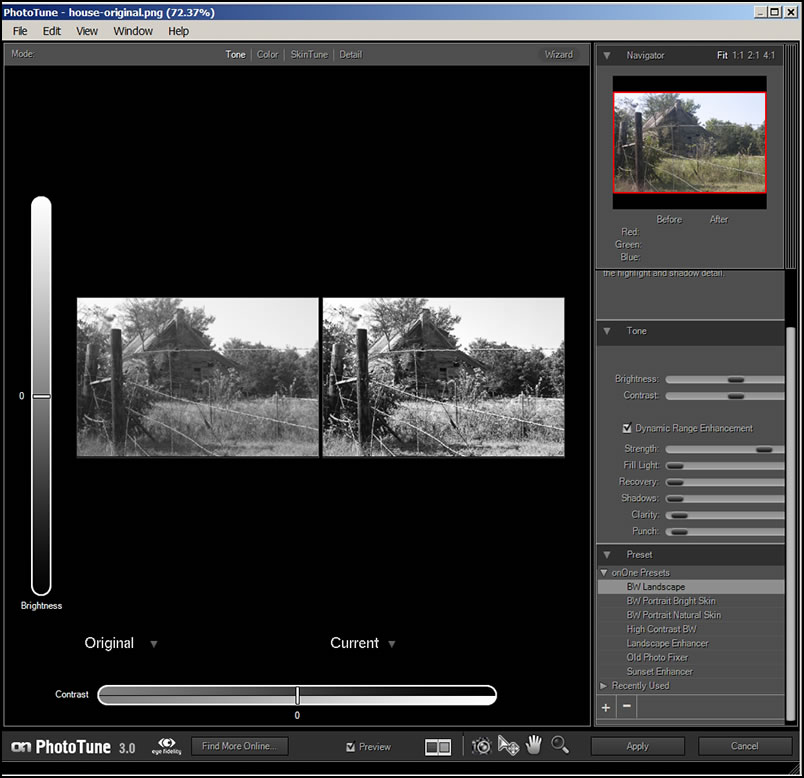
The next method I tried was the Pro mode. This can be used for both images with and without people. I used the same image for these tests. On the next three screens, I did not manipulate any of the sliders.
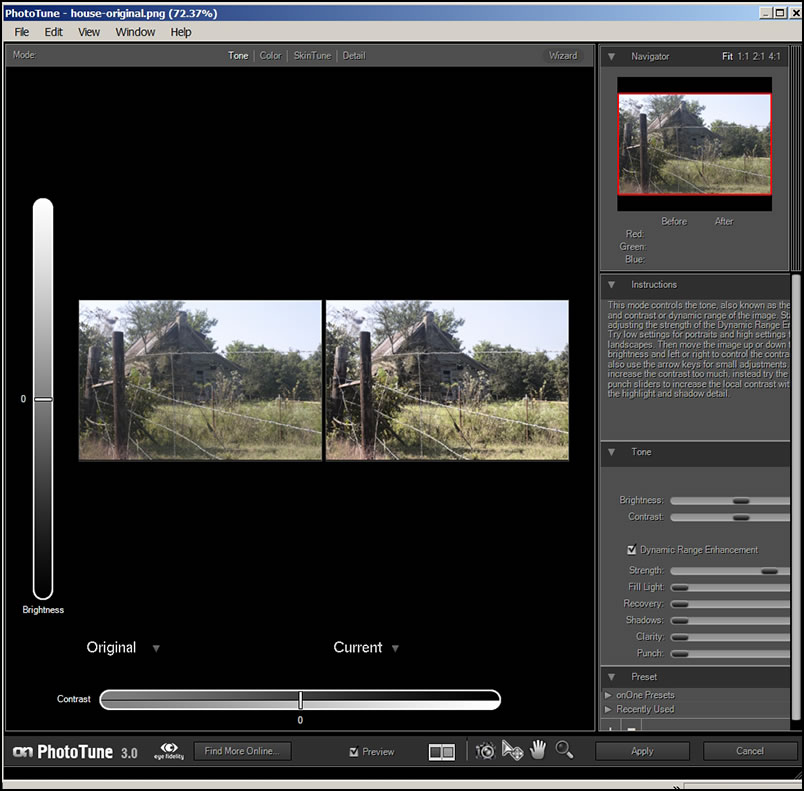
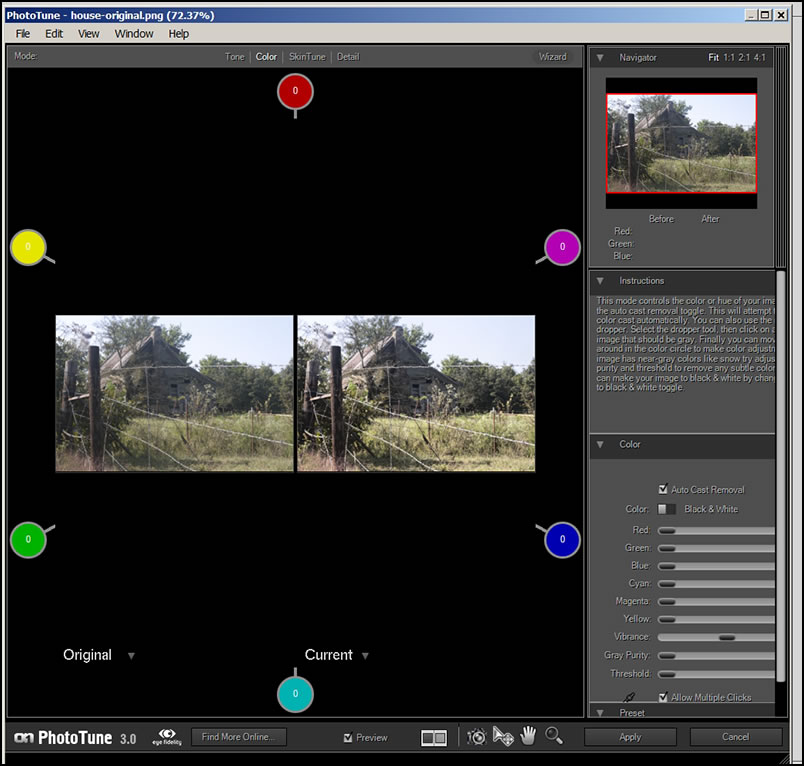
If I were to change the sliders, the change would be reflected in the colored circles. Default is 0.
The last screen I used was the one that dealt with sharpening.
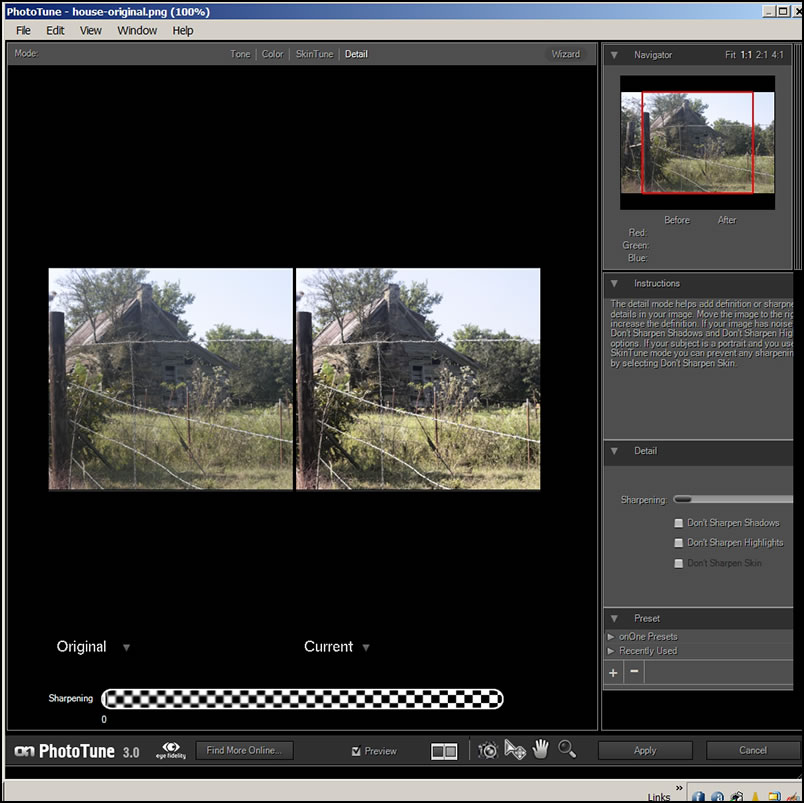
Notice on all the above Pro mode screens, I did not utilize the SkinTune choice since I was not working with skin tones. I will demonstrate that later as well as how the quick mode wizard works on skin tones.
In Pro mode, you can use already created presets or make and save your own. Below is an example of the Black and White Conversion preset. I could use it as is or make changes and resave it under a different name.
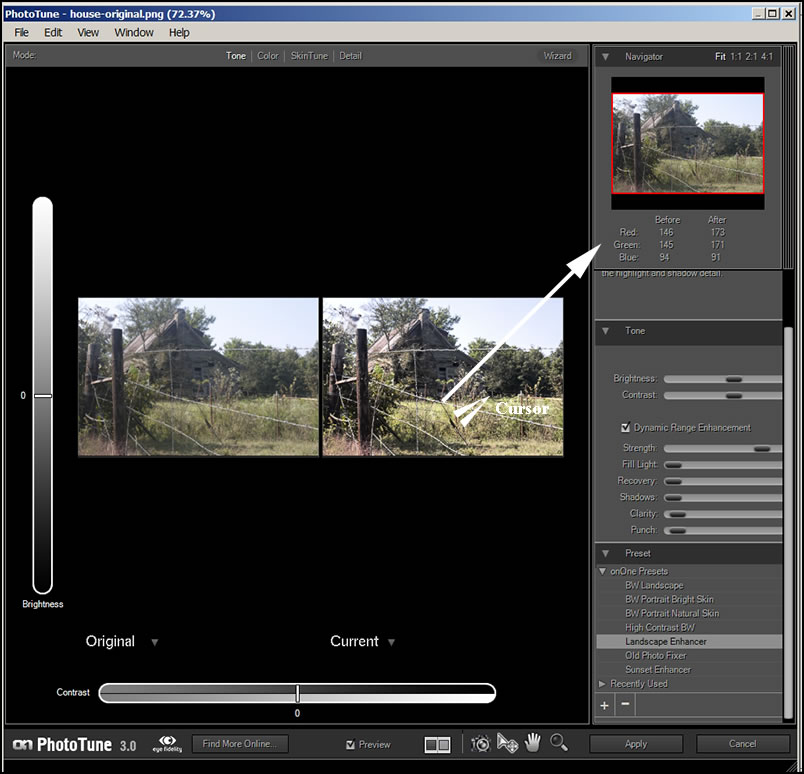
Below is an example of the Landscape Enhancer preset. On all images, you can put your cursor on a part of the image and see the RGB values before and after the transformation. This works on the Black and White Conversion preset as well.
When working with portraits, even in the quick mode which utilizes the Wizard, you still can make choices. I had the ability to vary the skin tone as well as work with the background. You can work with either preview. Whichever one looks best as you follow the steps, becomes your choice.
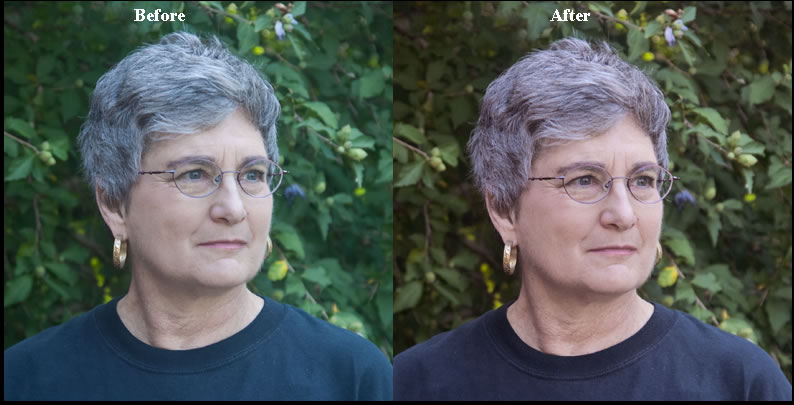
Below is a screen capture of one of the steps. While the steps are automatic, you have a slider to manipulate.
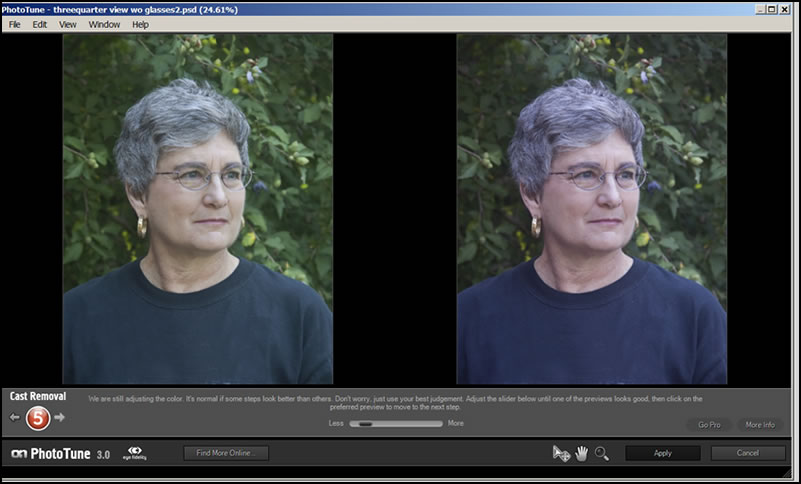
You can also use the Pro mode and SkinTune. This allows you to remove a color cast from skin. You position the eye dropper on the left image on a medium shade of skin and this will reflect on the color of the skin in the right image.
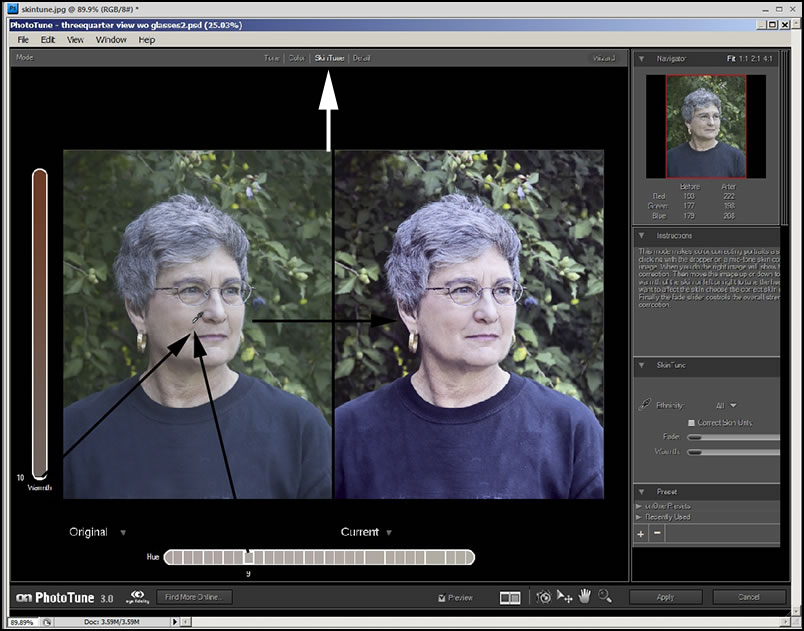
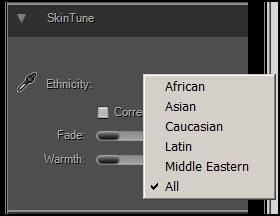
You can further refine your skin tone by choosing the ethnicity of the subject as well as using the other sliders. Thus, you have an amazing amount of control of the person' s skin tone.
Not only are many of the steps in the Pro mode intuitive, but should you need more guidance, onOne software has excellent tutorials on its website. I recommend looking at the short video tutorials first because viewing them will greatly speed up your learning process and give you a greater understanding of these simple to use tools. Also, if you are considering purchasing PhotoTune 3 or even trying it out, you can see how easy it is to use and how easily it can color correct your image.
The requirements are listed below.
| Apple Mac OS X | Microsoft Windows | |
| Latest Version |
|
|
| Operating System |
|
|
| Computer Processor |
|
|
| Computer Memory |
|
|
| Display |
|
|
| Required Host Application |
|
|
| Optional Host Applications and Integration |
|
|
| Other |
|
|
| Language |
|
|
The cost of PhotoTune 3 is $159.95 for a full version and $99.95 for an upgrade.
For more information on this easy to use and excellent plug-in as well as all the others that comprise the Plug-in Suite 5, go to the onOne software's website. Also, don't forget that you can download a trial version. This is another plug-in that makes purchasing the Plug-in Suite 5 such an exceptional value. That review can be found here as well as other links to the products that are contained in Plug-in Suite 5.