Mask Pro 4 (current version is 4.1) is a tool for removing backgrounds to either show another background underneath or to be able to create a selection once the background is removed. Below is what Mask Pro 4.1 does:
- Removes unwanted backgrounds with easy, intuitive techniques.
- Maintains transparency in hard to mask objects like hair, smoke & glass.
- Includes 12 tools to mask everything from large backgrounds to the finest details in hard to mask areas.
- Works with 8-bit and 16-bit images in Photoshop CS2, CS3 and CS4.
Some of the new features in this version are:
- Video Tutorials Palettes
- Tips and Shortcut Palettes
- Wacom Tablet Support (this can be enabled or not)
- Keep/ Drop Palette
- Improved Navigators
The User Guide can be downloaded and some of these new features can be looked at in more depth (page 4). Tutorials as well as images to use are also on the CD. (I used the CD for Plug-in Suite 5.)
A short movie on the onOne website gives an excellent overview of the product and how it works as well as additional information.
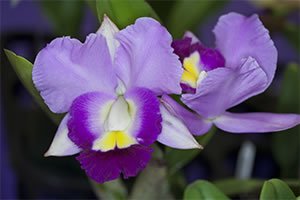
Mask Pro 4 works on the principle of selecting colors to drop and those to keep. Which tools you choose and what settings will depend on the image. Below I chose the Eye Droppers as my main method and selected which colors to keep and which to remove by using the two eye droppers. Below is the original image. I wanted to separate the orchid from the background but keep some of the green leaves.
The first step is to decide whether to use the eye droppers or the markers. In this case because of the various tones in the background that could conflict with the flower, I chose to use the eye droppers. You can make various sets of keep and drop colors as you maneuver around the image.
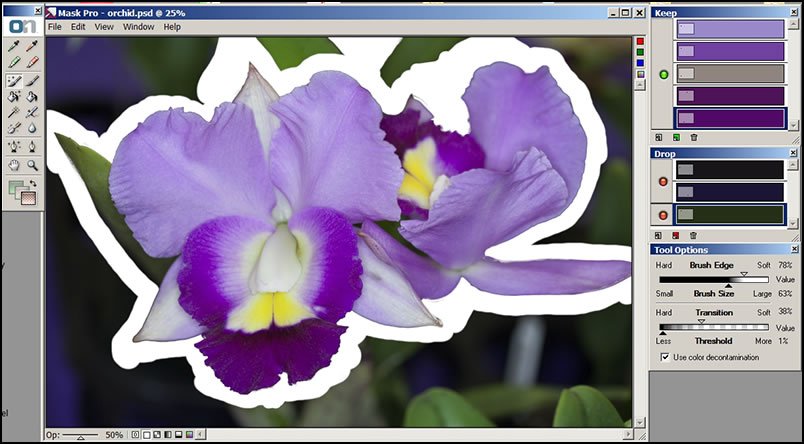
The Tool Options will change with the selected tool. When using the Magic brush, the threshold/ transition sliders are very import for delineating how hard a line is created and how the Magic brush deals with the keep and drop colors. Experimenting is the key to find out what works best on your own images, but onOne Software provides a number of tips through its Tool Tips and online video tutorials.
This program is so powerful and has so many options to refine the mask that you can basically correct for any imperfection. The key is that in any one area the background color and adjacent foreground color need to be different. But as you saw with the leaf, you can work with various parts of an image creating new sets of drop and keep colors as you work.

In the image above in #3, you will see that I have labeled the green square as white. The green square adds white because it removes part of the mask to restore the image. If you click on the pink square, it will add black to add more to the mask. These are the Erase/Restore toggles. There are two when using the regular brush and a split one in addition when using the Magic brush.
You can work with solid objects as well as remove the background that is under a transparent object.
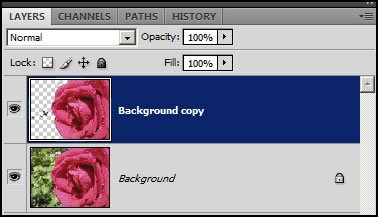
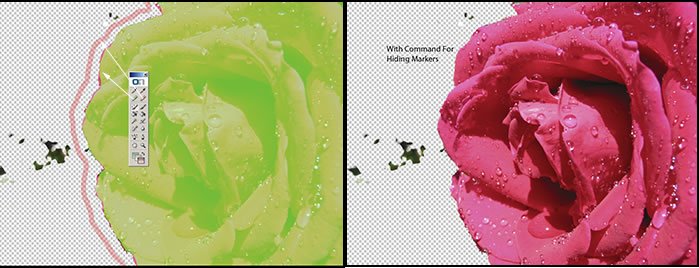
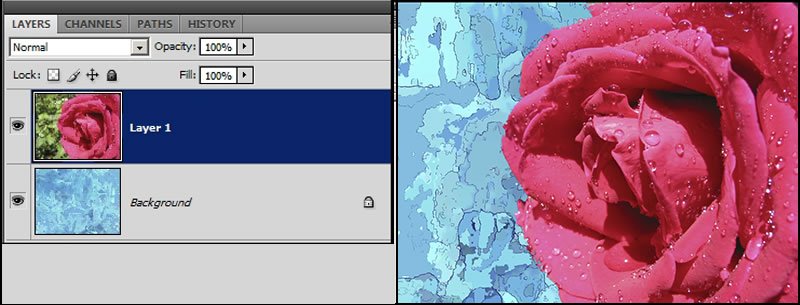
If your color is fairly well differentiated from background to foreground, you can use the quick markers. Again, there is a short video showing how to use all the tools and accomplish your objective. Having the ability to access this right from the Tool Tips on the screen makes learning very easy. The following shows two ways to use the red (remove) and green (keep) markers. First a screen shot of the final layer's panel in Photoshop.
You can accomplish the same objective in a few ways. This illustrates the simplest way without having to use any commands other than drawing the red and green lines with the markers.
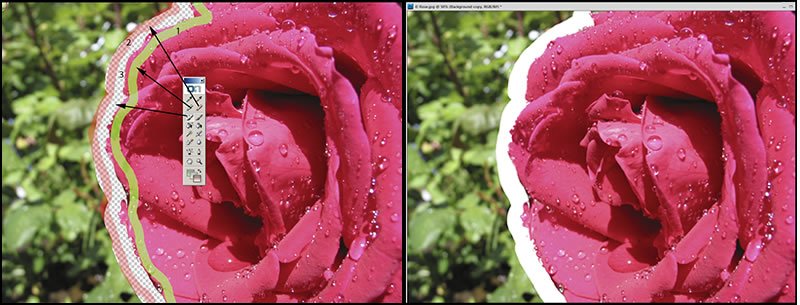
Below I added some commands from both the Edit and View menus. These instructions are shown in the Tool Tip video as well as in the User Manual. The Rose example is found on the CD.
This method is very fast. It is best used when the background and image are distinct color wise.. Should any stray colors remain, it is easy to clean them up. I did this more than once, and only once were there any unwanted colors. I showed this in order to show how easy it is to remove them should they appear.
Removing the background on the original rose image so that the blue could show through took about 2 minutes. The screen on the left shows how I set it up in Photoshop. The screen on the right shows the finished product. In this case, all of the color was automatically removed. I did not do any touching up.
The requirements are:
Latest Version |
Apple Mac OS X 4.1.6 |
Microsoft Windows 4.1.6 |
| Operating System |
|
|
| Computer Processor |
|
|
| Computer Memory |
|
|
| Required Host Application |
|
|
| Other |
|
|
| Language |
|
|
I think it should be obvious how powerful onOne Software's Mask Pro 4 is. It also should be evident that there are many ways to obtain the goal of removing the background so another one can show through as well as removing the background to create a selection of the "saved" object. This is a must for a tool box, especially if you have to spend a lot of time removing backgrounds or creating selections. In addition to the multiple ways available to achieve the desired result, the program is easy to use. To speed up the learning process, I advise looking at the quick videos of the Tool Tips. This is another great program in the Plug-in Suite 5.
For more information on Mask Pro 4, click on the link. As an individual product it can be purchased for $159.95 for a full version or for $99.95 for an upgrade. For a trial download, click on Trial. Don't forget that this is a member of the Plug-in Suite 5 which is a great value. That review can be found here as well as other links to the products that are contained in Plug-in Suite 5.