During the fall of 2007, I began using an early version of GeoControl2. I think it was an Alpha version. I had to lay it aside for the past few months due to other commitments and I have resumed using it now with the pre-release build of 39.
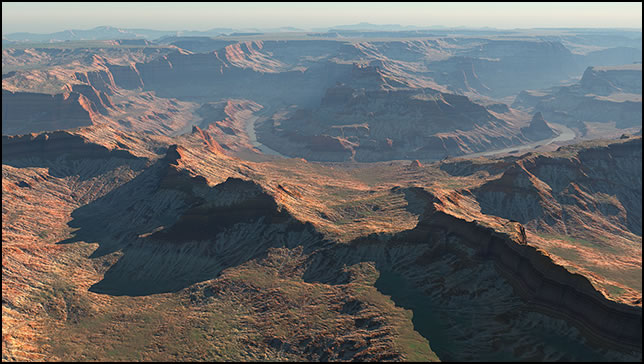
GeoControl is an incredibly powerful and well written program. I believe that those with the greatest knowledge of 3D will find it the easiest to learn. For others, I believe, the learning curve can be steep. However, it is more than worth working with because of what it can do. If you imagine a terrain, with enough practice, you can build it. Below is an image created by the developer of GeoControl, Johannes Rosenberg (Cajomi.)
If you are not familiar with GeoControl, you are probably asking what it is. It is a terrain generating program. Once a terrain is created, you can bring it into programs such as e-on software's Vue, Daz's Carrera, and Terragen as well as other 3D programs. The method used to bring it into Vue, for example, will determine its visible quality. Later in the review, I will speak about methods to bring it into Vue 7 Infinite since that is the program I use for my landscape creation. Cajomi has given me permission to use any information from the GeoControl website for this review. An excellent short movie on the GeoControl website will give you an introduction to GeoControl2. It is called Workflow GeoControl2.
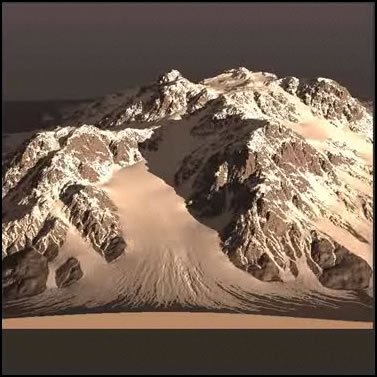
You can create a terrain in GeoControl2 with shaders that can be quite stunning, but GeoControl isn't equipped with atmospheres, etc. to complete a landscape. That is not its purpose. The largest size for a terrain is 4096 x 4096 pixels. While one uses the Render panel to render images and see them, it is not set up as a final renderer. It will render an image 788 x 708 pixels at 72 dpi. It needs to be done using the Render panel with the camera tab. The command on the camera screen is Save Image.The image below is from the Workflow movie mentioned above.
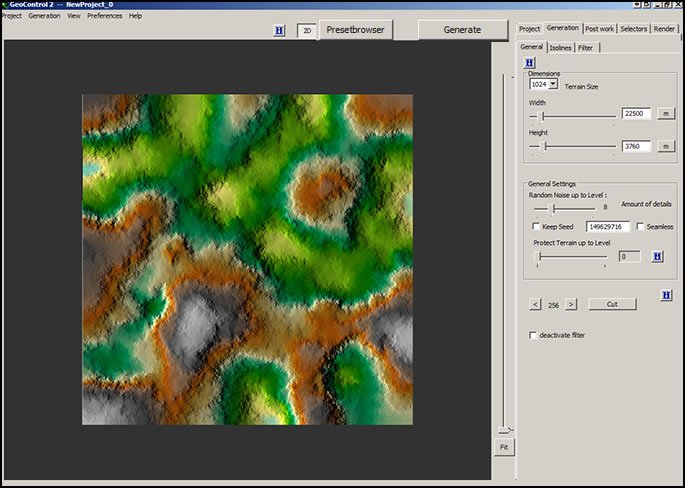
Below is the Interface from GeoControl2. Notice the Presetbrowser button. This is a good way to start and learn as I will mention later. Also, notice the Generate button. This button will change to a Render Button when you are working in the Render panel.
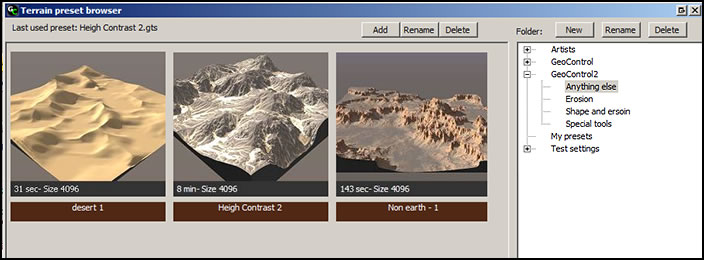
If you are new to GeoControl2 or not yet satisfied with your own work, one of the best learning tools is to use the library of presets as your starting point. They are very useful to pull apart and look at the various tools used to create the terrain. You can, also, modify them to your specifications. In addition, make sure you go to the tutorials on the GeoControl website. These tutorials by Johannes are excellent. Even if you have used GeoControl1 extensively, I recommend these tutorials because they will shorten the learning time for GeoControl2.
Let's now look at some of the features of GeoControl2. If you have used GeoControl1, you will be used to controlling the height of different parts of the terrain using brushes. In GeoControl2, Isolines are used instead. They are defined as: "sketch lines which define the height of the terrain." Roughly, the basic shape of the terrain is determined initially in the General Slider, in the Isoline section by using the levels, grid size, and in the placement of the isolines, of course. The height of the isolines is controlled by a slider.

Normally, one sets the height and the width of the blank terrain in the General slider. Below shows how doing it after the placement of the isolines still changes the terrain.

Applying filters continues to refine the shape of the terrain. Many of them work integrally. Once again, levels is very crucial to how the terrain will be modified.
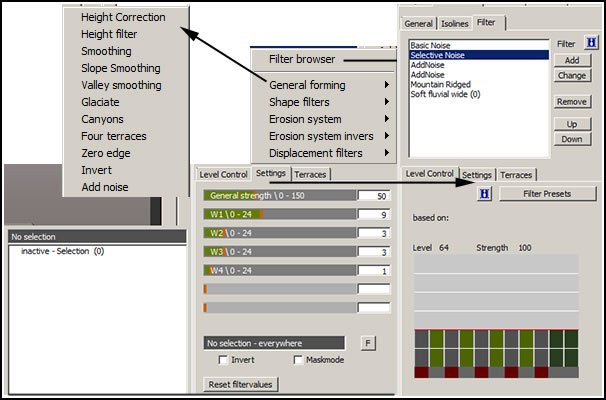
As stated earlier, levels are a very important component of GeoControl2. When applying filters, they also play a large part.
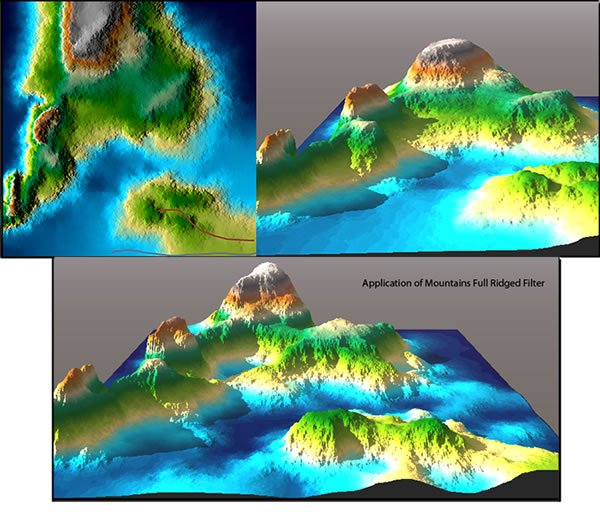
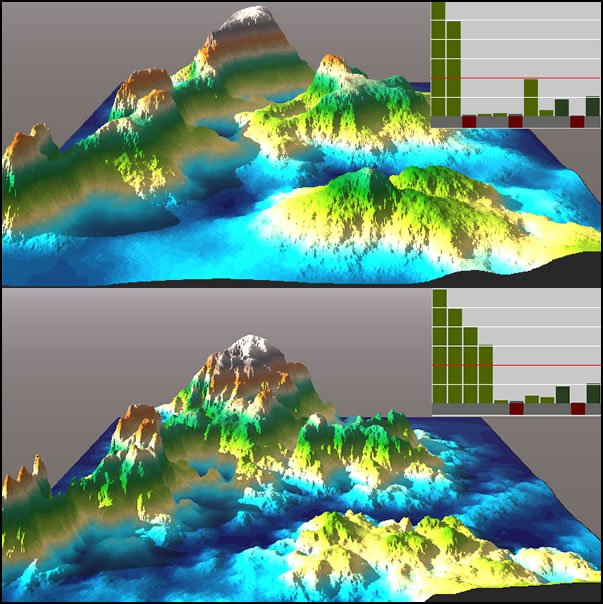
Below are two illustrations of how the terrains change when the Mountains Full Ridged filter is applied using different combinations of levels.
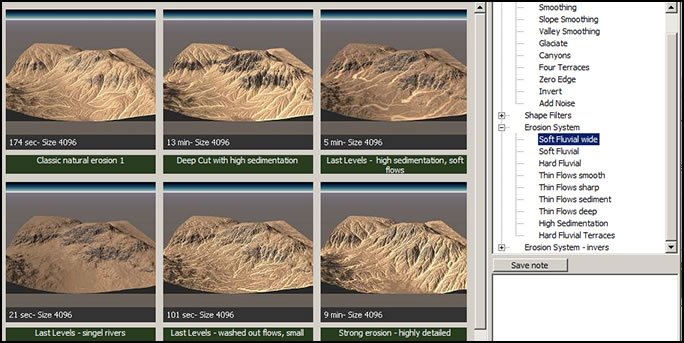
Manipulating erosion by the use of the erosion filtering system and through erosion presets is a very powerful way to create realistic and interesting terrains. It is one of the most powerful options in GeoControl2. There are many preset erosion filters available when you are working in the Filter panel.
I don't want to get bogged down in all the intricacies of the program. I hope with these few illustrations you can see how powerful it is and how, with knowledge, you can create amazing terrains. Even without knowing a lot about the program, you can create wonderful terrains, but their outcome will be dictated more by chance. However, for a long time that is how I worked and created terrains that were bases for my work in Vue.
Now, I want to get back to showing the panels and more of the tools. One does not have to work on the whole terrain. One can select a part of the terrain, for example the height, and create a selection.

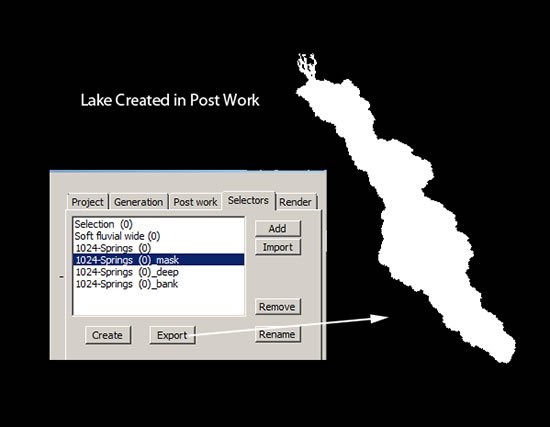
Once you create the basic terrain, you can do Post Work such as putting in rivers and lakes.

You can create maps from the Selectors by exporting certain selectors. Below I exported my lake. I can, then, use it as a distribution map in Vue.
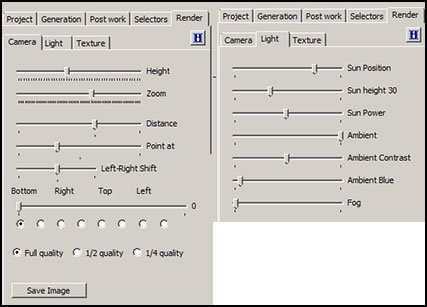
You will be using the Render panel throughout your terrain creation. Below are two of the menus on the panel.
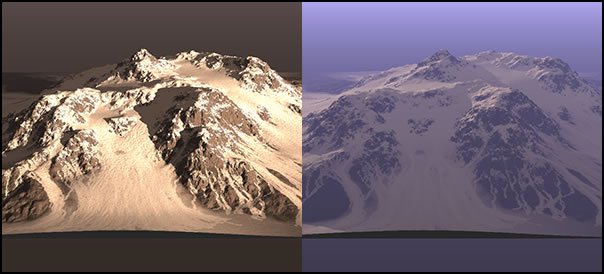
The lights will only affect an image when it is rendered and Saved on the Render/Camera screen. Below are examples. The left one uses default lighting and the right using lighting with high fog and ambient blue.
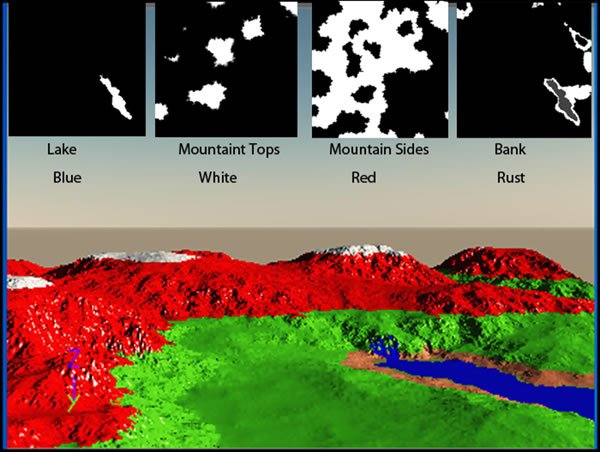
So that the lake would stand out from the rest of the terrain, a shader was created that was applied to it.

I exported 4 distribution maps from GeoControl2. When exported, it is saved as a BMP Grayscalemask (*bmp);. the color mode is Index color mode and it is at 72 dpi. In the image below, the colors in Vue were chosen just to show the different distribution maps and how they looked all together. Obviously, in Vue there is a lot more work to be done. But I wanted to show how well the terrain was reproduced as well as the distribution maps.
You can create a terrain in GeoControl2, add selections and shaders to show snow, for example, and then export the shader to use as a color texture map in another program. I found that I had to do a lot of maneuvering to place them accurately in Vue. I believe that was because of my inexperience in doing it this way. A tutorial demonstrating the best way to do this would be great. Does one use layers, mixed materials, a combination? For those successful in this, and I have seen examples, newbies to this technique need guidance. I found it much easier to export the distribution maps and create my shaders in Vue.
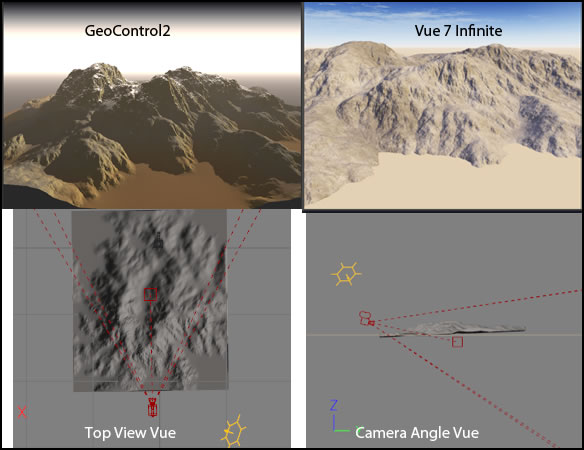
The control you have over creating a terrain is amazing. It is almost infinite. You cannot expect an exact match in Vue between the terrain created in GeoControl2 and the one imported into Vue using the 16-bit tiff which is the best way to go. The problem is that the altitudes are compressed in Vue. However by changing the camera angle, ground angle, and reorienting the terrain in top view, a similar terrain can be created.
You can purchase GeoControl2 from the download page on the GeoControl website. The cost in US dollars is about $158.00 for the full version and $86.00 for the upgrade.
If you are new to GeoControl or a seasoned user, you cannot forget the forum. Johannes (Cajomi) is actively on his forum answering questions and refining the program with each new build. He is receptive to ideas and comments. In this day and age where it is hard to find tech support by developers, it is wonderful to know that your questions can be answered directly.
I loved GeoControl1 and love even more so GeoControl2. Through writing this review, I was forced to experiment with areas that I normally would have put on the back burner just because there is so much in GeoControl2. I believe that if you use Vue or any other landscape building program, GeoControl2 is a must for your toolbox.