Review of Alien Skins' Blow Up 2
This review will mainly concentrate on the new features of Blow Up 2. For a review of the first Blow Up, click on the words. Blow Up 2 is a Photoshop® plugin. "Blow Up uses an innovative algorithm that temporarily converts pixels to a vector representation." What is new in Blow Up 2?
- Increased image quality with control over simulated natural textures
- Control for output sharpening
- Repair for jpegs that have been over compressed
- Batch processing
- Resizing up to 300,000 pixels per side.
- Improved interface
- New cropping tools
- New Preserve Natural Texture slider
- "Blow Up 2 is the first major Photoshop plug-in that will work in the upcoming Windows 64-bit version of Photoshop CS4" [Quote from the Alien Skin website.]
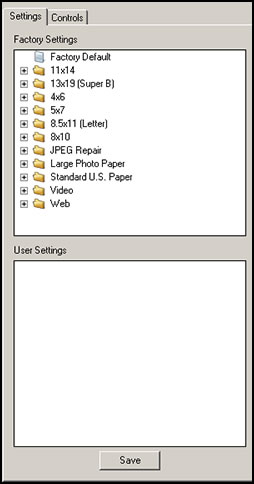
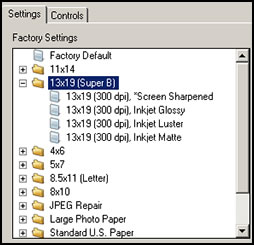
In Blow Up 2 there are two basic controls: the Settings Tab and the Control Tab. The Settings Tab is the starting point. You can find the output size you desire and the Crop to Size tool will crop your image to fit that size. It will automatically choose the correct level of sharpening for your output medium. I will describe the Crop to Size tool later in the review.
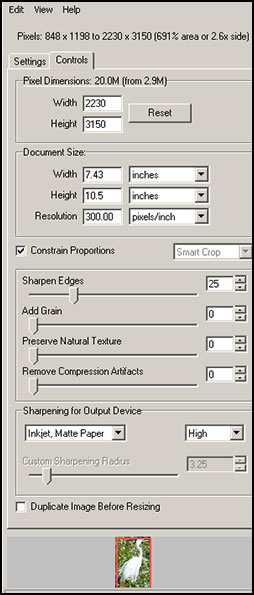
The Control Tab allows you to tweak the controls and choose your own size for the enlargement as well as use the sharpen feature, grain, etc. Notice on the bottom of the panel, the Sharpening for Output. You can select presets such as Inkjet Matte Paper and then high, medium, and low strengths of sharpening. There is a similar set for the web as well as none and custom. Again, I will discuss these later.
Before we go any further, for those who use Blow Up 1, you will recognize the interface.
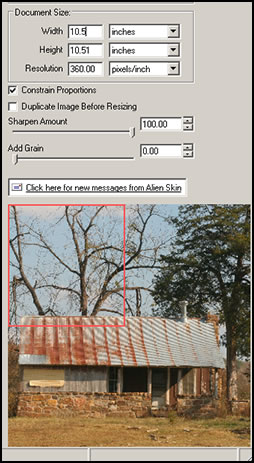
Notice on the tab that there are only 2 additional choices - Sharpen Amount and Add Grain. And there was not the Crop to Size tool, either.
To test Blow Up 2, I created a number of files that were blown up from 3 to 6 times (300% to 600%) their original size and, then, printed using my Epson R2400 printer. I used some very small files to start with and enlarged them to 8 x 10.5 inches. Granted, with the very small files you don't have much pixel information; however, they all enlarged well. I enlarged files using Photoshop CS3, Genuine Fractals Print Pro 5, Blow Up 2 with and without Output Sharpening, and Blow Up 1. All the files except Photoshop CS3 were set in the enlarging process to sharpen by the number 25 on the slider. This is not the additional Output Sharpening that is new to Blow Up 2. I tried to keep the conditions as similar as possible. I did a few different images including the head of an Egret. I cannot show them because if I scanned them in, I would add an additional element which could change the quality of the printed image. The results of all of these were very close. The only change I noticed was that the eye of the bird was a fraction sharper when I used Blow Up 2 with an output for Matte Paper set at high.
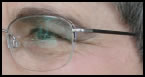
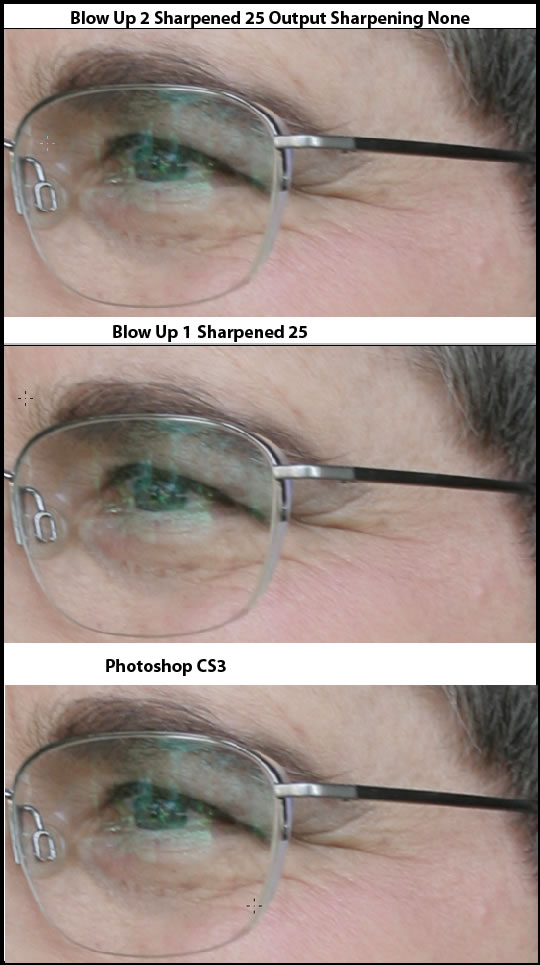
I, then, performed the same test on a series of images of eyeglasses from a photo of me. I printed these, also. Again, they were very similar. The one that was created by the Blow Up 2 plugin and had an Output setting of Matte Paper and a level of high was a fraction sharper, but there were tiny white lines around the temple of the glasses. The others had less distinct white lines on either side of the frame. The lines might have been some type of reflection.
I came to the conclusion that Blow Up 2 did bring out some finer details than Blow Up 1 or Photoshop CS3; however, on this scale of enlarging, the changes were very slight.
Below are screen captures of sets of files set for Print Size viewing in Photoshop CS3 (View>Print Size). The first file is a screen capture of the original, also set for Print Size viewing. These were not printed. All were 300 dpi.
Below is the first set of comparisons. All of them were enlarged by a factor of 4 or 400%
And more comparisons are below.
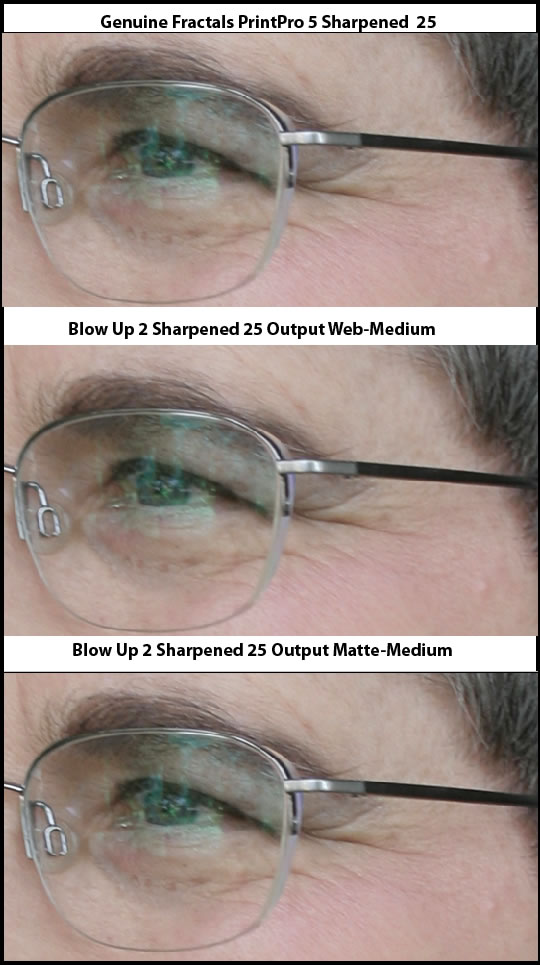
You be the judge of the differences.
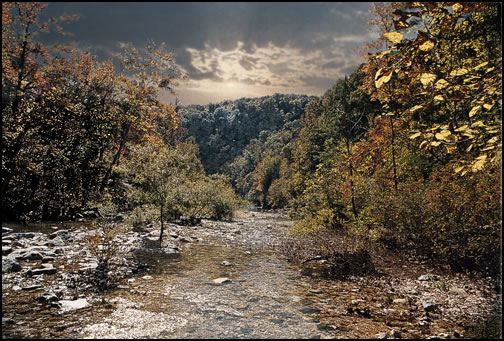
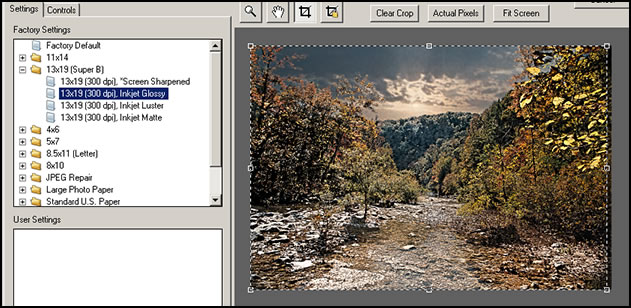
Blow Up 2 is not only about enlarging an image. It is set up to speed up the process through using Presets and the Crop to Size tool. Below is a 10 x 6 inch picture that I created in Photoshop. If I wanted to enlarge it, for example, to fit a paper size of 13 x 19 inches and one of 36 x 48 inches, I would do the following:
First, I would choose what I wanted my output paper size to be. You do not have a choice here of degree of sharpening. For that, you would need to go to the Controls Tab.
Once I did that, the Crop to Size tool would decide how the picture was to be cropped. For 13 x 19 inch paper, the cropping was very slight.
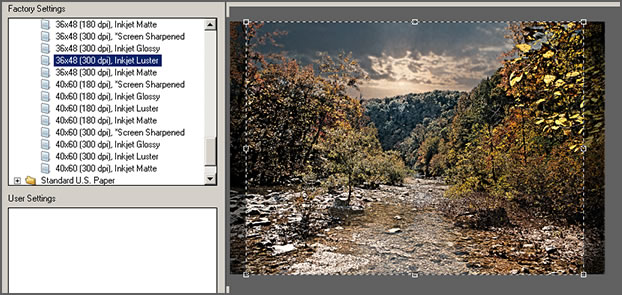
For the 36 x 48 inch paper, the cropping was more because of the ratio of the sides.
It is really not as accurate to display images enlarged on the screen as it is to view them once printed. Below is a part of an original image which was 10" x 6.7" at 300 dpi.

Below is a piece of the 36" x 48" enlargement done with Blow Up 2.
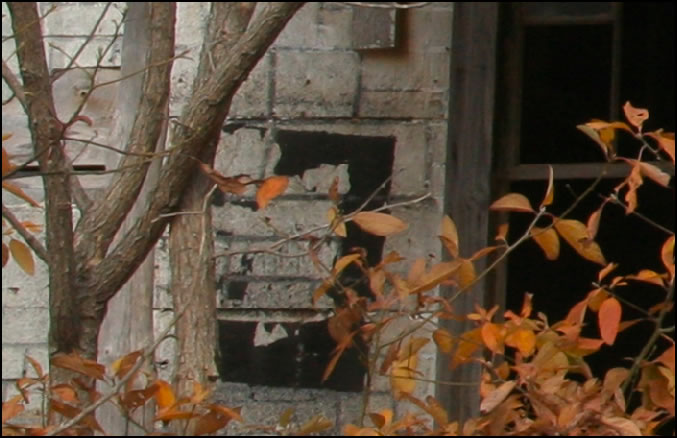
The "pinkish" bits of color in the shingles and the tree are not artifacts due to enlargement. They were in the original image.
Below are important notes about Output Sharpening and Resolution from the Blow Up 2 Help menu.
"An important tip about previewing results with output sharpening: The levels of output sharpening for print will produce results that look over-sharpened on the screen. This is ok; in fact, they should look a little “crunchy” on the screen to produce sharp prints. If you want to get an estimate of how they will look when printed, just select “Screen” as the mode for previewing. Once you have the parameters set to your liking, then choose a print format and apply the setting."
"300 dpi is often considered the standard resolution for most printing. We have gotten excellent results printing between 180 and 360 dpi. If you go below 180 dpi, the image quality will degrade and above 360 dpi it is extremely difficult to notice any improvements even with a magnification device. Some printers give clearer results for resolutions that are a multiple of 60, so we recommend that you stick to 180, 240, 300 and 360 dpi."
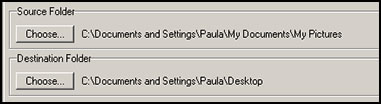
Batch processing in Blow Up 2 can be conducted right from the Automate Menu in Photoshop. Just click on File>Automate>Alien Skin Blow Up 2 Batch. Then, choose your source and destination folder.
The requirements are:
Macintosh Systems:
- PowerPC G5 processor or Intel processor
- Mac OS X 10.4.11 or later
Windows Systems:
- Intel Pentium 4 processor (or compatible)
- Windows XP or later
"Blow Up 2 is an automation plug-in and can only be used with the following host programs:"
- Adobe Photoshop CS2 9.0.2 or later
- Adobe Photoshop Elements 4.0.1 or later (Macintosh)
- Adobe Photoshop Elements 5 or later (Windows)
Blow Up 2 retails for $249.00 with an upgrade pricing of $99.00.
You can try a demo of this program by clicking on the word demo which will take you to the Alien Skin demo page. I always recommend people download a demo when available to see if the software will meet their needs.
Alien Skin has a lot of great plugins such as Exposure, Image Doctor, Eye Candy 5 Impact, Eye Candy 5 Nature, and Eye Candy 5 Textures, and Xenofex 2. Reviews of these can be found on my website.
To sum up my findings Each individual image file will contain a certain amount of information. You need information to work with when you create your enlarements. In the early days of using "enlargement" software which enlarged by using mathematical algorithms, as these still do today, there was a minimum file size. Now there doesn't seem to be a minimum size. I could not find any in the documentation and saw files used that were about 1/2 MB in size. But to be practical, you need to individually try your files to see how they will look. Also, you can't make a silk purse from a sow's ear. In addition, Photoshop has improved a lot. Whereas in earlier versions, I couldn't enlarge a lot without some type of distortion, with CS3 I could do it by at least 400% to 600% and get results almost similar to those created by Blow Up 2. The ones from Blow Up 2 were a little better with slightly sharper edges. It is important to remember that when you enlarge an image, you will probably be viewing it from a greater distance.
Blow Up 2 worked very well. It offers the user the chance of using presets and creating a new file size that meets standard sizes through the use of the Crop to Size tool. One can also use the Control panel to create a new enlarged file manually and have complete control. Both the Settings Tab and Control Tab are to be used together. The elements to improve an image such as sharpening and adding grain are also there.