I like to state that most software that has the word "Photo" in the title can be used for any image that works in Adobe Photoshop. The same is true for Perfect Photo Suite 9 by onOne Software. I create many types of bitmapped images that are not photographs or are from multiple photographs using file formats such as psd, jpg, tif, and, bmp; I can use the tools in this suite on all of them. I work on a Windows 7 platform in 64-bit.
As the years have gone by and new versions have appeared, Perfect Photo Suite has turned into a full featured photo (image) editor. In a previous version, the Layers module was added giving the standalone and Lightroom plug-in a huge increase in functionality including various ways of blending layers.
A number of changes have been made to Perfect Photo Suite 9 from version 8.x. I will describe some of these changes, additions, and modifications. All information within quotation marks is from onOne Software's literature. These are some of the new and changed features:
- "Perfect Browse
- Lightning fast previews of all your files. You can start to view and work on your images right away.
- Ratings, Labels and Likes: You can now rate, label and “like” images. ratings and labels are stored in the metadata so they will transfer to other applications like Lightroom.
- Rotate: You can no rotate images in Browse.
- Metadata Pane: The new metadata pane allows you to view and edit EXIF and IPTC metadata.
- Filter Pane: The new filter pane allows you to filter (search inside) the contents of a folder. This is useful for finding just your five-star images for example.
- Batch Rename: Accessed from the contextual menu. You can batch rename files or folders.
- Sources Pane: The Sources and Folders panes have been merged together. This makes it easier to drag and drop across volumes.
- Favorites Pane: The favorites feature of the Folders pane has been split out into its own pane. Favorites are shortcuts to places where you keep your images.
- Send To: From Browse you can now send images to other applications. Photoshop, Lightroom and Aperture are automatically detected and added. You can also add as many of your own apps as you want.
- Save As: You can now save out copies directly from Browse in any supported file format. This works for one image at a time, if you want to do multiple images, use Batch instead.
- Smart Photos: Smart Photos are a special PSD format that allows you to save your settings and masks from each module that you use so you can go back and re-edit them later.
- Masking Changes: The best tools from Perfect Mask have been merged into the Suite in general. You can now access all the masking tools in Layers and Effects directly. These are big changes and you can now get better masks than before, in the place where you want to work with them, especially for selectively applying filters in Effects. Here is a rundown on the masking tools.
- Quick Mask Tool: This is the replacement for the Drop and Keep brushes from Perfect Mask. Select the tool and loosely brush over what you want to remove. It will automatically expand the selection to the borders it finds.
- Refine Brush: The Refine brush is used after the Quick Mask Tool or the Perfect Brush to clean up difficult areas like hair or trees. It now has a mode option which is set to paint-out by default. This provides better results than it used to because it does not bring back unwanted colors.
- Perfect Brush: The Perfect Brush is an option on the Masking Brush. It now works better on semi-transparent areas. It replaces the Magic Brush from Perfect Mask.
- Blur and Chisel Mask Tools: The Blur and Chisel Mask tools have both been migrated from Perfect Mask. They are used to refine the edge of the mask.
- You can now copy and paste masks from image to image and across modules. Keep in mind with Smart Photos your masks are stored on a per effect basis across time and can be re-edited later.
- Retina Display Support: For Mac users with Retina displays the preview area and all artwork are now drawn at 2x quality. This will be coming soon for Windows 8.1 users as well.
- Printing: You can now do basic printing from any module, including Resize and Browse. Access Print from the File menu. You can select the printer settings and paper size as well as control how the image will fit on the paper and the color management options.
- Auto Tone: There is a new auto tone algorithm that replaces the old auto levels. In the past we just set the the white and black points. Now it sets these as well as adjusts the brightness, contrast, shadows and highlights.
- Image processing performance has been increased. We use more OpenGL and OpenCL as well as more optimized use of multiple processor cores.
- Noise Reduction: There is a new noise reduction filter in Enhance and Effects.
- Lens Flare: There is a new lens flare filter in Effects.
- Crop Tool: The crop tool has been modernized. It now moves the image inside of the crop box instead of the other way around. It also has leveling tool. There are new crop aspect ratio presets as well as document size presets that allow you to crop and resize at the same time. This is in Layers, Enhance and Resize.
- Updated user interface"
The requirements for Perfect Photo Suite 9 are:
"Operating System:
Windows 7, Window 8;
Mac OS X 10.8, 10.9, 10.10
Processor: Intel Core 2 Duo, Xeon or better
Memory: 8GB+
Hard Drive Space:
1GB for installation, approx. 10% of boot volume for virtual memory
Display:
OpenGL 2.0 capable video card with 256MB dedicated VRAM;
1280×720 or higher;
Integration: Adobe Photoshop CS6, CC, CC 2014;
Adobe Photoshop Elements 11, 12, 13;
Adobe Photoshop Lightroom 4, 5;
Apple Aperture 3.5
Other:
Internet connection for activation and auto updates;
Administrative privileges for installation"
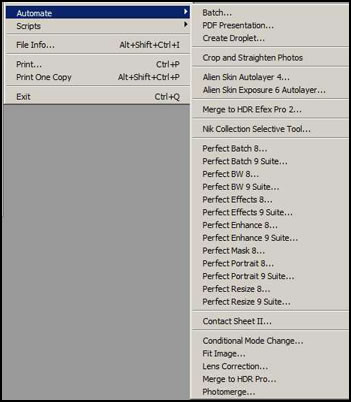
I first opened Perfect Photo Suite 9 in Photoshop CC 2014. I still had 8.5 on my machine. I had the onOne file Extension panel on my second monitor. I used this panel in 8 as well and in different versions of Photoshop. Instead of showing any of the Perfect Photo Suite 8 or 9 modules, I got a message telling me it wasn't signed properly. It did this in Photoshop CS6 as well. It wasn't really an issue because I could still access the modules from File>Automate.....
This issue can be fixed in Photoshop CC 2014. To see how, click on the word FIX.
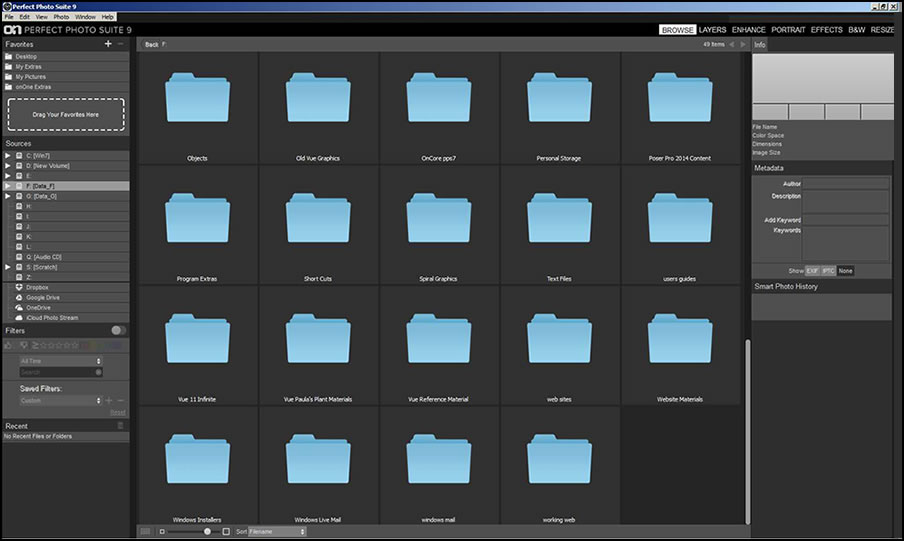
I first opened Perfect Photo Suite 9 from the standalone to show the Browse module. Since the Browse and the Layers module are more pertinent to the standalone, I will discuss them here. It was quick and easy to access any folder and file.
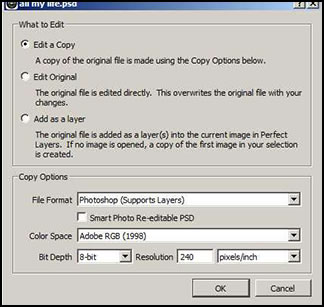
I opened an image and switched to the Layers module. When I did, a preference screen that I had setup earlier with the specifications I wanted popped up.
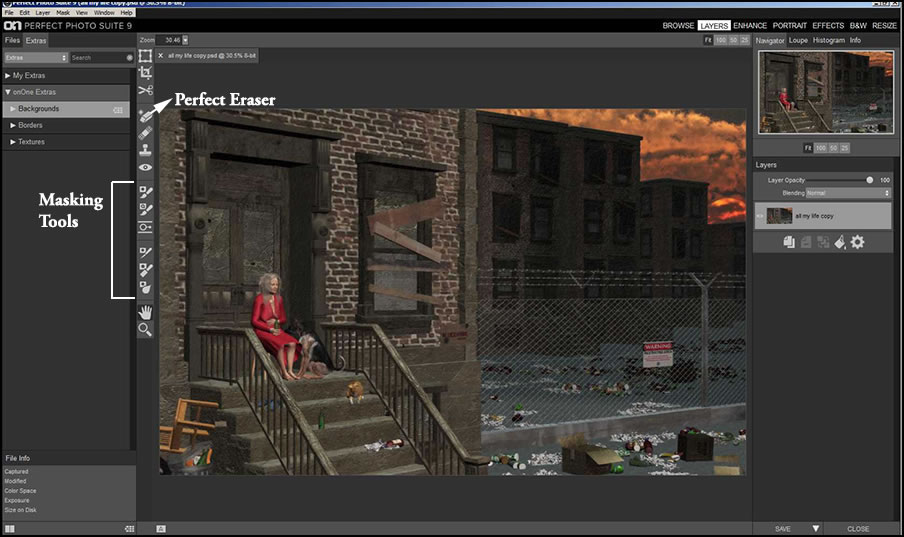
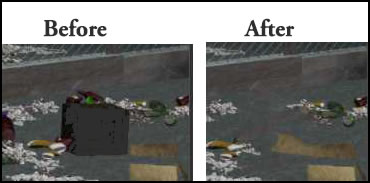
As you can see, there are a number of masking tools available from Quick Mask to Masking Bug and more. You can, also, do masking in other modules. This give the user a number of options when refining or changing and image. The Perfect Eraser is a tool that can be used to easily remove an object and automatically replace it with a background one. Notice what an excellent job it did in removing the box from the image.
If you look on the right panel of the interface, you will see Layer options. There are Blending options. The second option from the right is an icon of a tipped can. That is the new color fill layer (basically equivalent to a new layer in Photoshop).
Going down the list of modules, the Enhance module is the next one.

You will notice some changes in the right panel.
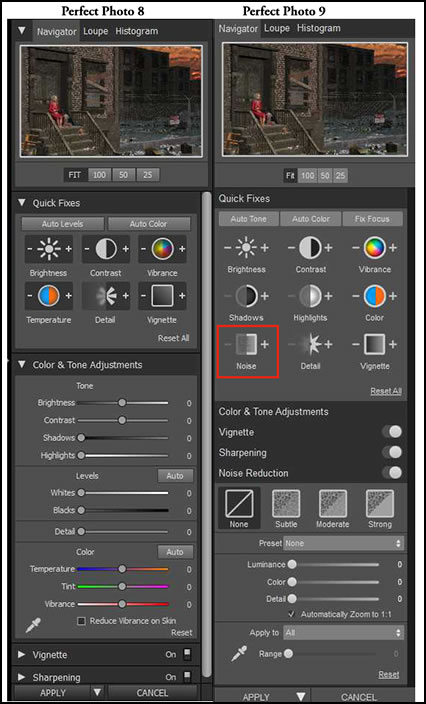
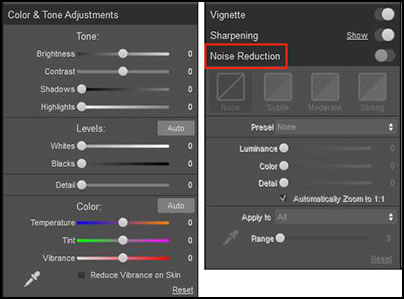
Below is a continuation of some of the right panel options in Perfect Photo Suite 9. Notice the new Noise Reduction options. They appear in both Quick Fix and in their own section of enhancements.
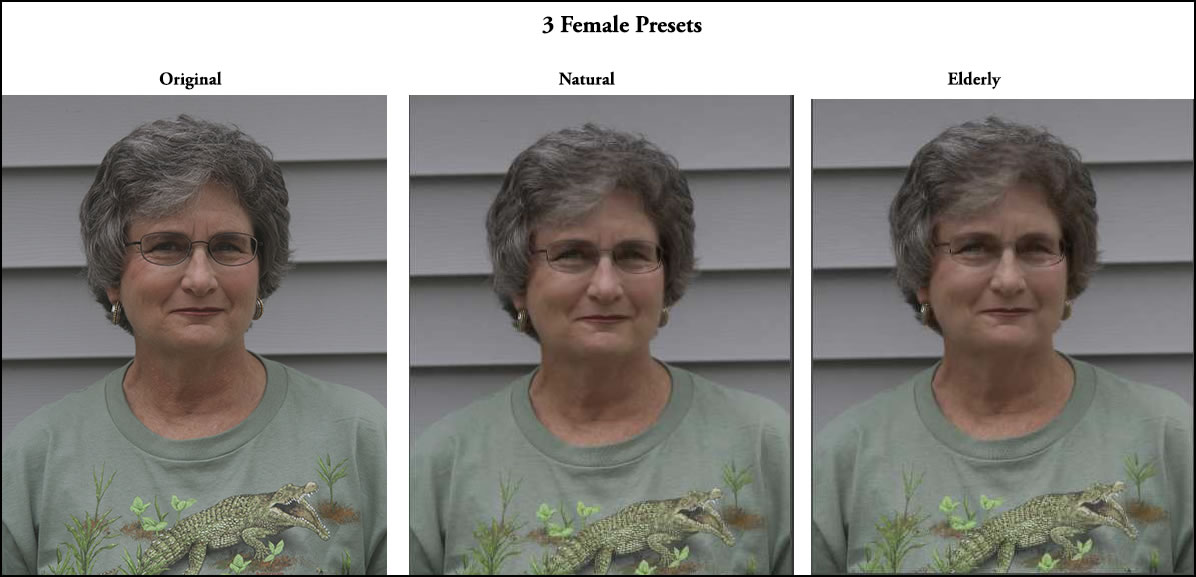
The Perfect Portrait module gives the user the ability to refine a portrait. This is especially helpful if the skin has some discoloration or a lot of wrinkles and lines. Automatically, the program generates a number of possible "fixes" as well as allowing for manual work.
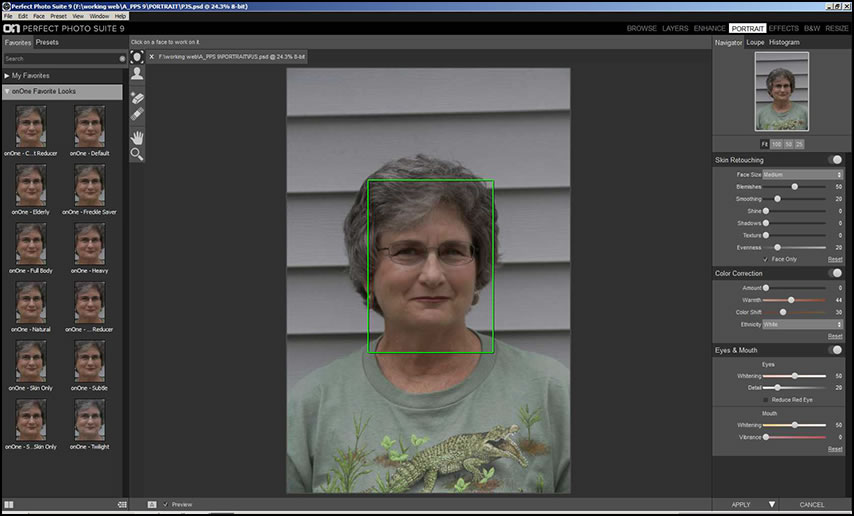
As you click on a face on the left panel, not only will the image change, but it will change the settings on the right panel.
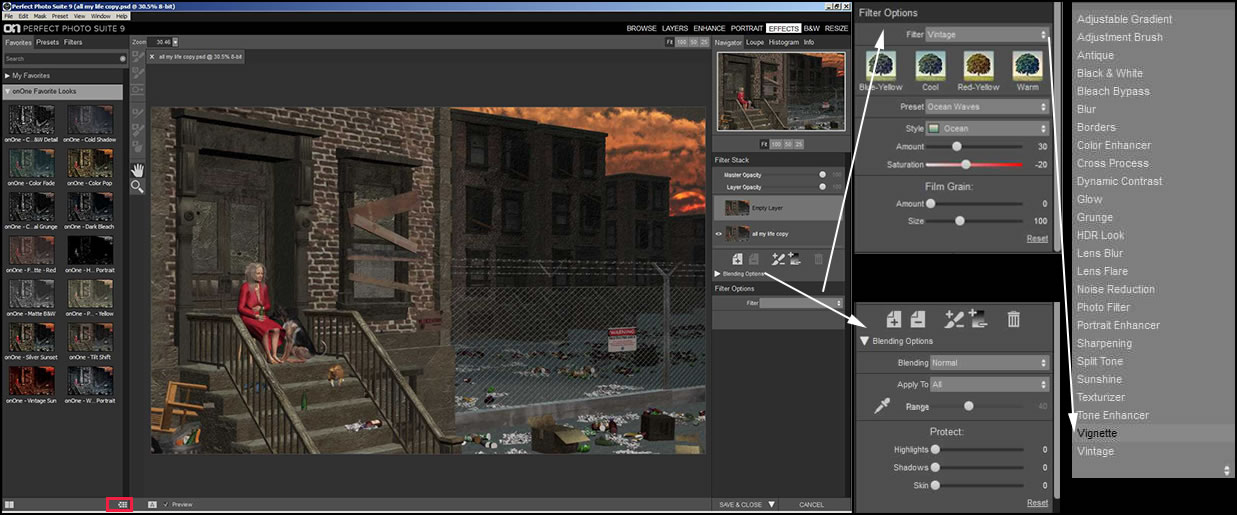
The Effects module contains a huge number of options to change or slightly modify the look of an image through tone, color, etc. The interface below shows some of the options. If you look at the right hand panel, you will see two options called Filter and Blending. Following the arrows, you can see what these two options offer. All the changes made through the left panel can be modified by those on the right. If you look at the Filter Option menu that has vintage as its style, you will see that that can even be modified by presets (Ocean Waves) and style (Ocean.)
If you look at the bottom right on the left panel, you will see an icon outlined by a red rectangle. Clicking on this icon wherever you see it, will show various configurations of the presets on the left panel.
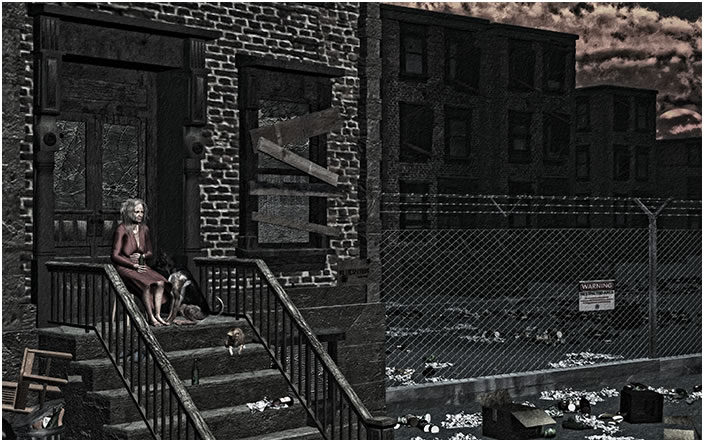
Below is the image using a preset called Commercial Grunge.
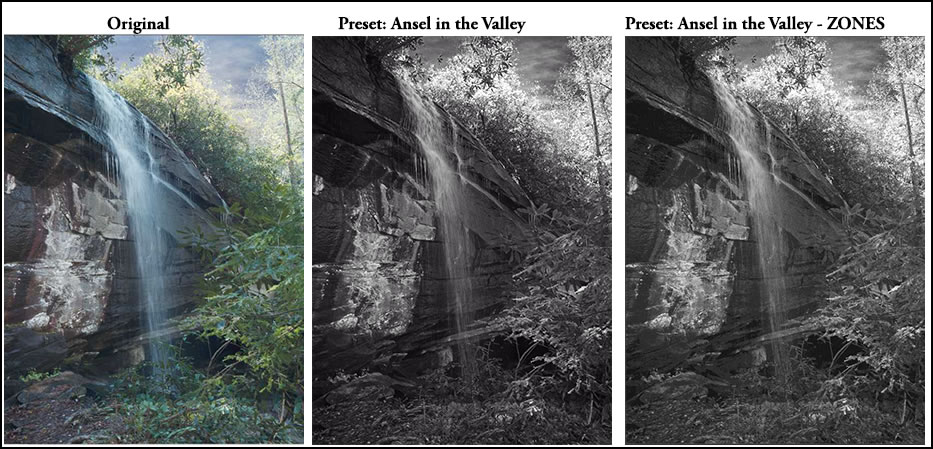
When I started working with photography almost 45 years ago, I learned both darkroom techniques and how to use my Nikon at the same time. I still love black and white photography. It is very easy to turn a color photo or image into black and white. In the preview, you can also see how Ansel Adam's zone system applies.
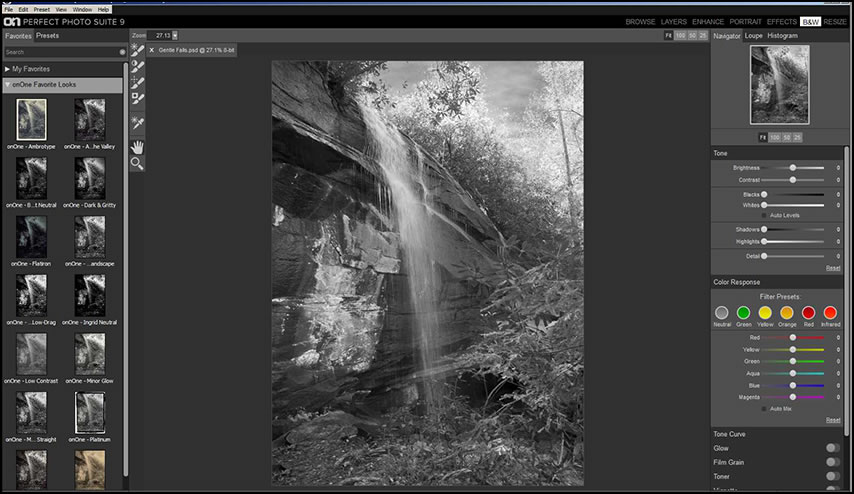
There are many tools you can use to obtain a black and white image of your vision. Below are the right panel tools from the interface.
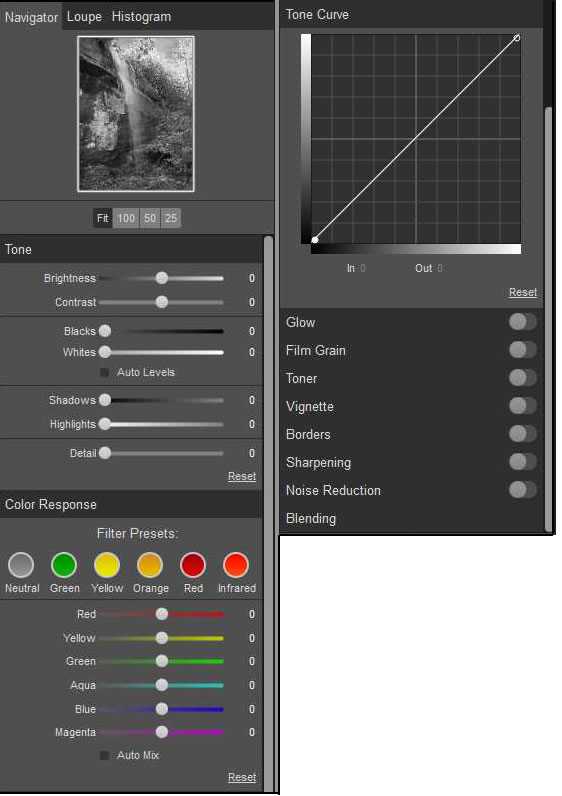
Lastly I chose the preset Ansel in the Valley for my waterfall photo. This photo had already been completed. The Zones preview is an automatic interpretation of the zone system, according to onOne Software's manual on this module.
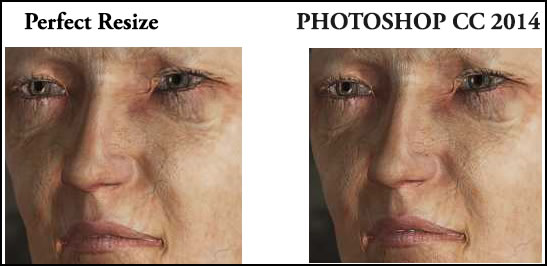
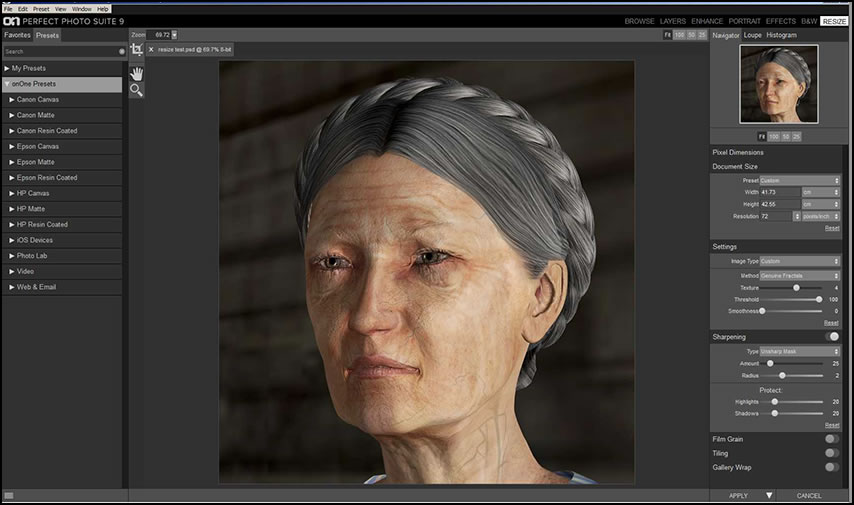
I relied on the Resize module for many years. It is still fantastic at enlarging images. As you can see, you have many options to configure your final print. I always used it until Photoshop CC. Even though in the latter program there is only one slider that relates to noise, I have found it equally good if not better. The skin on this face was intentionally rough.
Sometimes when there are too many options, you do not find the perfect fit or match.
To Learn more about onOne Software's Perfect Photo Suite 9, click on the Perfect Photo Suite 9 link; that link will take you to the main page. Some useful links are: Product Downloads for onOne Owners; Perfect Photo Suite 9 Central; download free trial; user guides or manuals; store. The cost of Perfect Photo Suite 9 Premium is $139.95 with an upgrade cost of $99.95.
The number of tools enables this program to be able to create a multitude of changes to an image. However, not all the new or replaced tools were self explanatory. I very much recommend the manuals if you find yourself "stuck." In addition, and this is probably my own prejudice and applies to many program, I would like more simplicity and fewer of the same type of tool. For example, how many variations of masking tools are really needed? The program responded very quickly to any changes I made. The cost of Perfect Photo Suite 9 and the number of tools, processes, etc. makes the purchase of this an excellent deal. This is especially true if you want to use it as a standalone image editing program or as an adjunct to software that does not have these features.
As I always recommend, especially if you are upgrading, download a trial and see if it meets your needs.