OnOne Software has just released its Perfect Photo Suite 8. I will be reviewing the Premium Edition. There are three versions: Standard Edition, one for Adobe Lightroom and Apple Aperture, and the Premium Edition. To see a comparison between the three, click on the link. All versions can be used as a standalone which automatically is downloaded. With all the modules contained in Perfect Photo Suite 8, one has basically an equivalent of an image editing program. Only the Premium Edition can be used in Photoshop. The Premium Edition sells for $299.95 with an upgrade price of $149.95.
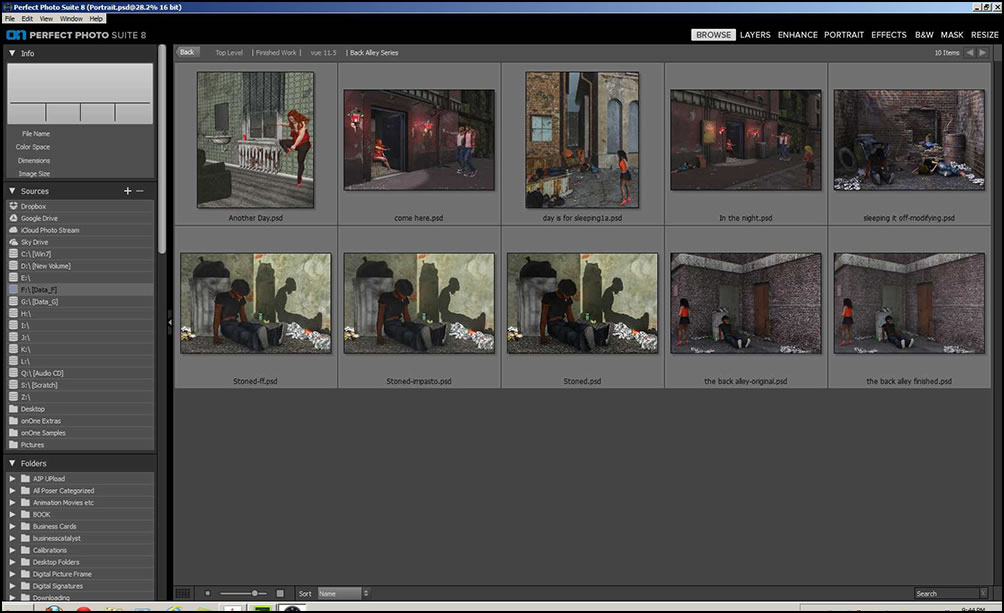
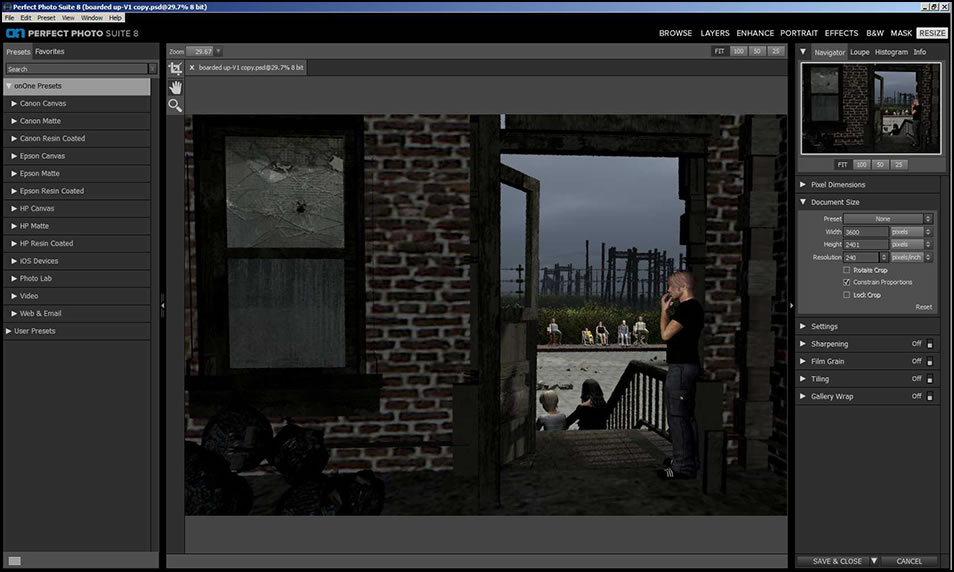
Perfect Photo Suite 8 consists of eight modules: Browse, Layers, Enhance, Portrait, Effects, B&W, Mask, and Resize. Currently showing in this screenshot of the interface is the Browse module. If you have Perfect Photo Suite 7, you will notice that the Focus module seems to be missing. It isn't, however, because it is incorporated in the Perfect Effects module.
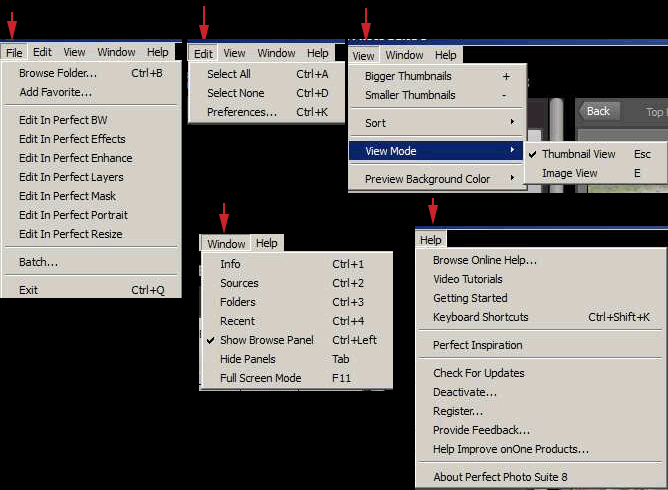
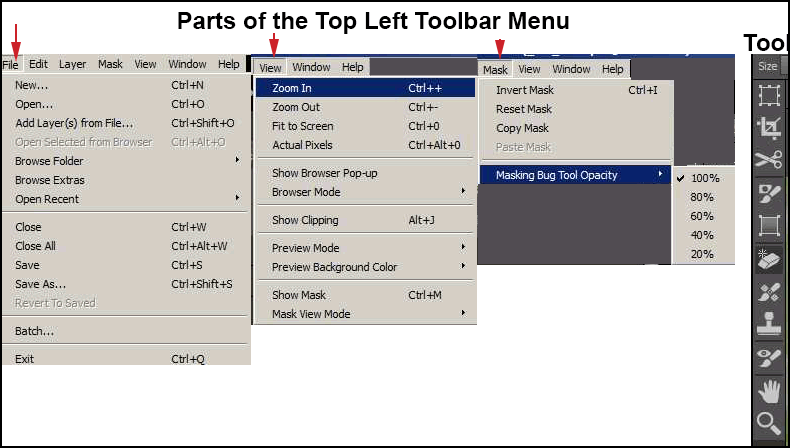
The top left toolbar contains menus that change with the module selected.
There are a number of new and improved features in Perfect Photo Suite 8 including two new modules which are identified through italics.
NEW Browse Module
NEW Perfect Enhance Module
NEW Perfect Batch Processor
NEW Perfect Eraser for removing blemishes
NEW Adjustable Filters in Perfect Effects
NEW Lens Blur Filter in Perfect Effects
NEW Dynamic Contrast, HDR Look, Portrait Enhancer, Vintage, Grunge & Antique filters in Perfect Effects
NEW Easier-to-use and redesigned Masking Bug
NEW Support for Multiple Files in Perfect Layers
IMPROVED
handling of Raw files
Here is a short summary of the purpose of each module taken from the Perfect Photo Suite 8 Manual.
"Browse - Quickly get to your images wherever they're stored—whether they’re on your computer, network, or on a cloud-based storage service. Find the exact image you want by previewing them side-by-side and navigating through them with intuitive keyboard shortcuts.
Layers - Combine and blend images without Adobe Photoshop. With layers, you have the power to swap faces, create balanced exposures, retouch portraits and landscapes, create layouts and composites, and more!
Enhance - Apply the basic adjustments that almost every image needs to go from good to great. You'll find tools to improve color,tone, and detail, and brushes for spot healing, cloning, and removing objects with content-aware fill technology.
Portrait -Focus on the art of portrait creation because the most time consuming retouching tasks are automated in the Portrait module. Improve skin texture and color, remove blemishes, and enhance eyes and mouths to create flawless portraits.1 Welcome to Perfect Photo Suite Perfect Photo.
Effects - Make your images extraordinary with the best effects available today. Customizable filters and hundreds of built-in presets inspire your creativity and give you ultimate control to create effects that make your images look their best.
B&W - Develop stunning images that recreate the timeless look of black and white master photographers. Use a library of expertly-crafted presets for instant results or powerful, darkroom-inspired controls for you own custom look.
Mask - Create high-quality masks with state-of-the-art tools that help you select subjects and isolate backgrounds for removal—even around hair and trees and through glass and veils.
Resize - The Resize module gives you everything you need to prepare your images for print. Powered by Genuine Fractals technology, you'll maintain total clarity and sharpness of your image for your enlargements - even for snapshots taken with a mobile device."
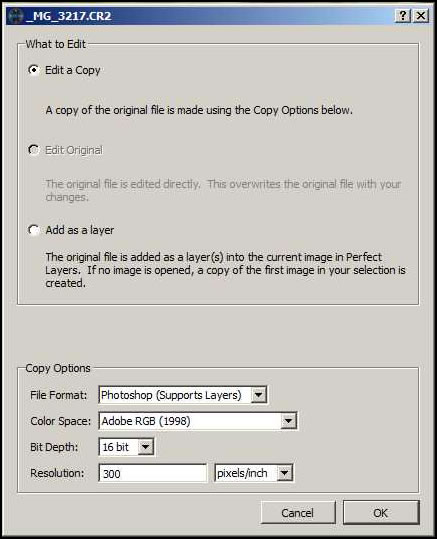
When you access Perfect Photo Suite 8 from Adobe Photoshop CC, you do not do it through the filter menu. There are two ways to do this. You can have a panel open at all times Window>Extension>onOne or you can go through File>Automate.
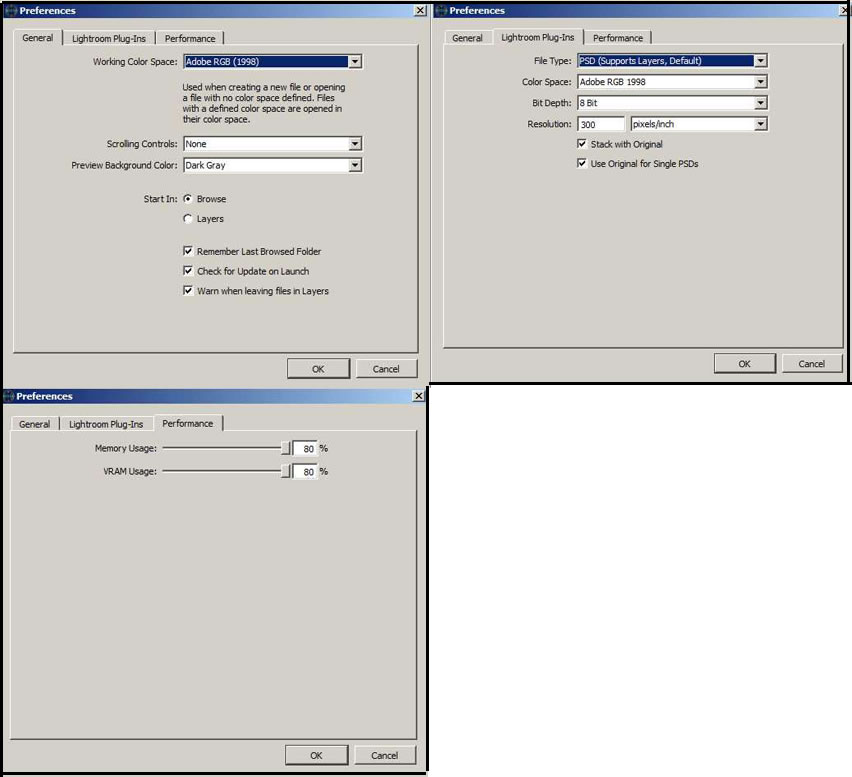
I like to work in the Adobe Color Space. I checked preferences and found that that wasn't the default setting. So I just changed it. Otherwise I left the preferences as they were.
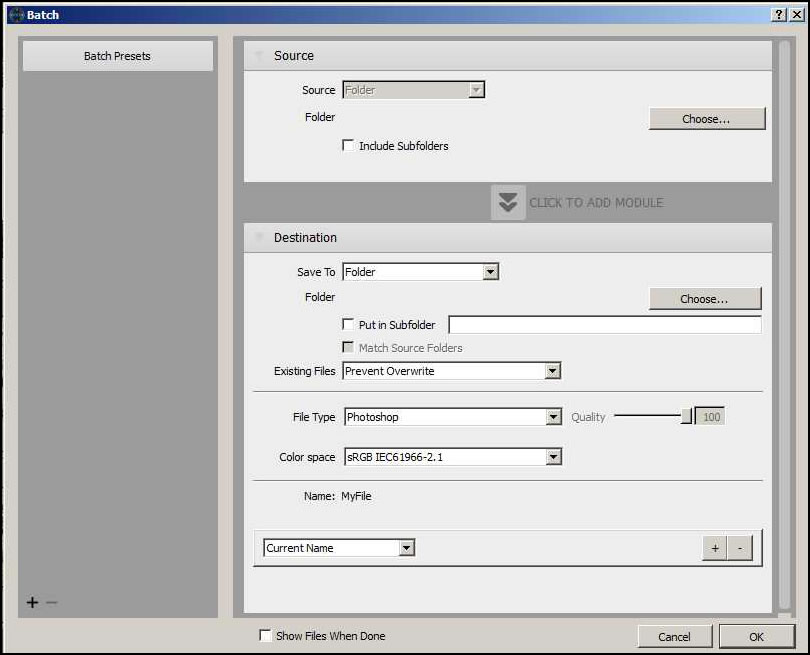
For this review I will be working with the plug-in for Photoshop CC on a Windows 7, 64-bit machine as well as with the standalone version. In the Standalone version you can go from one module to another. In the Photoshop plug-in version, I had to choose the module I wanted to use and could not switch to another. However, if I had a blank canvas in Photoshop and went to Automate>Perfect Batch 8
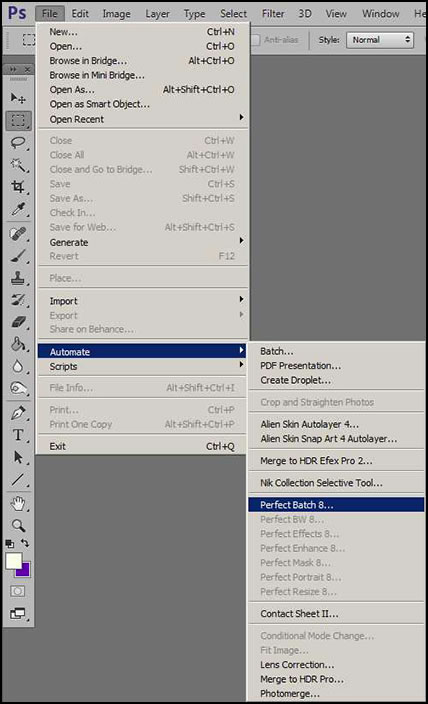
and clicked off the batch screen that will appear, Perfect Photo Suite 8 will act as if it is a standalone version.
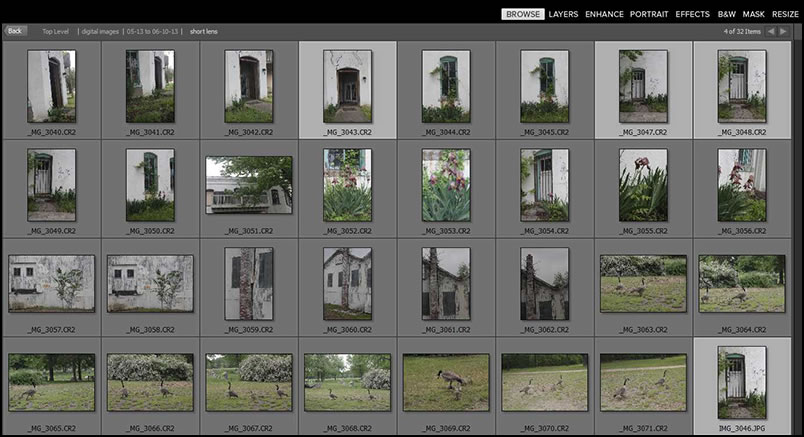
To demonstrate some of the features, I am going to take the raw image file of the gosling shown in the Browse interface and follow it through some of the modules. If it is not applicable to the module, I will use a different image.
Browse Module
The Browse Module lets you find all your images including raw images as well as giving information about each image. It is a great navigational tool to start your workflow in Perfect Photo Suite 8. The inclusion of working with raw images is a great plus because they will not show up in all cataloging or browsing software.
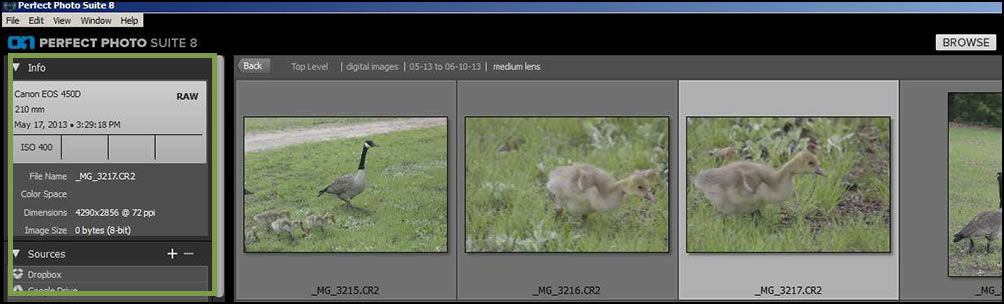
I will be showing the top left toolbar menus for many of the different modules to give a scope of their importance in using the program.
Layers Module
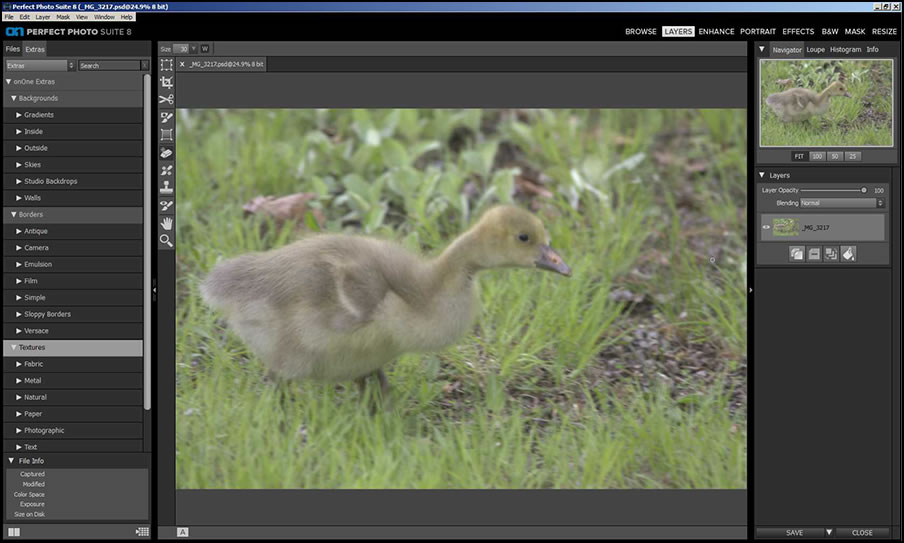
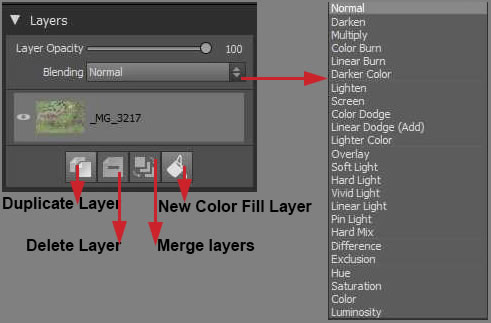
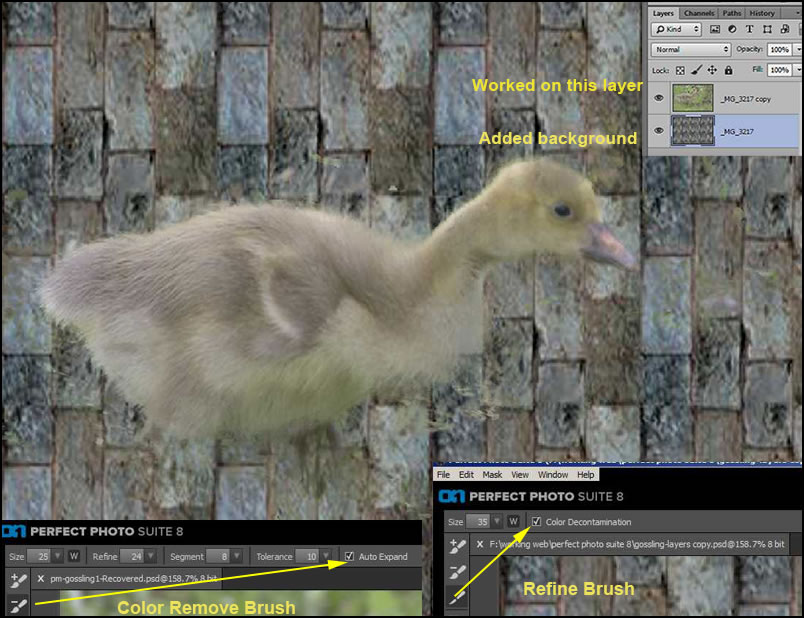
The Layers Module creates layers whether you are using Perfect Photo Suite 8 as a standalone or in Lightroom, for example. Working with layers, in my opinion, is a necessity for blending purposes, changing opacity, and general image manipulation. Initially, perhaps because I am used to how layers work in Photoshop and even Photoshop Elements, I kept looking for tools that were not there. As I kept working in Perfect Photo Suite 8, I realized that the layers were used in other modules where the manipulations can occur. Directly in the Layers Module, you can work with the tools that are present as well as do blending and working with different opacities. When you access an image in the Layers Module, you will see this screen. The screen I am showing is the default. I, then, changed some of the information such as bit-depth.
I have screen captured various portions of the interface to demonstrate what one can do in this module. Notice the number of tools.
Below is a look at the tools directly associated with the layers' panel.
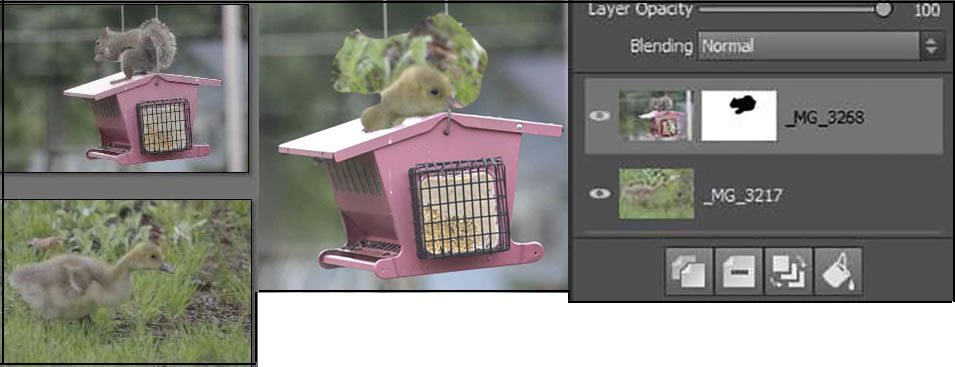
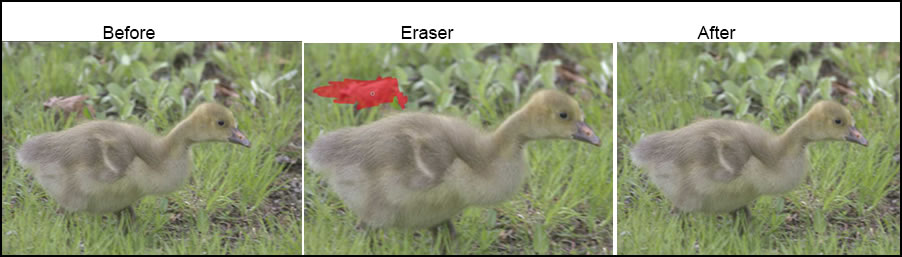
I kept looking for an eraser that was not content-aware to erase sections of an image until I discovered that I needed to mask the image out rather than erase it (middle image). Below I just decided to mask out parts of an image to show how it is done in the Layers Module of Perfect Photo Suite 8.
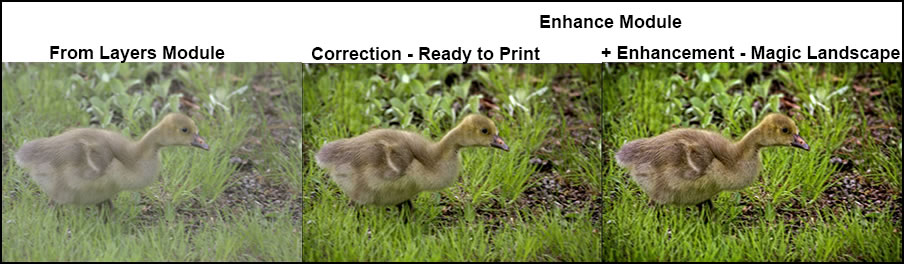
Enhance Module
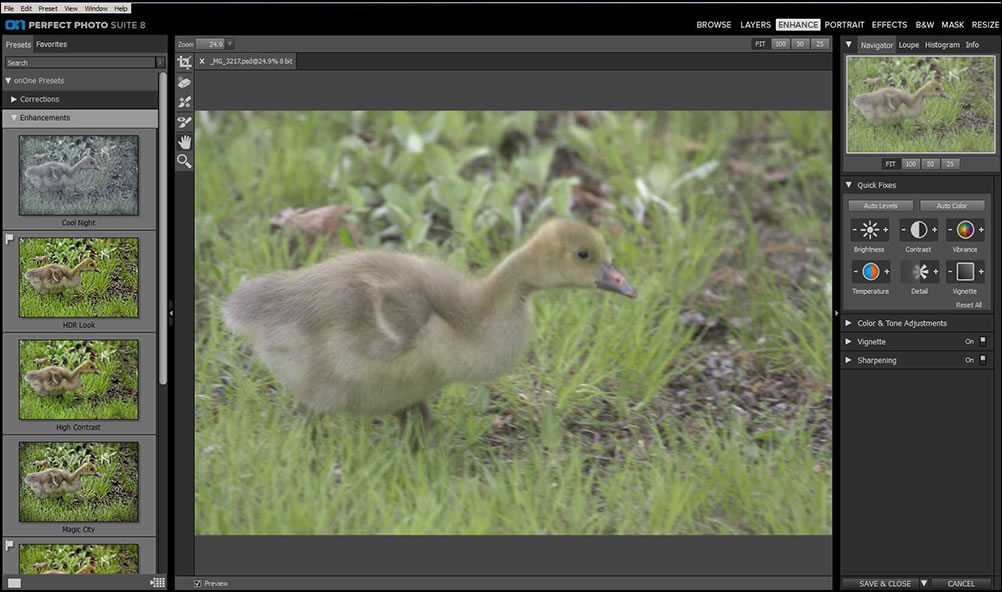
When I moved to the Enhance Module and worked with it, I discovered that an Enhanced layer was added to the stacked layers in the Layers Module. The Enhance Module has presets on the left and manual settings on the right. You can, also, create your own presets.

The image below shows how the image was improved from the original in the Layers Module). All I did was use the clone stamp on a small section of the background.
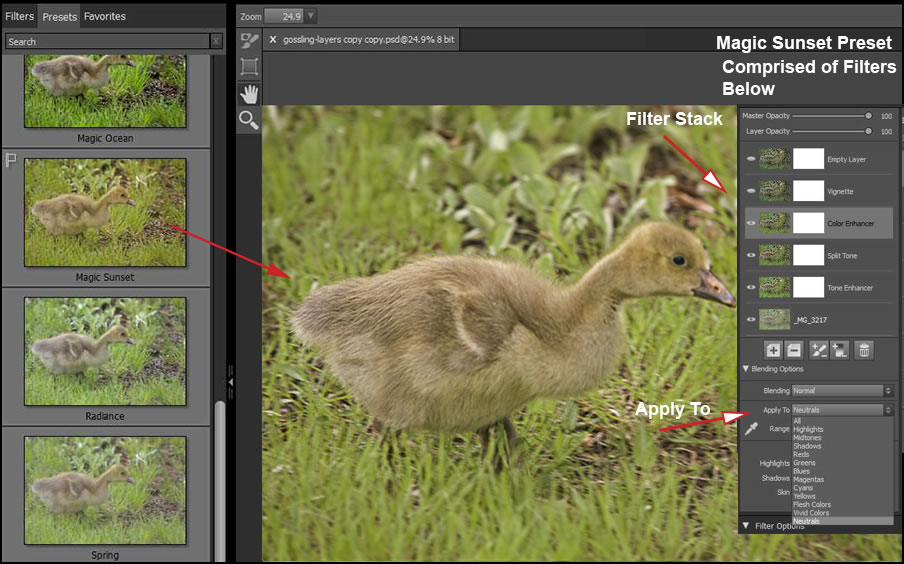
Effects Module
The Effects Module has both a manual set of filters as well as presets. It is set up in a similar manner to the Enhance Module.

Below is a closeup of the panels. Notice the large number of Filters. Each Filter category contains variations.
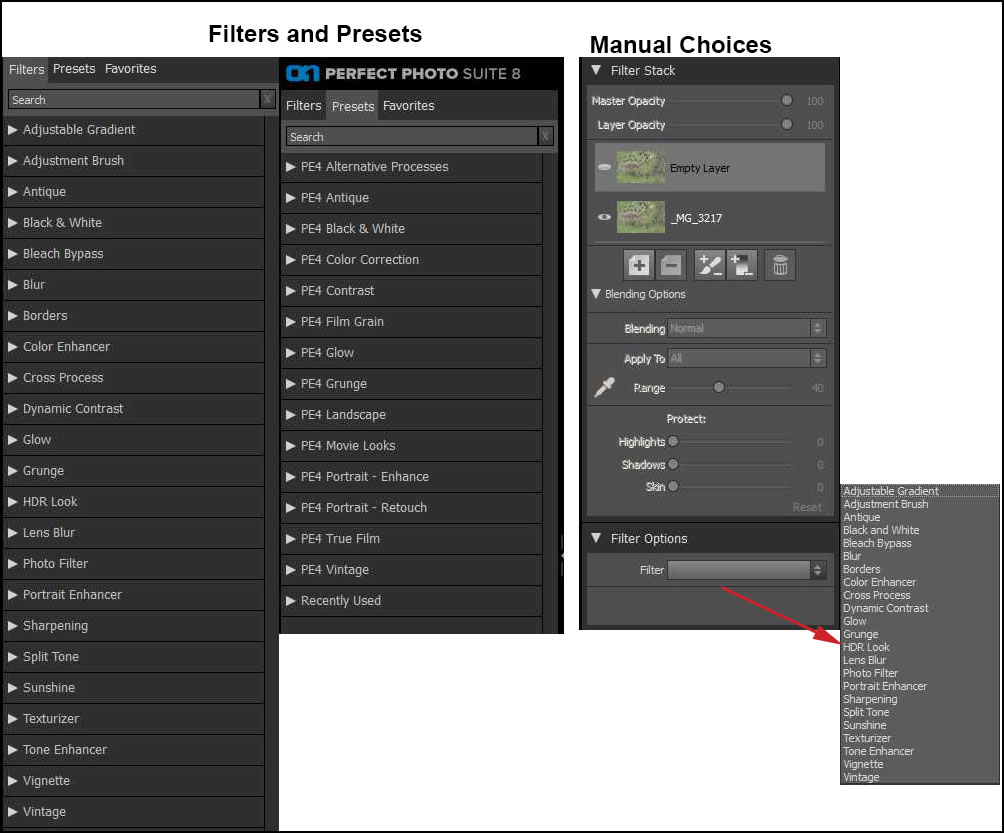
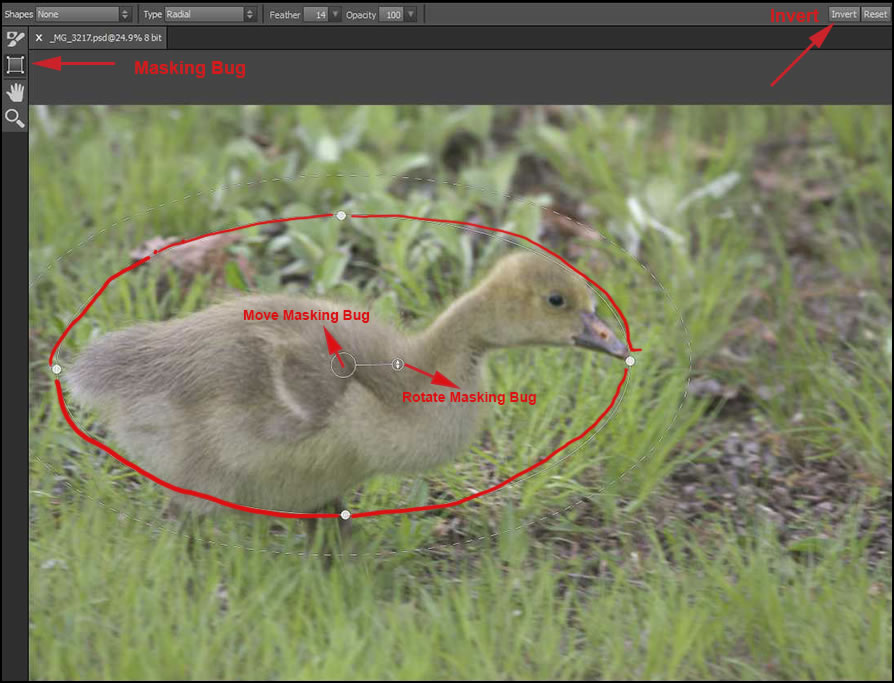
Filters are applied individually while Presets are comprised of different filters each of which can be manipulated and applied to all or to different areas of the image. The versatility is seemingly endless - from using the Masking Bug for effects on visibly delineated areas to applying an Effect to a certain area of an image such as highlights.
Manipulating areas of Focus is now accomplished through the Effects Module. When you use the Mask Bug, you must click on Invert if you want the area inside the Mask Bug to be in stronger focus than the area outside it. The same principle applies to the other filters. Notice in the above image, how you can stack filters and control their opacities.
Portrait Module
Since I have not taken a portrait in a long time, I decided to use one supplied by onOne Software. This is the only image I am using that isn't mine. This module gives you a whole toolbox to customize a portrait. As with other modules, you can combine both presets and manual applications to perfect your portrait.
You can use Perfect Portrait to:
• "Smooth skin and remove blemishes
• Enhance eyes and teeth
• Remove red eye
• Correct image color based on skin tone
• Apply custom retouching to each face in your image"
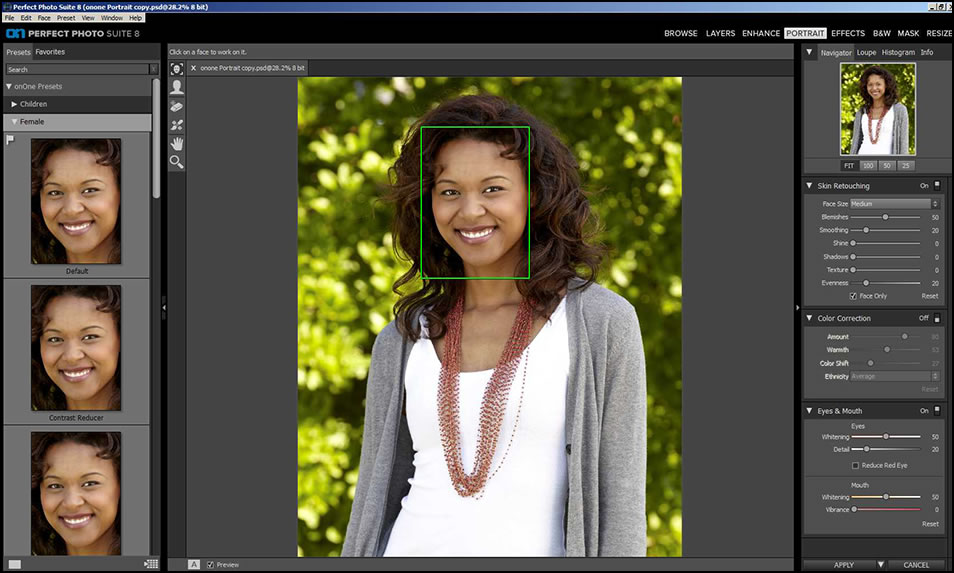
Below are detailed versions of the right and left panels.
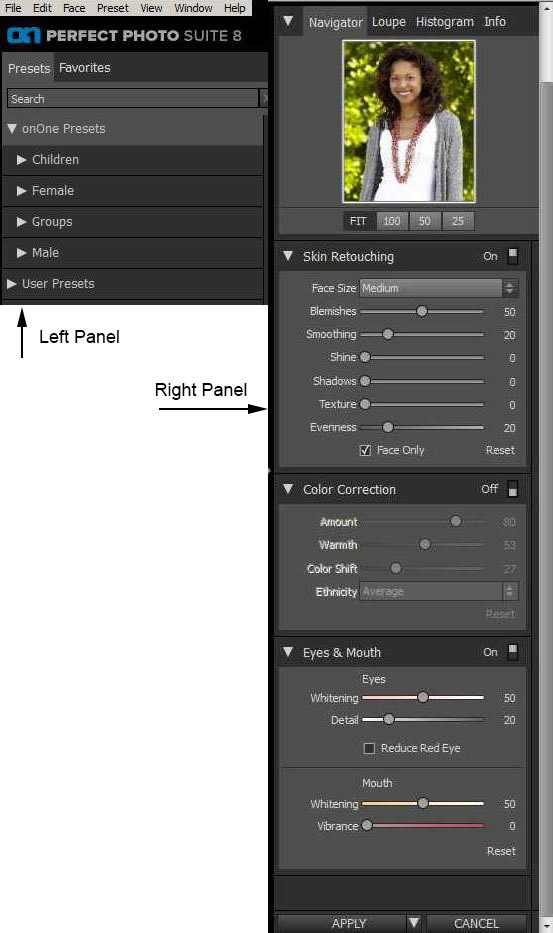
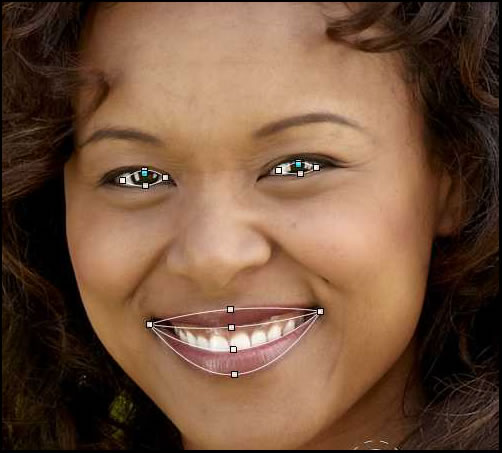
You will notice that on the right panel there is a section entitled "Eyes & Mouth." You can adjust the area that you will want to brighten (lips) or whiten (teeth).
Mask Module
Perfect Mask is the next generation of Mask Pro. It is used to separate objects from backgrounds and/or remove backgrounds. Of all the modules, this was the only one I found non-intuitive even though I had used it in the past. I needed to refer to the manual before it would work as I remembered it did. You can think in terms of grayscale - from black to white and shades in between. When you paint on a mask with black, you are basically blacking out all the information (paint-out mode). When you paint with white, you are allowing all the information to show (paint-in mode). In between lets various opacities of the color information show. As onOne says in the manual re: the mask "White reveals and black conceals".
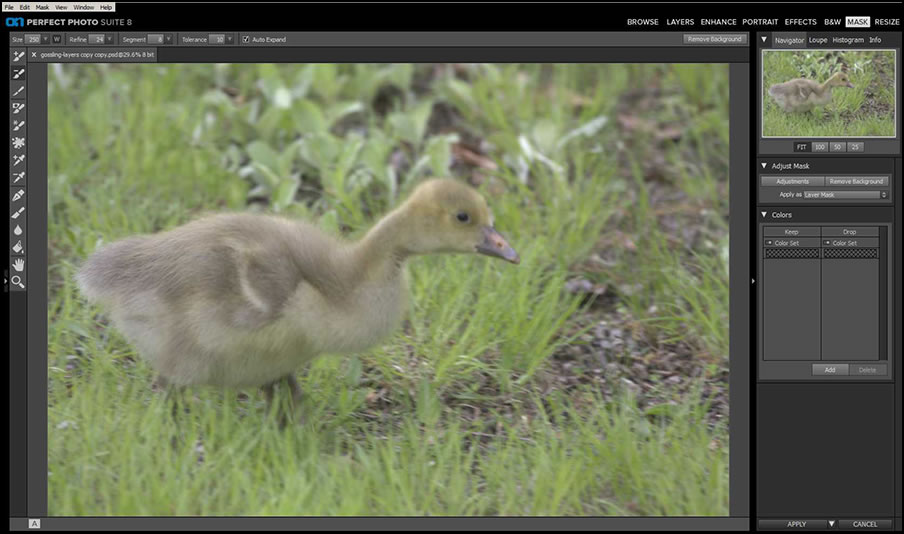
The below images are quick. They have not been refined. With careful work, one can remove areas of an image even if the "keep" areas have colors similar to the background. First I will create a mask by painting over the background.
Then I will work with Drop and Keep and the Magic brush. This is my favorite method.
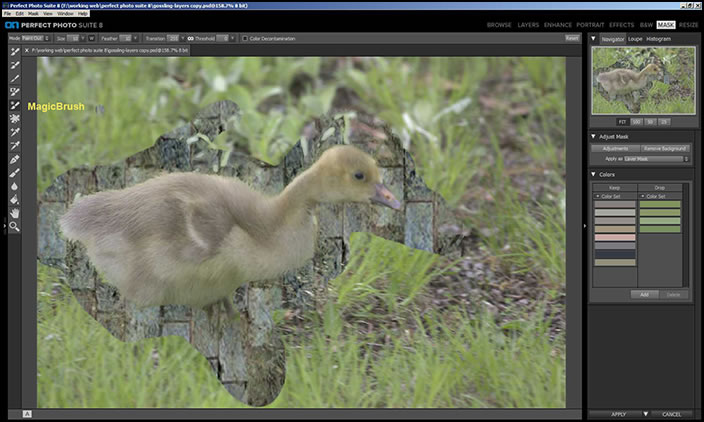
If you have an image that is complex (ie: similar color in the background or fine strands of fur or hair), you can do a good job of removing the background using a combination of these methods. You need to experiment with the settings such as tolerance in order to match them to your subjects. Once you see how the program functions, future work will be a lot easier.
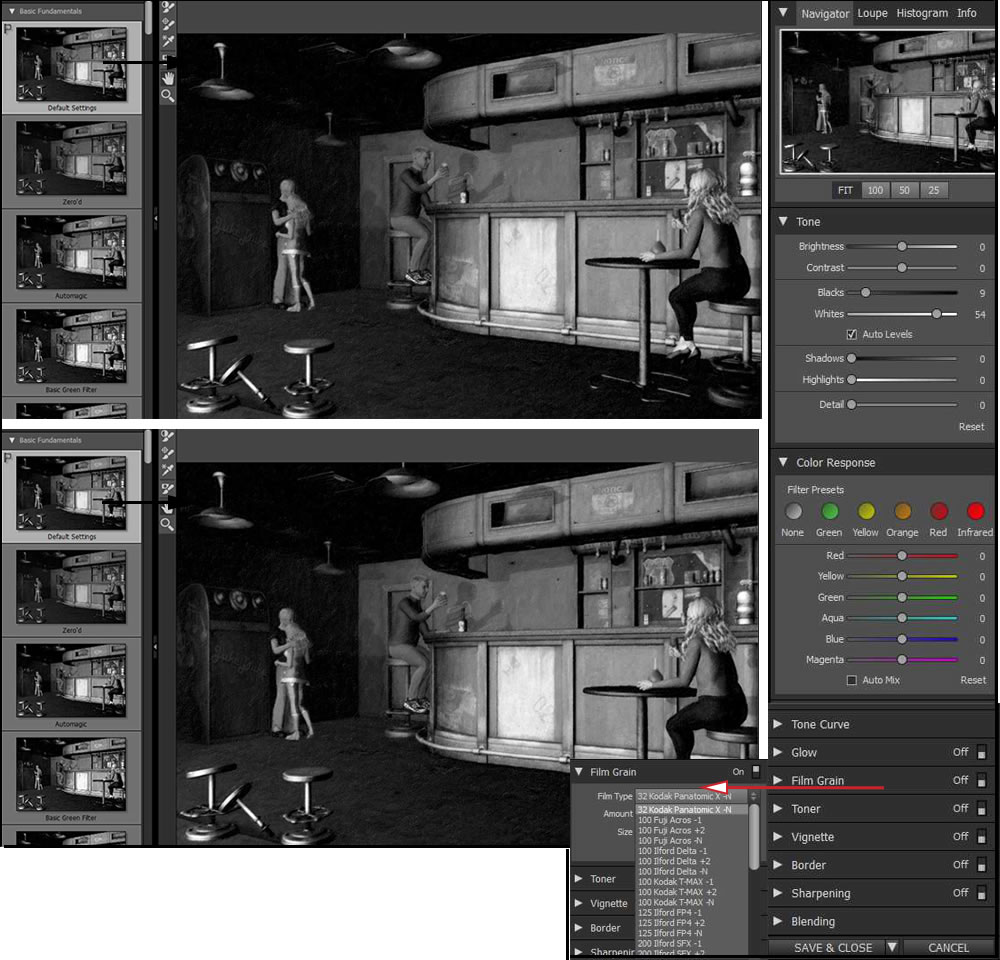
B&W Module
In the B&W module, one can turn a color image into a black and white one. I keep mentioning image often instead of photo. I use this program with photos as well as with 3D rendered images such as the one below created in E-on Software's Vue.

As with the other fmodules, one can use presets which are very varied or manually determine how your image will appear. In addition, you can combine the manual settings with the presets. If you want even more control, use the tools shown in the interface such as the Brightness brush, the Contrast brush, etc. These allow you to work on small selective areas.
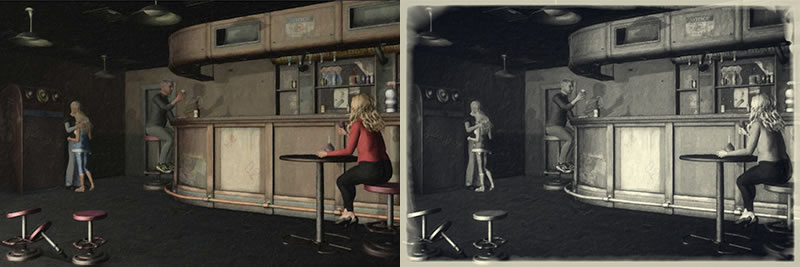
Below is an example of how the image looked when in color and in black and white utilizing a number of the features in the B&W Module.
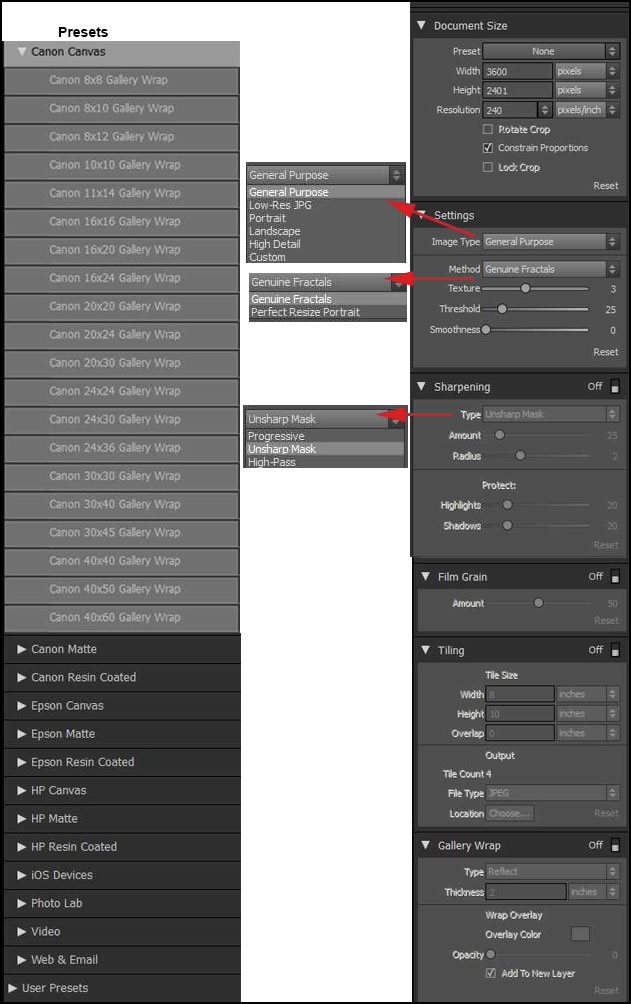
Perfect Resize
Perfect Resize is a standard, in my opinion, for enlarging images without losing details. It has been available for many years now and many photographers and others rely on it.
In the above screen capture, the presets on the left are different size choices for different types of media. However, the right panel gives the user choices to create their own sizes and ratios. I normally set my sizes when I create an image and when I use Perfect Resize to enlarge it, I keep the ratio. I have always had excellent results when using Perfect Resize.
Below is an enlargement of the right and left panels and some of the fly-out menus.
Here are some other highlights of Perfect Photo Suite 8.
The Perfect Eraser is content-aware. When you erase a part of an image, the surrounding background fills in the space left.
The new Perfect Batch Engine applies universal adjustments from multiple modules across a large number of images. All you have to do is select the images in the Browse module in the standalone product or in Photoshop as I've discussed previously. When you are in Photoshop and have a blank screen, go to File>Automate>Perfect Batch 8 and follow the prompts. Those screenshots appear at the beginning of the review.
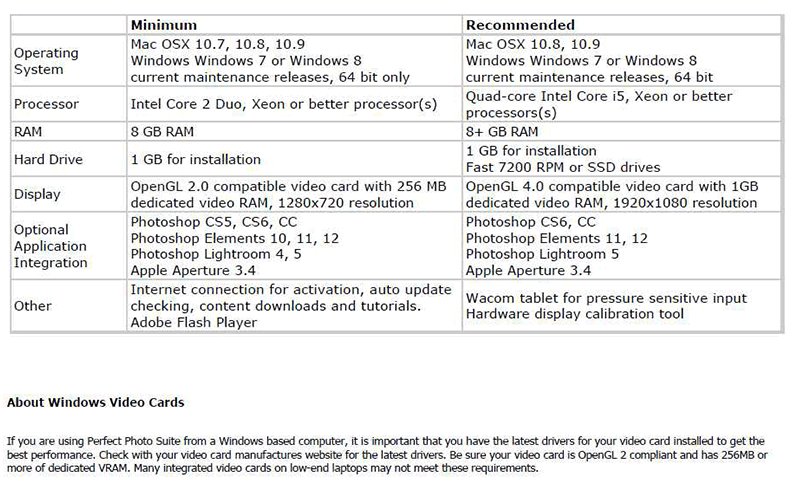
Below are the System Requirements for Perfect Photo Suite 8:
To sum up what you can do in Perfect Photo Suite 8, here is information from onOne Software:
• "Make basic adjustments for brightness, contrast, sharpness, and color cast
• Stylize images with photographic effects with one-click presets and flexible controls
• Develop stunning black and white images
• Retouch portraits
• Edit images in a layered workflow
• Remove objects, distractions, and unwanted backgrounds
• Resize images up to 1000% and prepare them for print
• Batch process universal adjustments and presets across a large number of images
• Work directly with Adobe Photoshop, Lightroom, Photoshop Elements, Apple Aperture® or as a
standalone application"
If you have never used a Perfect Photo Suite, you will have basically an image editing piece of software set up in module formation. This suite is very powerful and versatile. If you are upgrading, you know how you can edit an image as well as add the final touches to it as you conceive it. The Premium Edition sells for $299.95 with an upgrade price of $149.95. To download a trial, click on the link. You can learn further about all the things Perfect Photo Suite 8 can do through tutorials, webinars, and more learning tools such as the good manual onOne Software provides. While all the tools, such as the Layers module, are not necessary in Photoshop, purchasing the Premium Edition gives you access to the standalone version and the plug-ins for Photoshop, Lightroom and Apple Aperture. This is quite a bargain and a wonderful addition to the graphic artist's toolbox.