Grain Reduction in Slides
(update on original article)
I decided to work on some slides that I had taken over 30 years ago. I thought that they might have disintegrated slightly because they had such a large amount of ugly grain, some of which had strange colors, especially in the areas of the skin. This was visible to the naked eye, especially when magnified. I wanted to save these, so I began to experiment with noise reduction programs. I knew this wasn't noise since noise is generated by digital cameras, but I tried these various programs to see if I could use the features to reduce the grain in the slides. However, when scanned in, noise was generated. So that was an added factor. I had first tried the noise reduction filter in Photoshop and a few other ways to remove noise using Photoshop tools. I did not try any of the Action Scripts one can purchase to use in Photoshop. I was not happy with these results so I started searching the web for information on third part plugins or standalone programs. I found this very useful comparison of programs at: http://www.michaelalmond.com/Articles/noise.htm and started from there. Then, I did a current search of the web because the author's last update was in 2005.
My purpose here was to reduce or soften film grain without destroying the details in the image so I tested all these programs for that purpose. All of these programs can be downloaded for demo purposes. The following are the programs I tested: GEM, Photomechanic, Picture Cooler, Akvis Noise Reducer, Noiseware, MagicDenoiser, Noise Ninja, Dfine2, Neat Image, Pure Image, Stoika Noise Autofx1.6. (Photomechanic wouldn't install.)
The following are the ones I found best for reducing the film grain: Noiseware, Noise Ninja, and Neat Image. After extensive testing on the slides, I chose the professional version of of the plug-in of Noiseware by Imagenomic which sells for $69.95. It works with Adobe Photoshop CS3 and with Windows' Vista as well as with other host programs and operating systems.
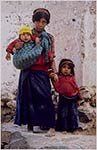
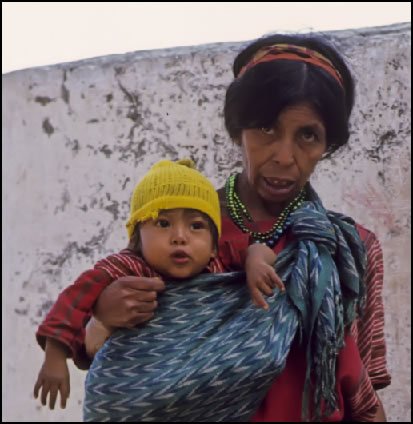
The first is an example of the slide that I had scanned with my Nikon SuperCoolScan 5000. I made some minor adjustments in scanning using Digital GEM and Digital DEE to reduce grain and lighten some of the very dark areas. However, the image was still very grainy.
 .
.
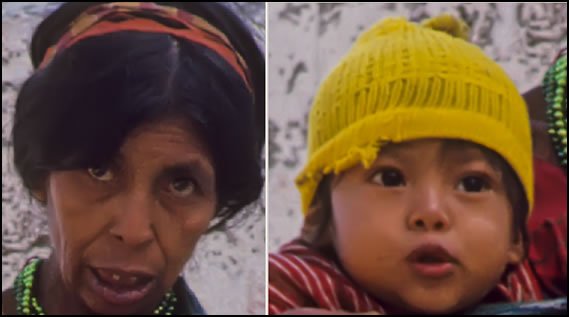
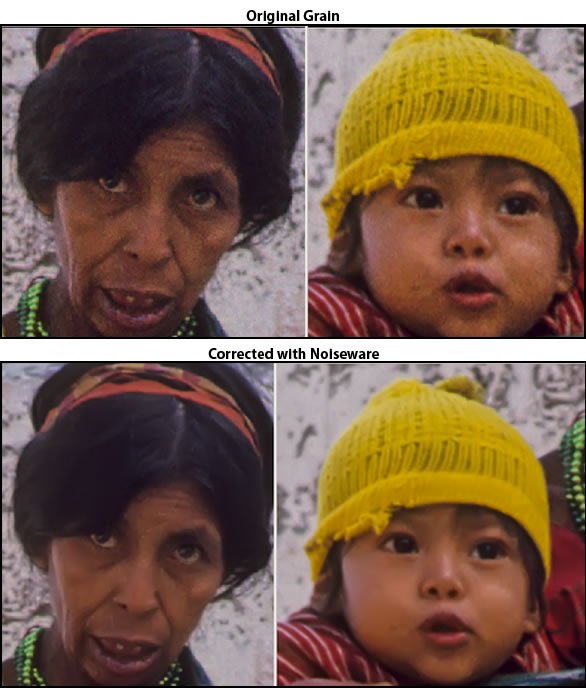
Below is a blow up of two of the faces.
Below is a print size version of the picture. In Photoshop I selected View>Print Size. Of course, it will look different under different resolutions, but it is a screen capture of the image that was 3524 x 5285 pixels with physical dimensions of 9.7 x 14.6 inches at 360 dpi which is one of the recommended settings when using Epson printers.
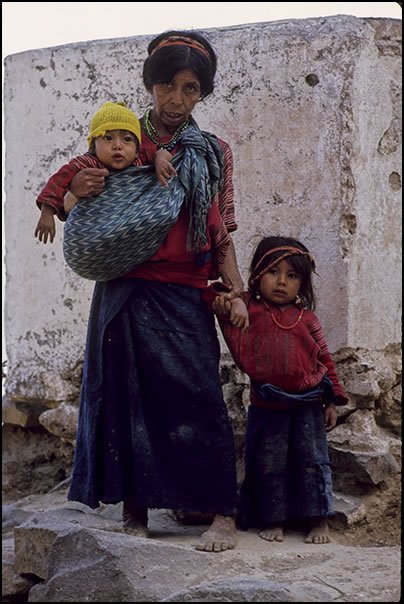
Below is the full slide that was corrected using Imogenic's Noiseware plug-in and Photoshop CS3.

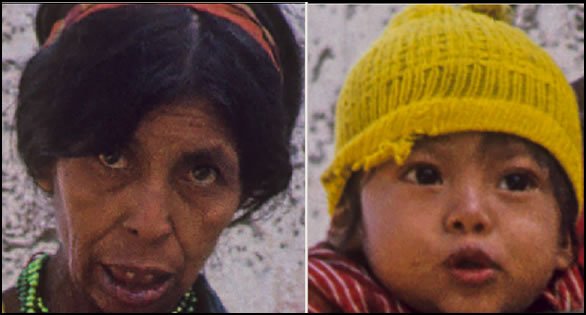
Below is another blowup of two of the faces after using Noiseware.
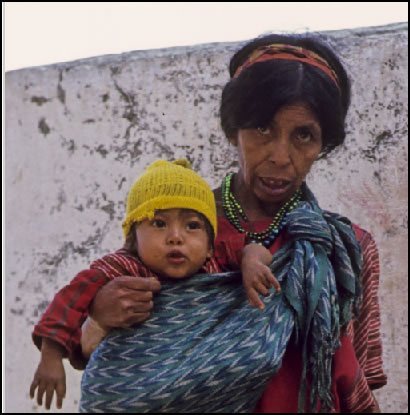
Below is a print size version of the picture created after reducing the grain with Noiseware.
Lastly, a comparison shot.
A lot more will be done with this image before it is finished.
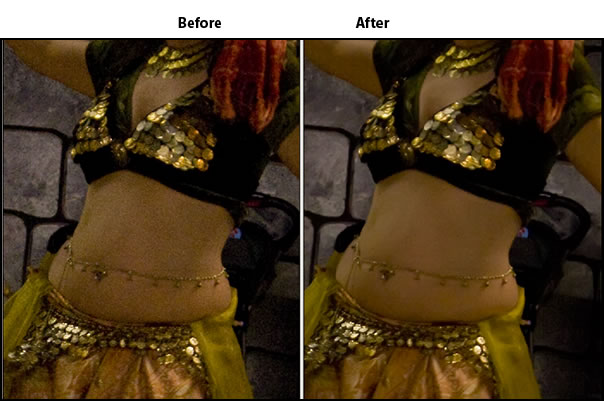
The next question was, "Does this Noiseware plug-in work well with digital images since that is where you will find noise?" I only tested it on a digital image that was shot using Camera Raw and for some reason was grossly underexposed. It was shot at ISO 800, but was so dark that the image was not visible. I still haven't figured out what happened, but that is not the issue. I opened it in Photoshop and adjusted the exposure and a few other exposure related commands and then saved it as a PSD cropping most of it away. For this demonstration I didn't do any color correcting. This was taken indoors under yellow lights.
Thus, I think you can see that grain and noise where applicable can be reduced very well. Below is a link to the final image of the Guatemalan Family.