Dfine 2.0 is a noise reduction application that is geared toward digital photographers. To understand how a noise reduction program works, it is important to understand noise. Digital cameras generate noise as do scanners because of the CCD. There are two types of noise: luminance (contrast noise) and chroma (color noise). Luminance noise looks similar to film grain. When reduced it can lead to blurry details. Chroma noise shows up as blotchy discolored areas or speckles of unwanted colors. What causes this noise? In digital cameras high ISO speeds or very low light levels will produce noise so will severely underexposed images.
Nik plug-ins share a basic uniformity of interface and type of controls. This lessens the learning curve a lot although it doesn't eliminate it when using the different programs. I will be treating each of my reviews on Nik Software plug-ins individually so there probably will be some repetition of features. One of the basic feature is U Point® Technology which relies on Control Points. Control Points affect an area that you establish. In Dfine 2.0 you can set up areas that will be affected by the noise settings you choose. These settings are not global but similar to creating a selective area with a lasso tool. This will be discussed in detail later in the review. If desired, these plug-ins have the ability to be used as Smart Filters.
Depending on how many of the plug-ins are installed, this box will vary. You can set up the parameters so it will open whenever you open Photoshop. To access the Dfine 2.0 screen, click on the word Dfine 2.0. The other Dfine 2.0 options will be explained later in the review.
First, let's look at the particulars of the interface. A very detailed description can be found under Lessons on the Nik Software website. The Lessons go into details on many of the major features of the program and can be found in different formats such as video, Pod, and PDF.
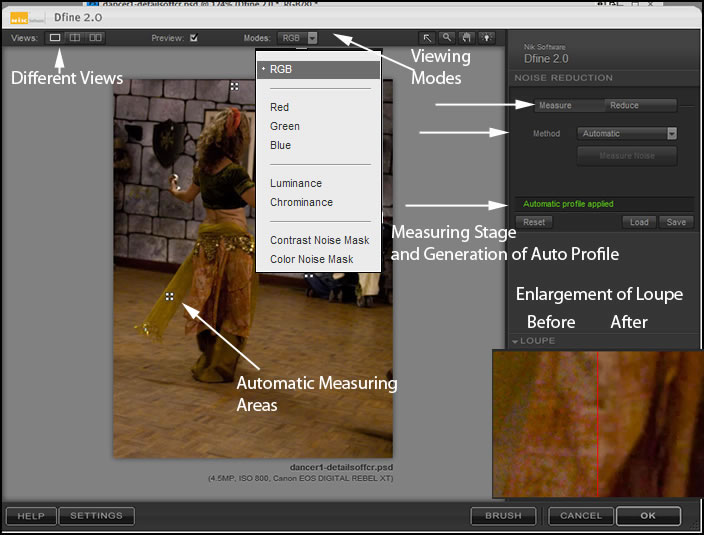
There are so many options for noise reduction that full control of an image is possible. However, showing all of them without confusing the reader I found hard to do, so I will just show some of the choices available.
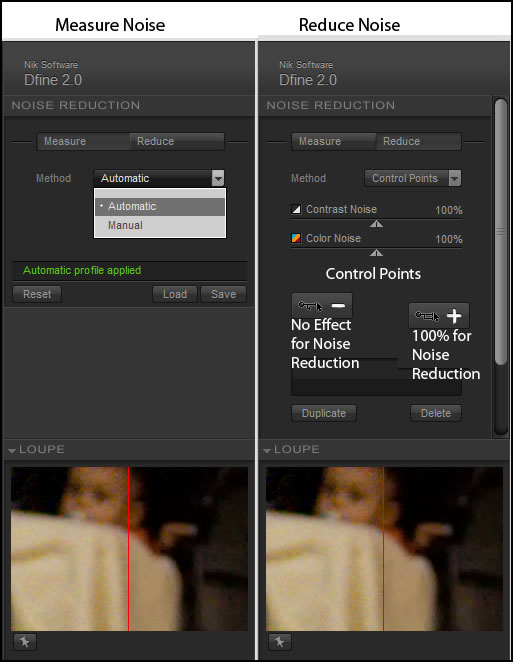
Initially you profile your image for noise. This can be done automatically, manually or you can load a predefined profile. At this stage a predefined default amount of noise reduction is applied to the image. Once this is done, you can reduce the noise in three ways. The default method is Control Points. On the screenshot below, you will notice that Control Points and the Global sliders are on one panel simultaneously. All the noise reduction controls go from from 0-200%. Once you have done that, you can set the Control Points for various parts of an image to intensify the noise reduction or diminish it. You can readjust the global settings as well as the Control Points so you only reduce the noise in your image and not the detail.
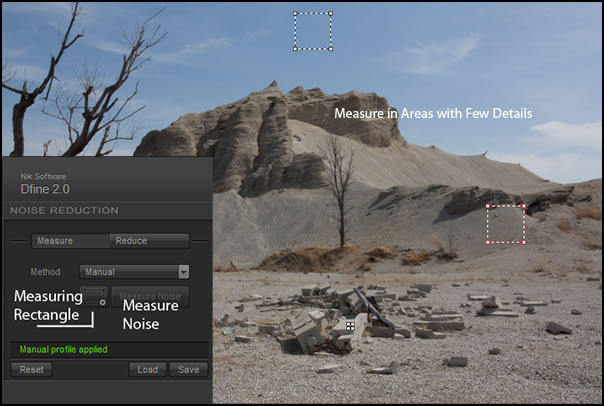
Below is an example where I created a manual profile using two measurement rectangles. The more rectangles, the greater the degree of refinement of the profile.
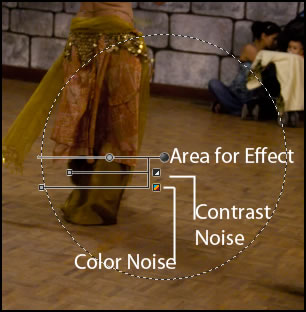
Below are shown the controls of the Control Point. These controls will differ with different programs. The circular area is not really a circle according to information found in a Nik Software video lesson, but an adaptive shape making use pf the image's tonality where the Control Point was placed.
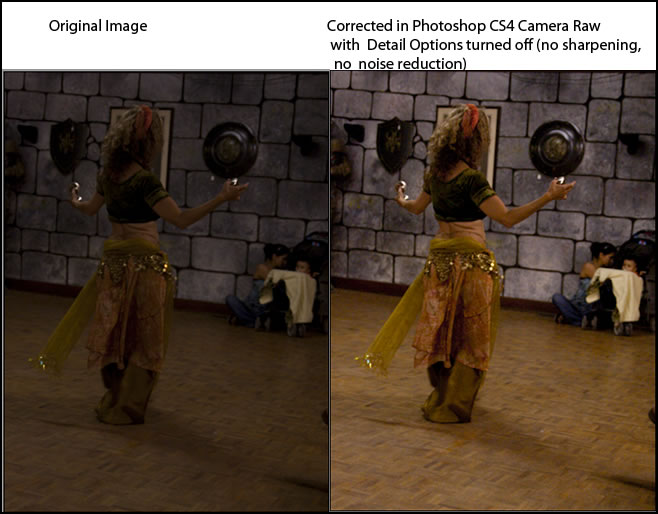
Without some noise reduction, this image was unusable since it was severely underexposed. Why this happened I do not know because the ISO was set at 800 and other images in this series were exposed correctly. But this is a good image to use for an example.
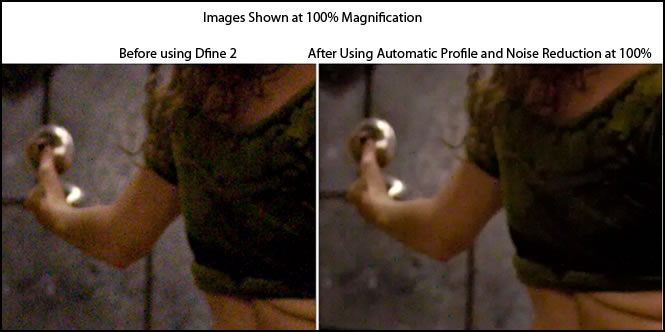
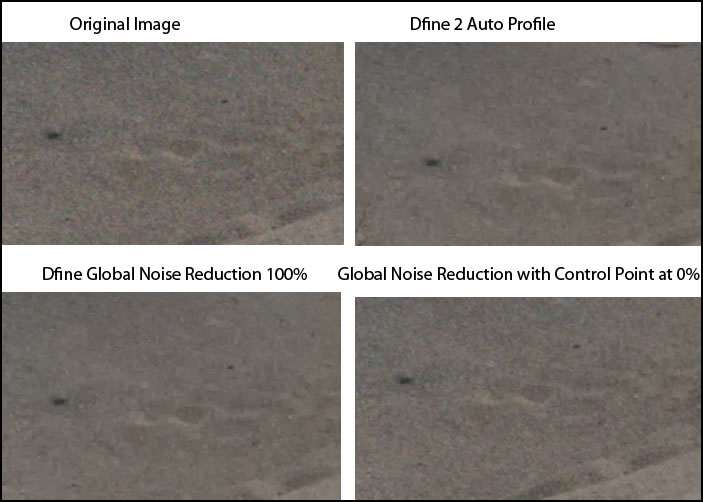
Below shows noise reduction just using Automatic for profiling and then an image wide noise reduction at the default of 100% (no Control Points were used).
The second method is Color Range. Below is the default screen. Here you set the color range using eye droppers.
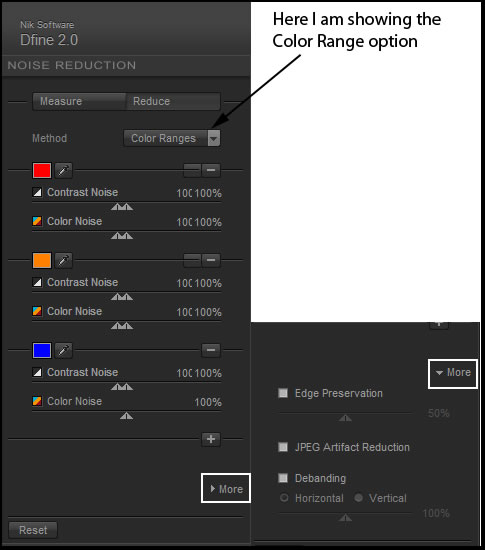
If you will notice on the above screen capture, you can also facilitate JPEG Artifact reduction, etc. This can be done when choosing either the Control Point method or Color Range method for noise reduction.
Since there were three definite sections to this image, I decided to try the Color Range method especially since I didn't want to reduce the chat (tannish grey color) by much if anything at all. The default setting for the sliders is always 100%.

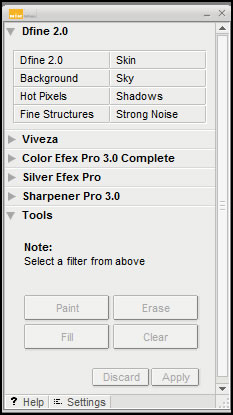
The last basic method I will discuss is the use of the Tools.You can individualize noise reduction even more by using tools instead of the Control Points or Color Range methods. You can have more than one layer mask per image. That way you can modify the specific masks as you desire. Below for the first mask of the image, I chose Skin, Paint and created the mask. You can, also, do an initial layer of noise reduction and, then, click OK to save what you have done and, then, add layer masks using the presets as mentioned below.
The User Guide describes all these selections. I will just quote a few from the Guide.
"The available Noise Brushes are:
• Background - The Background Noise Brush applies noise reduction that is designed to effectively reduce noise that appears in a background of the image.
• Hot Pixels – The Hot Pixels Noise Brush helps minimize unwanted pixels that become visible as bright dots in the image, often appearing against dark backgrounds and night shots.
• Skin – When applied to the skin of subjects with your images, the Skin Noise Brush reduces both contrast and color noise and irregularities while taking into account any fine detail structures that may be present in the image." [pp38-39 User Guide]
There are four Selective Tools: paint, erase, fill, and clear.
"Use the Paint button to selectively paint the current noise reduction effect into your image. Ensure that the mode of your Paint Brush is set to Normal and that opacity is set to greater than 100%. You can control the amount of the effect that is added to your image by varying the opacity of the brush." [p 39 User Guide]
You select a filter such as Skin which has built in noise reduction properties and, then, you select a tool such as Paint.
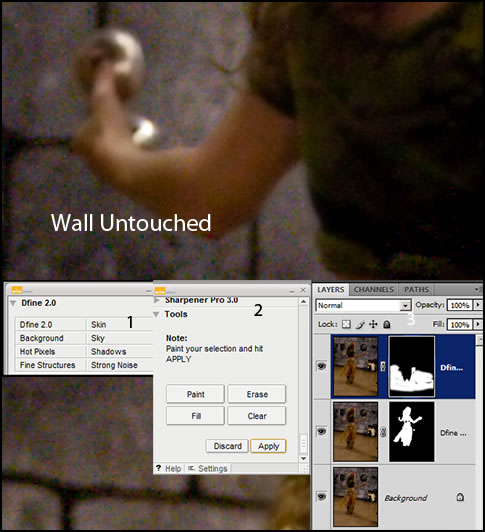
The next question is: How well does this program work? My main concerns were how well could I reduce noise and how well could I control the noise reduction so that I lost as little detail as possible? Could I reduce the noise in one area while protecting another area so that detail was not lost where there was little noise? The answer to the question is, yes. The image on the lower right had a Control Point set up so that that area of the image was not effected by noise reduction. When I checked areas near to it, they had been affected by the default noise reduction.
If you look at the images below, you will see that the program reduced noise correctly.
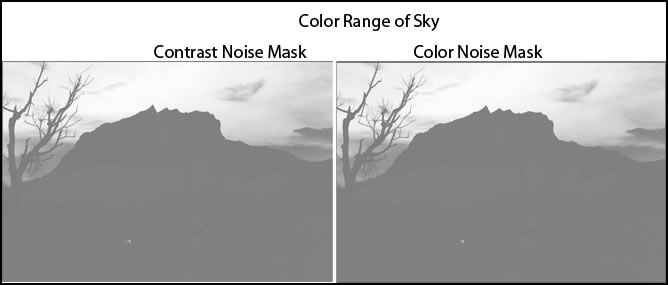
When working with either the Color Range or Control Points to reduce noise, the color and contrast masks are excellent for showing noise removal. In the images below, the noise in the sky was reduced by 200% for both color and contrast.
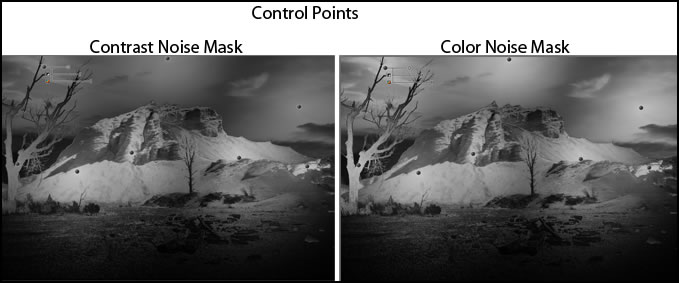
The following masks were created using Control Points set at different noise reduction levels. When creating masks, the lighter the area, the more the noise has been reduced.
How important removing luminance noise (contrast) or chroma noise (color) depends, from my perspective, of how much the noise detracts from the image. This will depend on the type of image, the type of output, and the size of the output. Personally when I shoot with my Canon DSRL at an ISO of 400 under normal conditions, I don't notice noise. While the noise in the above image of the chat fields was not visible when the image was set to View>Print Size (17.8 x 11.867 inches at 240 dpi) it was visible in Dfine 2.0
However, with the image that was shot at ISO 800 and for some reason was very underexposed, the difference using just Automatic Measurement and then a global default of 100% noise reductions was tremendous.
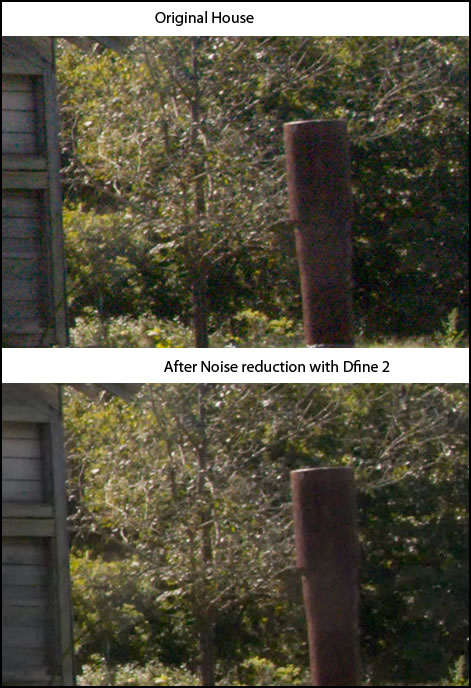
The last set of images are of a house. This image was underexposed by a stop to try to bring out the poor sky. I had planned to combine it with properly exposed images of this house. I did increase the exposure in Photoshop Camera Raw. However, it was very noisy in certain areas as you can see from the images. Also, before noise reduction, the house was actually darkened by the presence of chroma (color) noise.
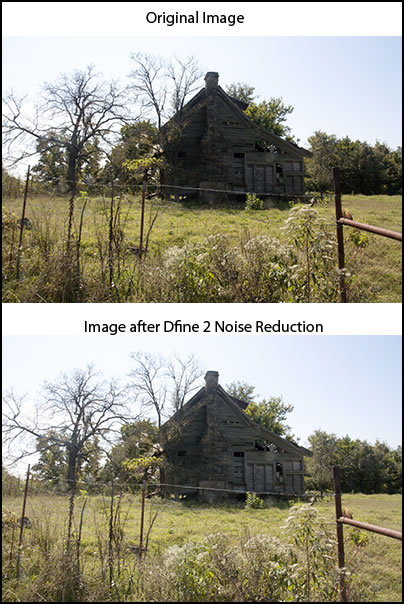
However, some of the detail was lost because I had to reduce the Luminance (Contrast) noise by a lot, also. To correct this, Nik Software has a program called Sharpener Pro 3 which is to be used after Noise reduction. I will be reviewing this, also.
System Requirements |
||
Windows
|
Macintosh
|
|
** Nik Software product filters are developed to integrate seamlessly into many popular image editing applications that support the Adobe plug-in architecture and there are numerous software applications that accept Adobe plug-in compatible filters. Please consult your image editing application’s documentation for compatibility and installation instructions for 3rd-party plug-ins. |
||
The cost of Dfine 2.0 is $99.95. The upgrade price is only $69.95
You can purchase the plug-ins separately or in different bundles. I will be reviewing all the programs in the Complete Collection:
"The Complete Collection includes all of Nik Software’s latest award-winning plug-in software titles for Photoshop®, Lightroom® and Aperture™ including: Dfine® 2.0, Viveza™, Color Efex Pro™ 3.0, Silver Efex Pro™, and Sharpener Pro™ 3.0."
For more information on Dfine 2.0 click on it. Also, go to demo to download a fully functional 15 day trial. For more information about other Nik Software plug-ins, go to the Nik Software website.
For this review I used Vista Ultimate 64-bit on a PC. I mention this because the MAC interface shown in some of the lessons on the Nik Software website is different than the one for the PC.
The program has a lot of parameters. This is great because you can tailor it to suite each image.
I discovered that even an image that has apparently no visible noise can be improved in certain areas and one that was not workable at all can be more than salvaged. I would recommend that users read the manual first. The interface is not completely intuitive, especially the Control Points, even though certain tools, such as Control Points, are used throughout the Nik Software that I am in the process of reviewing. This program is, however, especially useful with underexposed images or those at a high ISO. Once you understand how the Control Points work and become familiar with using the noise masks, you will have an amazing amount of control on removing noise and will be amazed at the difference it makes in an image. I plan to take a number of these images that have been treated to noise removal and use them in my review of Sharpener Pro 3.
Nik Software products Reviewed: