Rays by Digital Film Tools is used to create light rays in an image. If you have ever seen the sun streaming through the clouds, you can add these godrays using Rays v2. Below are some of the features from the user guide.
Set the ray length and brightness
• Control ray direction with an on-screen control
• Customize the color of the rays using a color picker
• Threshold control to specify where the rays will be visible
• Add your own light source to generate rays
• Randomize the rays
• Add texture inside the rays for a more natural and organic look
• Layering system for multiple rays applications
• Sophisticated but easy to use masking tools
• Modify settings with sliders
DFT Rays is a plug-in for Photoshop and similar programs. Below are the requirements:
- Adobe Photoshop CS5 and up (64 Bit Only)
- Adobe Photoshop Elements 13 and up (Non-app store version)
- Apple Photoshop Lightroom 3 and up
- Apple Aperture 3
- Adobe After Effects CS5 and up
- Adobe Premiere Pro CS5 and up
- Apple Final Cut Pro X
- Apple Motion 5
- Avid Editing Systems (64 Bit only)
- Assimilate Scratch v8 and up
- Black Magic Resolve v11 and up
- Sony Vegas v13 and up
- The Foundry's Nuke v8 and up
- Macintosh Multicore 64 Bit Intel® processor
- Mac OSX 10.7.x and up
- Windows Vista 64 Bit, Windows 7 64 Bit, Windows 8 64 Bit
To see how the Rays plug-in worked, I used images that I had already finished. Pictured below is an image I created with flat lighting. A finished version will appear later in the review.
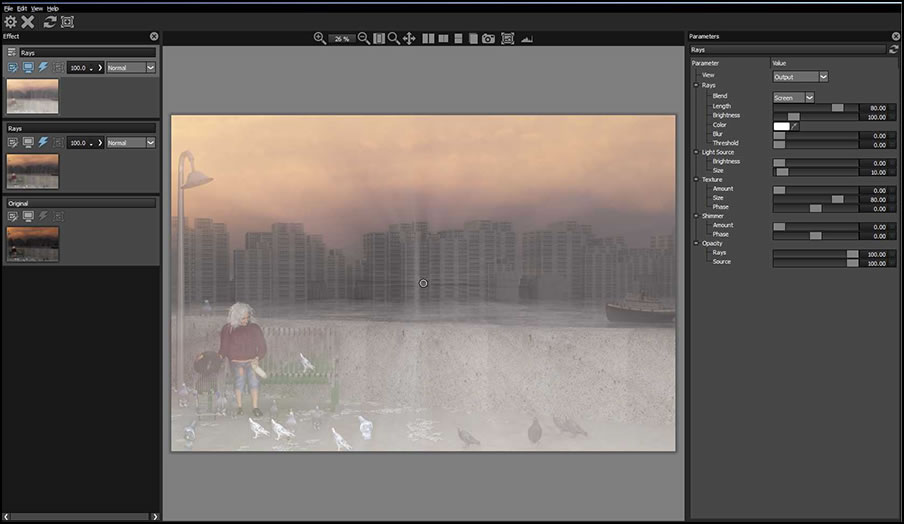
I am not sure why two layers above the background showed up in the default interface. The manual only showed one layer above the background for the default. I decided to delete one of those layers. (Right click the layer; press delete.) All the tools are on the right panel.
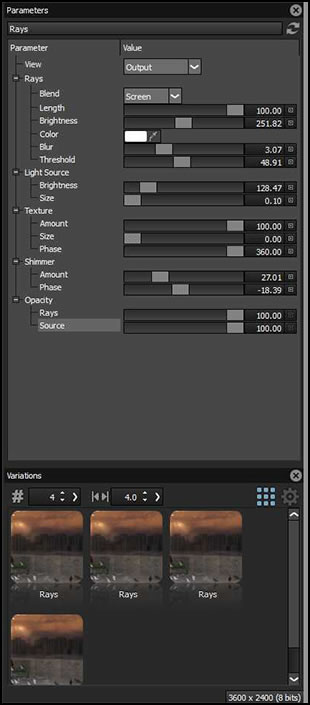
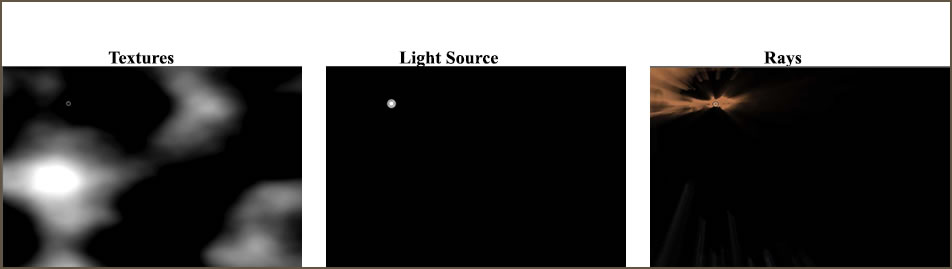
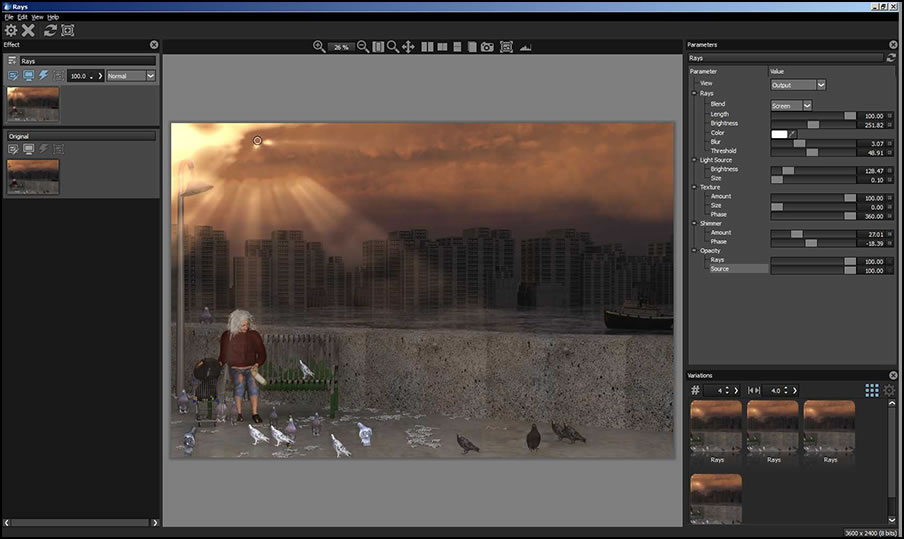
The Values tab on top is set for Output. If I change that, different aspects of the image will appear in the viewport.
I worked with the sliders to obtain the image below.
For my next test, I repeated the above steps using the image with the sun reflecting off different surfaces. Below are pictured the two images with different lighting.
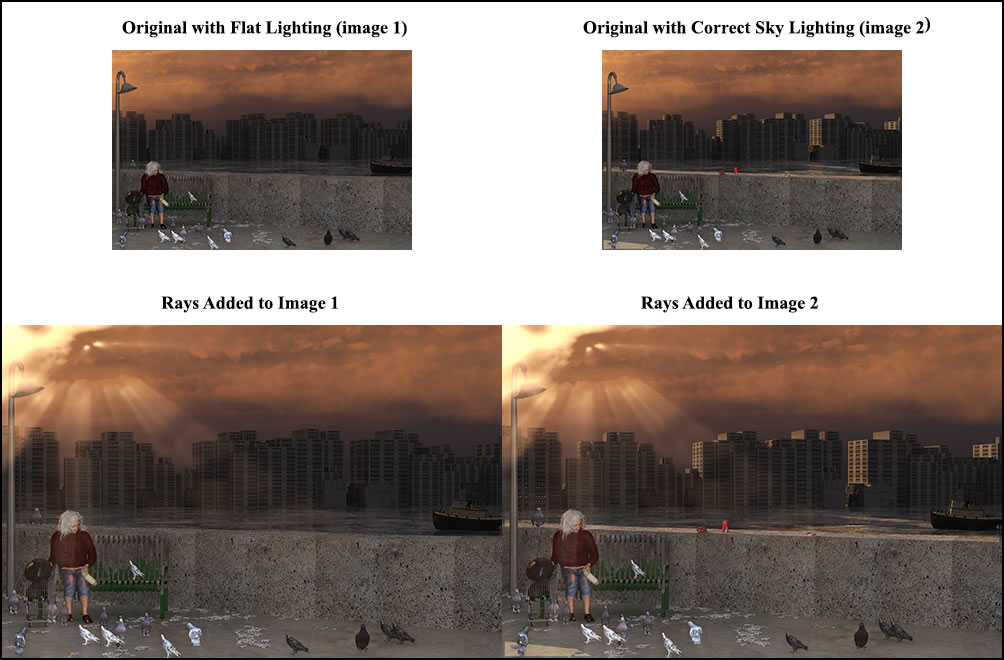
The reason I changed certain parameters of the image was to see how Rays would modify different elements of the image. As can be seen, they really don't.
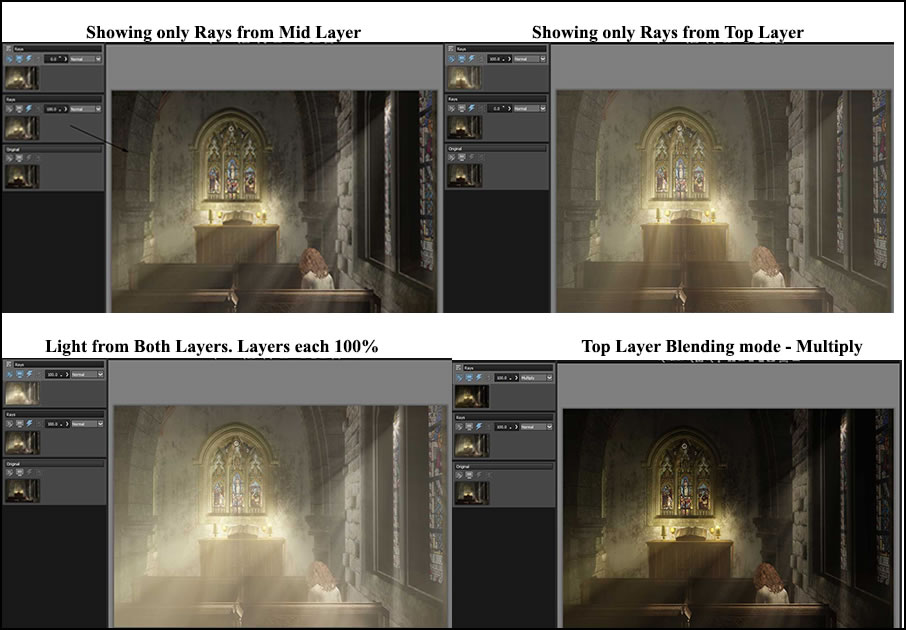
You can have light sources on different layers, but I found working with one source was more natural for the images I was using.
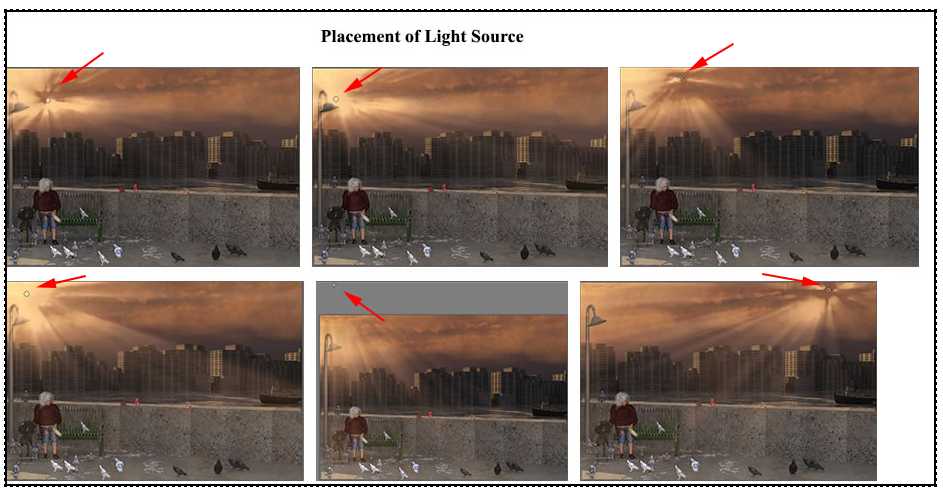
From what I could gather, one changes the basic ray first by positioning the light source shown by a circle. It can be position on the image or off the image. Then, one changes the settings on the right panel. Below show some positions for the light. All those with the light source on the left, didn't necessitate a manual change on the right panel. The light source that is placed on the right in the last image did.
The Threshold slider controls how much of a proportion of the rays will appear. This can also be controlled by other sliders. For this test I kept all sliders the same except the threshold slider.
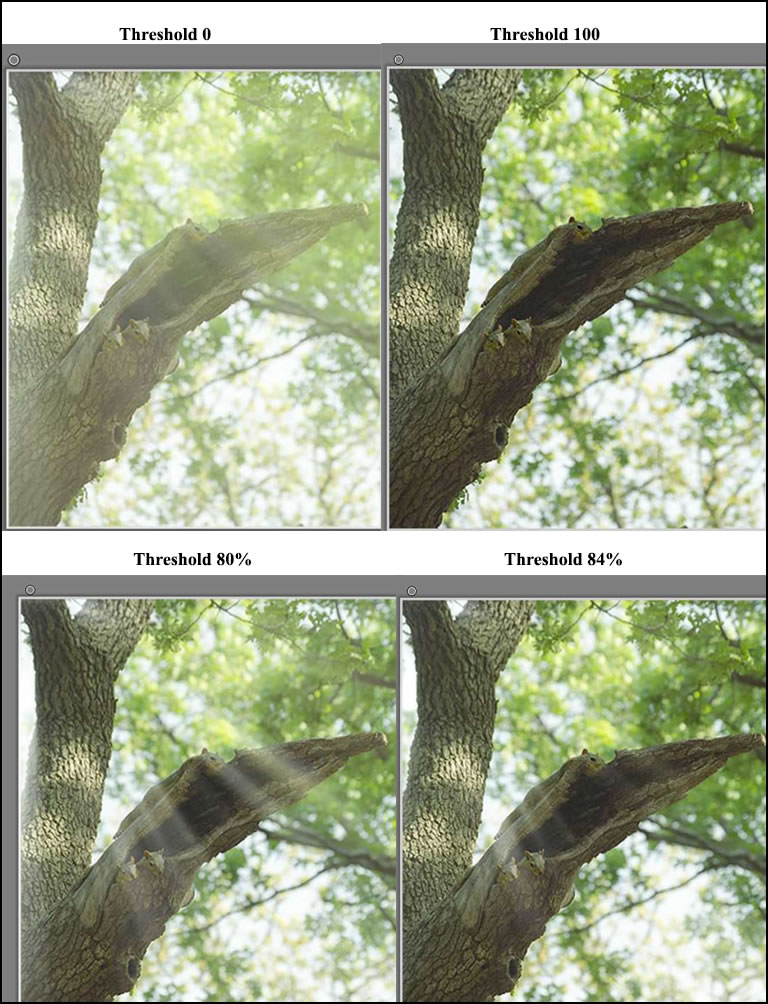
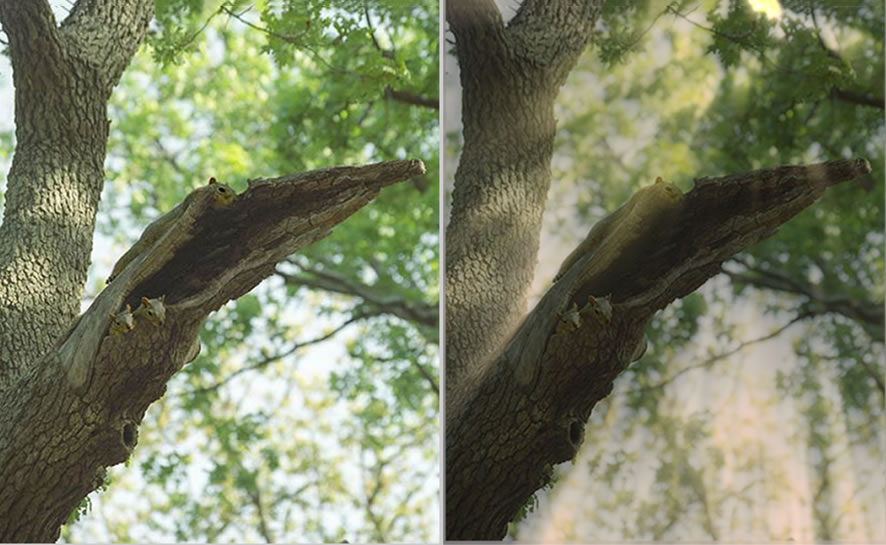
This example is of a tree with squirrels with the sun coming from the right and having an orange caste. If I were to work more on the image, I would have lightened the squirrels a little since they blend with the tree anyway.
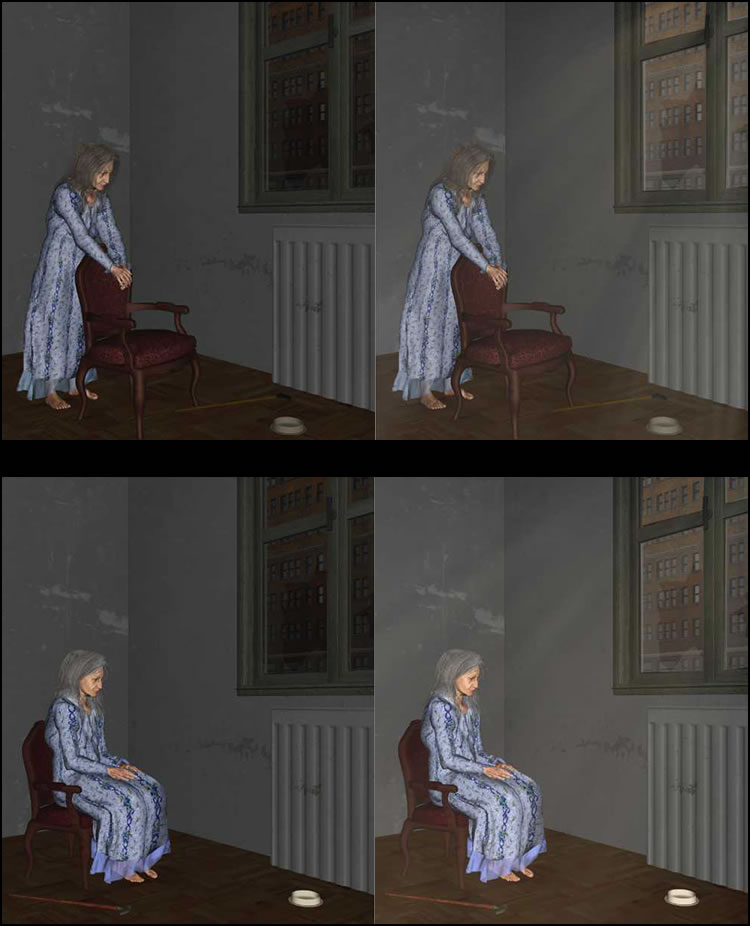
Lastly, I took two night scenes and turned them into early morning with the sun streaminng in. On one I used more than one layer of rays, having the rays slightly different colors.
Examples from the Digital Film Tools' website can be accessed here. Rays can be purchased for both video work and photography. As a Photoshop or equivalent plug-in, the cost is $50.00
This plug-in is what I call a 1 effect plug-in. I was able to easily add light rays to an image. By using layers and blending modes, I could manipulate the image even more. The program worked smoothly and easily. I recommend downloading a 15 day trial and testing it out for yourself.