Alpha channels, creating quick masks, using layer masks, and selections all have a commonality. The alpha channel is the repository for saved selections and various masks as well as maps such as bump maps, distribution maps, etc. used in 3D programs. Let's look at what this means. Creating masks and understanding alpha channels is really not as complex as it seems. Masks are created to modify an image. They are always in grayscale. On the two ends of the grayscale are white and black. Black always protects an image and white makes it editable. Various shades of gray are also used. This will be explained through the examples.
I will address in this article Quick Masks, Smart filters, Layer masks as well as discuss alpha channels in general.
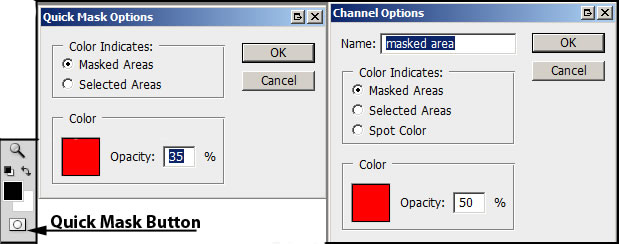
What areas you wish to protect and how you structure a quick mask, is basically up to you. The default for Photoshop CS4 is pictured below. If you change the default, you will also change whether you use an eraser for creating a mask or a brush to remove it. That is why for this article we will apply all concepts to the defaults as shown below.
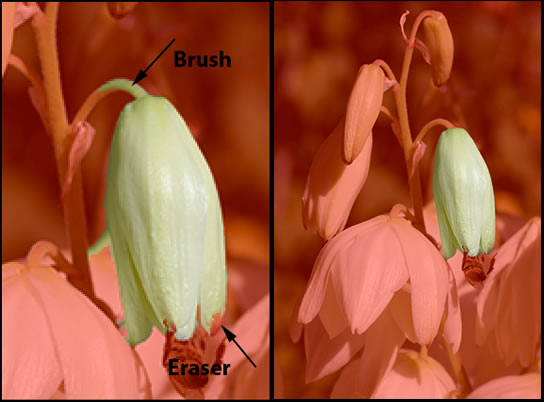
I selected the flower with the magic wand. It wasn't selected as I wished. So I clicked on the Quick mask button to activate the Quick Mask. The Quick Mask is shown by a red overlay. I used the brush tool to add more to the background and the eraser tool to remove some of the overlay from the flower itself. The final selected flower is on the right.
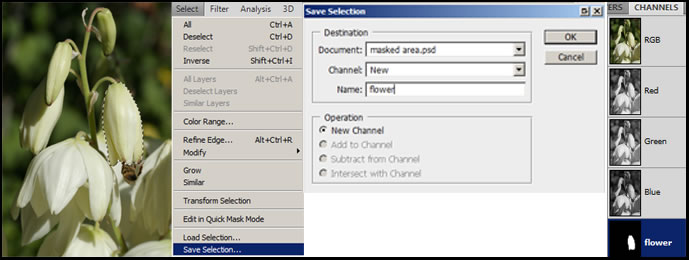
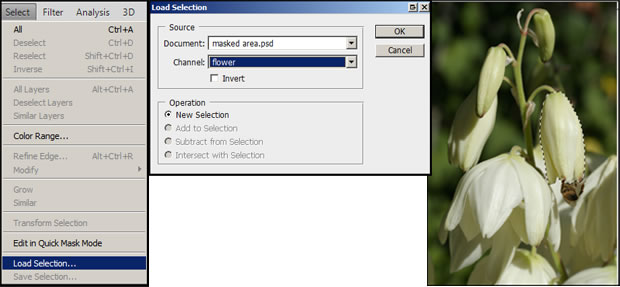
When I deactivate the Quick Mask, notice the image below on the far left. It shows the completed selection. Once I am satisfied with the selection, I go to Select>Save Selection. The Save Selection menu appears and I can type in the name of the selection. It will appear on the channels panel as white (flower) on a black background. If I hadn't typed in the name, the name that would have appeared on the channel is Alpha 1. This is called the alpha image in the alpha channel. Remember Black shows the protected area and white shows the editable area.
If I want to retrieve the selection to further work on it, I click on Select>Load Selection; then the Load Selection menu appears and I go to the name of the alpha channel and click OK. Notice the selection on the far right.
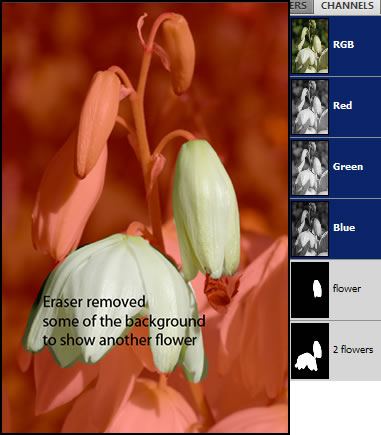
If I were to click on the Quick Mask button, the background would have a red overlay and I could add to the background by using the brush or subtract from the background by using the eraser. Now the selection would consist of 2 flowers. And you would have saved another image in another alpha channel.
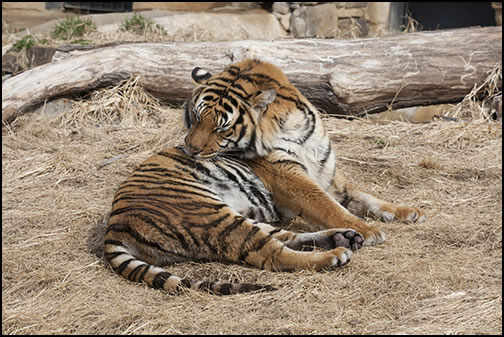
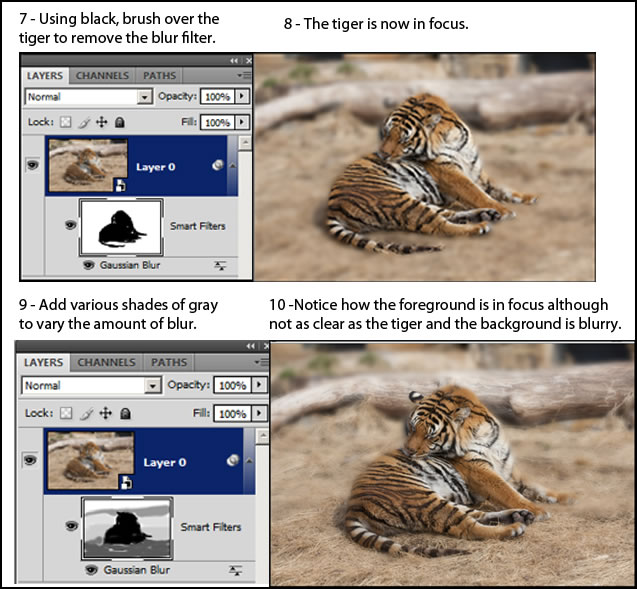
How does this relate to layer masks and Smart filters? Again, black is used to protect and white to make it editable even though this might look contradictory at first glance especially as it relates to creating layer masks. Let's first start, however, with Smart filters and see how white and black are used. Black can still be said to preserve the underlying image because it is used to remove the effects of the filter. Actually the continuum from black to white is in effect as you will see by the following example of a tiger. Below is the original image without any changes.
The next two screens show how to create a Smart filter. Using this technique I can paint over the filter using black and shades of gray. If we think in terms of protecting the background, I am using black to protect (bring into original focus) the tiger. Then, I am using shades of gray to remove some of the effects of the filter. The darker the gray, the more blur I will remove or the more the original background layer will be protected or show through.
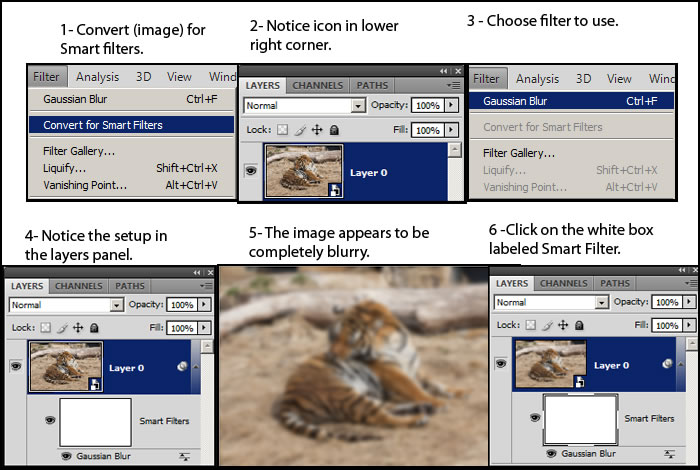
In step 6, you must click on the white box of the Smart filter so that you can paint on it.
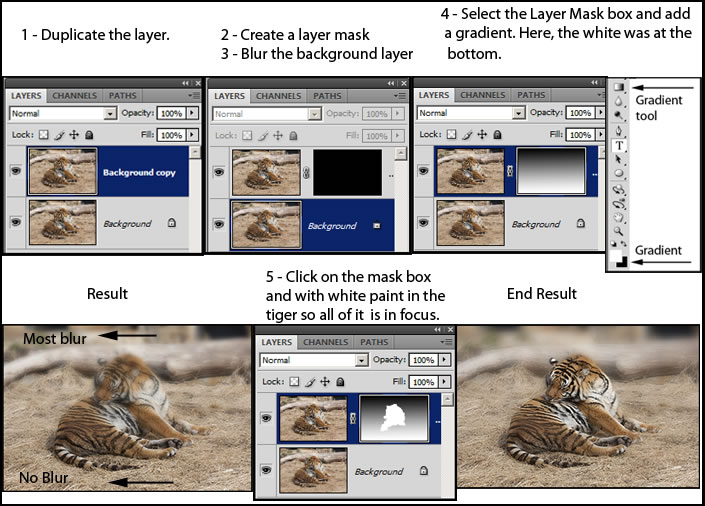
Now we will take the same tiger and create a layer mask.
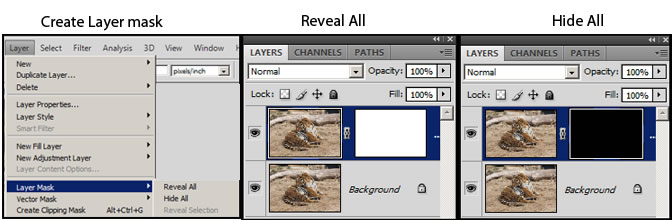
The end result will be the same whether you choose hide all or reveal all. Below are the steps to create a basic layer mask.
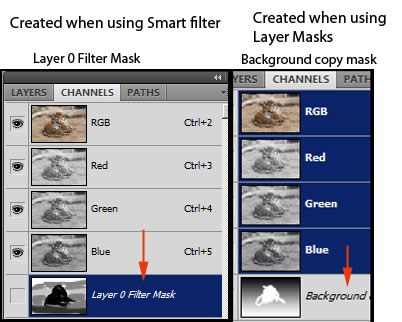
In every instance of creating a mask, you will see it in the alpha channel. I had to recreate the images that used the Smart filter and the layer mask to show how they appear in the channel menu; thus, they will be slightly different that those above.
Whereas we painted in black to preserve the background, here we are using white to edit how the tiger looks. The black still preserves the background because the background layer has had the gaussian blur filter applied to it.
While it might appear that sometimes we use white and sometimes black for the same purpose, when the function is analyzed, we are still using black to protect and white to make an area editable.
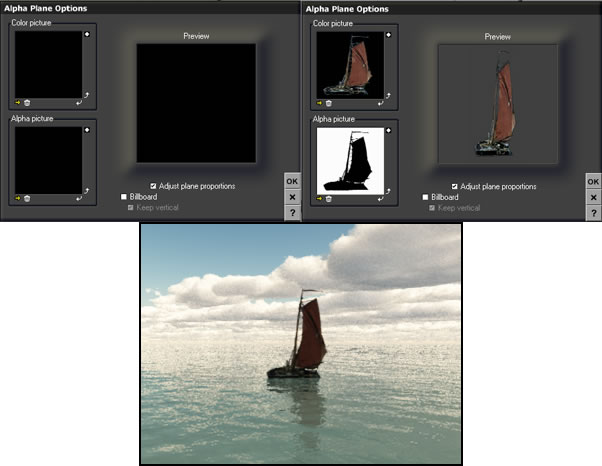
How do we use alpha images in other programs? We use alpha images in 3D programs to add a 2D image. Here is the setup for e-on software's Vue. We are going to add a sailboat to a scene. To do this we need two images - an alpha image and a color image.
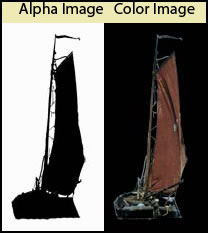
Below demonstrates how an alpha image can be used to create a 2D image in a 3D program. The alpha image can only be pure black and white. Notice there is no background surrounding the boat. The boat appears on its own. No, this is not magic.