Introduction to CS6
With the advent of CS6, users have a choice of purchasing hard copies by downloading or by accessing the programs through the Adobe Creative Cloud™. It is necessary to understand how these two methods for purchasing programs work. Let's first look at the Creative Cloud. The Creative Cloud isn't only for accessing programs. It is a way to keep everything you do in the "present." In other words, as you create a document and change it, the change is already reflected in the document in the Cloud so that if you are sharing documents, the latest will be immediately available. The same is true with programs. If you use a tablet, you are already familiar with apps. Your work can be stored in the Cloud so if you are away from your desktop computer or laptop and create an image on your tablet, you can save it to the Cloud to be accessed later on your desktop or on any other appropriate mobile device. Think of the CS6 Master Collection as a series of apps. For $49.99 per month with a years commitment, updates and programs will always be available. These programs will be continually and continuously updated. New features will even be released between major upgrades. There will be programs that will only be available from the Cloud as well as services. If you join by August 31, 2012, you only pay $29.99 per month with a one year contract. As Adobe states on their website: Get the world's best tools, Store and Share, Publish apps and websites, and Stay a step ahead. Also, current Creative Suite users save $20/month for the first year on Adobe Creative Cloud membership. The offer is good for all registered users with CS3 or later. You can think of the Creative Cloud as both a hub for working on all your devices and with all your team as well as a storage repository.
If you are not sure what suite you want, click on the Comparison Guide link to see the list of suites and the programs that comprise them. Following this introduction, I will be reviewing the programs that comprise the CS6 edition of Design and Web Premium. I am using a downloaded version of the suite that is not from the Cloud. As I review the programs, I will include a link to the review in this introduction. Acrobat X Pro was already reviewed when it first was released.
When I started reviewing graphic programs over 20 years ago, one could be a generalist, i.e., be familiar with and use creatively most of the products. As time has progressed and more content has been added, one needs to be more of a specialist in each field, creating or adapting images, setting up layouts in print, and setting up websites not only for the desktop and laptop but especially for mobile devices. Then, we cannot forget being skilled in using programs such as Flash and all the video editing programs available from Adobe. Each time I review, I find so much material that is new and in certain areas material that is totally new to me.
If I had to describe the programs in CS6 Design and Web Premium, I would say they are all about designing for mobile devices, whether you are creating fluid layouts in InDesign or multiple layouts in Dreamweaver; speeding your workflow through more responsive interfaces and enhanced panels in all programs, especially the new interface in Photoshop and Illustrator; having even more integration between programs; and never having to leave a program to preview web elements in Fireworks or create forms in InDesign.
- Acrobat X Pro
- Photoshop Extended
- Illustrator
- InDesign
- Dreamweaver
- Flash Pro
- Bridge
- Media Encoder
- Fireworks
Photoshop CS6 Extended Review
There are many obvious and not so obvious changes to Photoshop CS6 Extended. This review will highlight the new features and discuss the program as a whole. Adobe has stated that there are 62 % more new features and over 65 user-inspired enhancements. One of the new under the hood major features is the new Adobe Mercury Graphics Engine designed for "blazing fast" performance.
What makes Photoshop CS6 Extended different from Photoshop CS6? Quantitative Image analysis, the ability to work with 3D with enhanced 3D merging and 3D animation. To see comparisons for the Photoshop family, click on link. For a comparison of the different versions, click here.
Some of the new major features for Photoshop CS6 Extended are:
- Content-Aware Patch
- Adobe Mercury Graphics Engine
- New and re-engineered design tools
- New Blur Gallery
- All-new Crop tool
- Preset migration and sharing
- Adaptive Wide Angle
- Background Save and Auto-recovery
- Adobe Photoshop Camera Raw 7
- Preset Migration and sharing from earlier versions
- Improved Auto Correction
- Intuitive video creation
- Adobe Mercury Graphics Engine for 3D for performance boost
- 3D controls at your fingertips
- New reflections and drag-able shadows for 3D
- Easy alignment and distribution of 3D objects
- Faster Adobe Ray Trace rendering
- Plus other improvements
While I am using Photoshop CS6 Extended for this review, I will use the term Photoshop CS6 when it applies to both versions to avoid confusion.
The first item that struck me was the new "sleek" dark interface with silver letters.
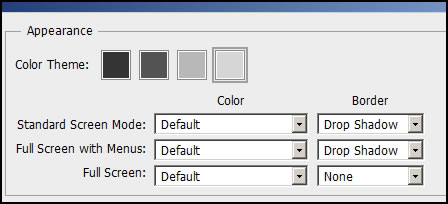
Perhaps since I have used Photoshop for over 20 years, I have become accustomed to certain things. One is the interface. I like the older gray interface. Fortunately, Adobe has made it very easy to change it and customize it in many ways. Go to Edit>Preferences>Interface. All of my screen captures will reflect my choice of an interface color theme.
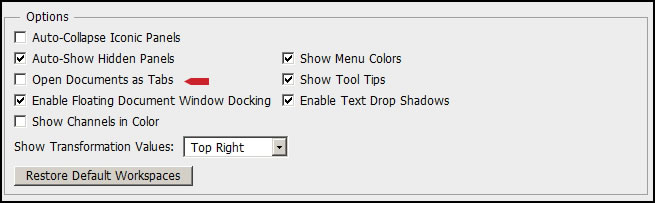
Also, in Photoshop I don't like my images to open as tabs. I do use tabs in Dreamweaver all the time and find it invaluable for a good workflow. Click on Edit>Preferences>General>uncheck tab.
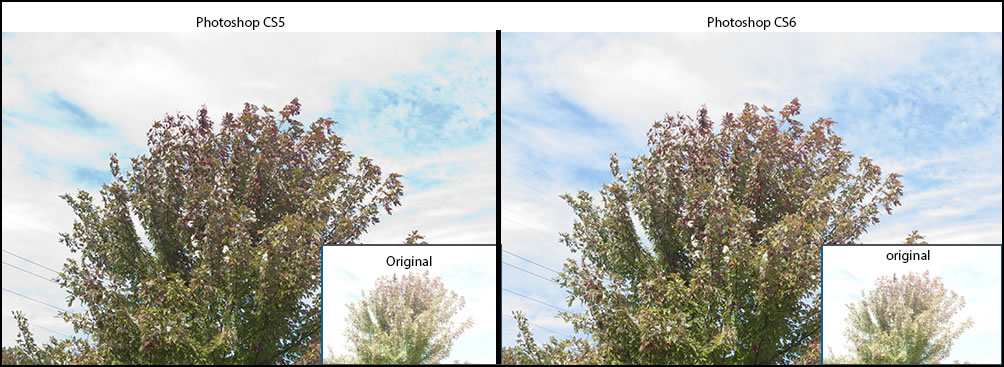
I'll first discuss some of the publicized new features starting with Camera Raw 7. When I saw a demo of it and what it can do, I was skeptical. However, I took a very overexposed image and within less than two minutes, I was able to correct it. I, then, took the original into Photoshop CS5's Camera Raw component and try as I might I could not make it pleasing. The colors (especially the blue of the sky) in the one created in Camera Raw 7 in Photoshop CS6 are more accurate with the properly exposed images than the one created in Camera Raw in Photoshop CS5.
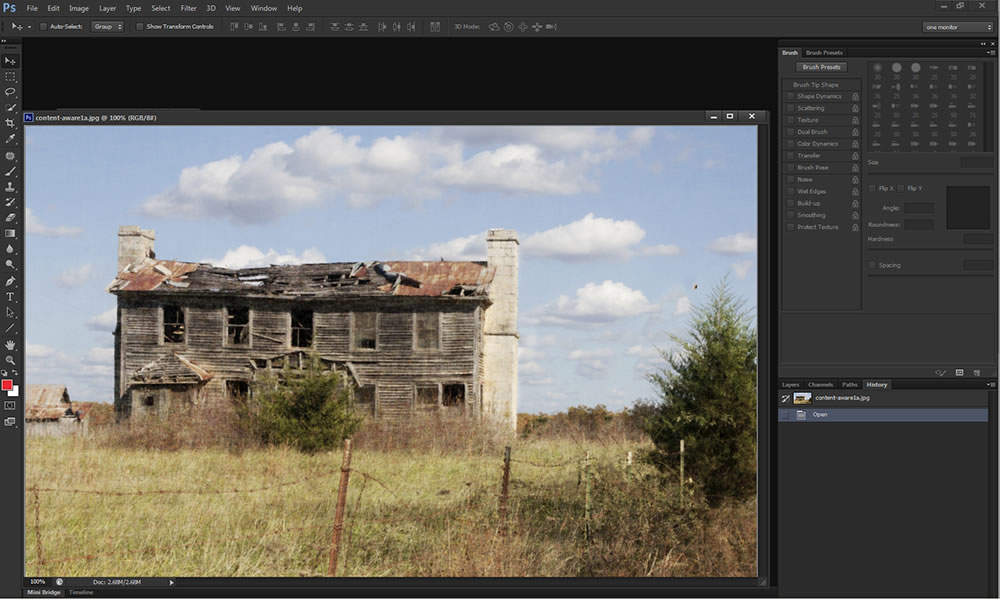
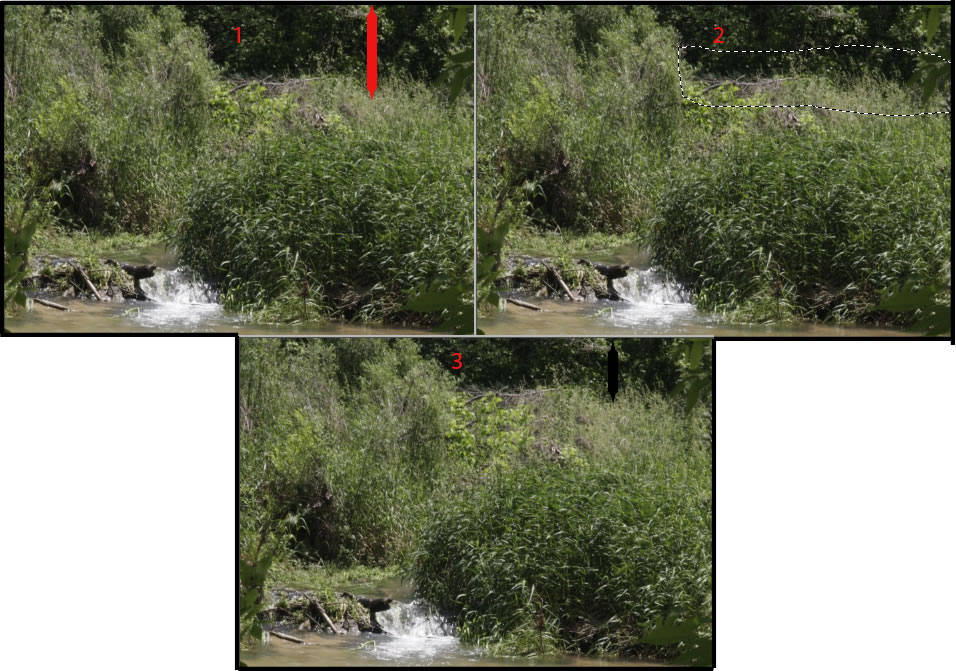
The functions and capabilities of Content-Aware have expanded in Photoshop CS6. I didn't know how this tree would appear when I moved it due to the branch structure. I was pleasantly surprised. I moved it through the new Content-Aware Move tool. It just left one tiny piece behind and all the limbs looked great in the new image.

Below is just another example of what one can do with the Content-Aware Move tool.

You can, also, extend part of an image. I extended the light green bushes in the back.
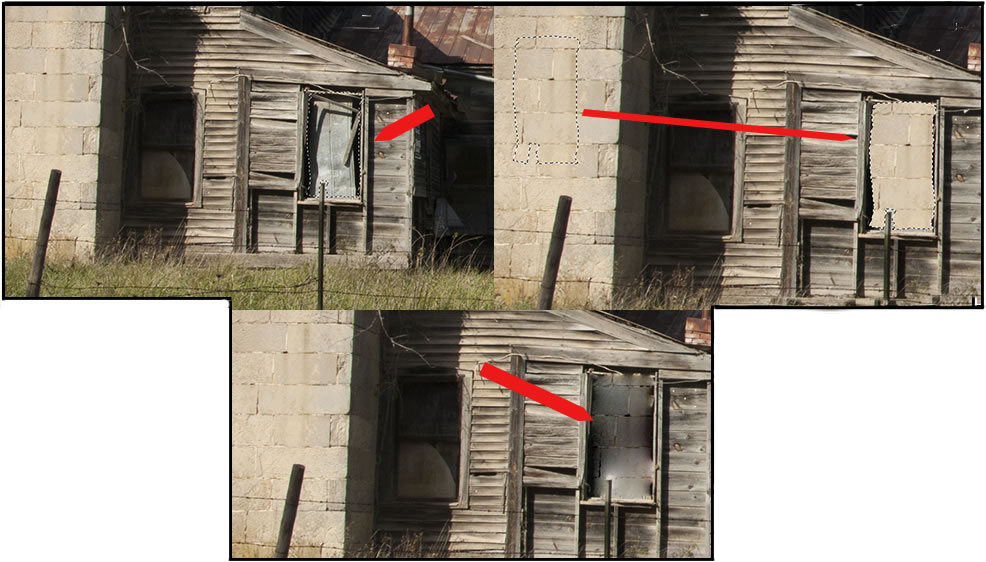
Next I decided to fill in a window using the the Content-Aware Patch tool.. Notice how it filled in the window with the chimney blocks, but it kept the tonal quality of the window.
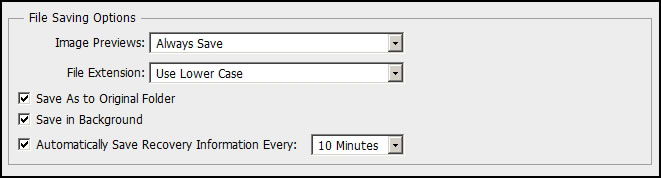
Background Save is a long desired feature. No more crashes or exiting by mistake and losing hours of work. Rarely have I had Photoshop crash, but I have exited without thinking and lost work on an image.
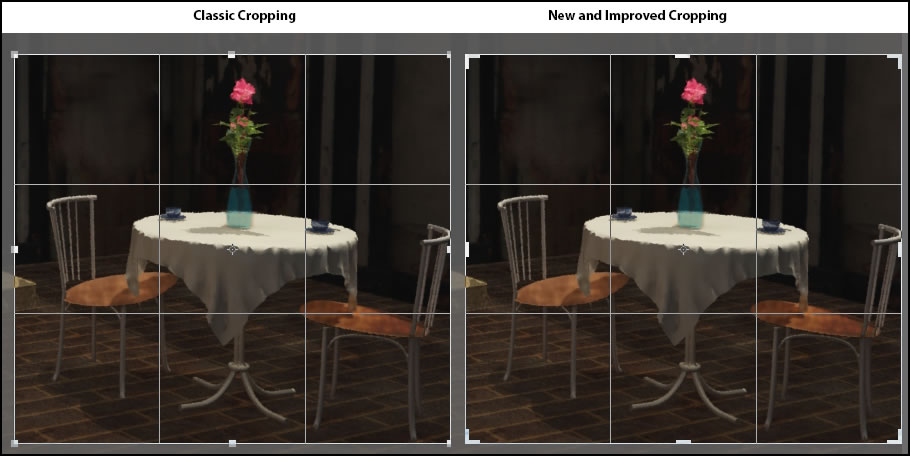
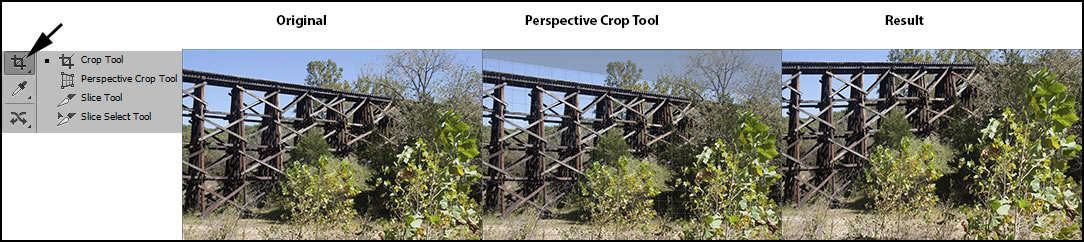
As with many new tools, the new Crop tool took some getting used to. Firstly, after you press Enter to create the crop, to remove the dotted lines, you have to access another tool. Using the old crop tool (now called Classic) the Crop tool moved. Now the image moves. You can change your image nondestructively, with more precision, and in more ways. It is easy to see the number of new choices. After a short while, I became very comfortable with the new Crop tool and began to use it automatically.

This shows some of the settings on the top toolbar when you select the Crop Tool. (screen capture courtesy of Adobe documents).

In Photoshop CS5, you had a choice of only Rule of Thirds, None, or Grid. In Photoshop CS6, you can save your crop dimensions and resolutions as presets. Below I used the Rule of Thirds which is my favorite.
There is another new Crop tool called the Perspective Crop tool. It gives the user the ability to align objects as you crop and to straighten image elements or scenes. I love this tool. It already saved me a lot of work by not having to access different Transform options from the Edit menu.
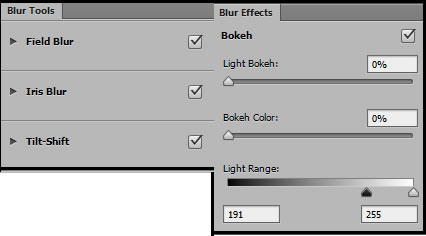
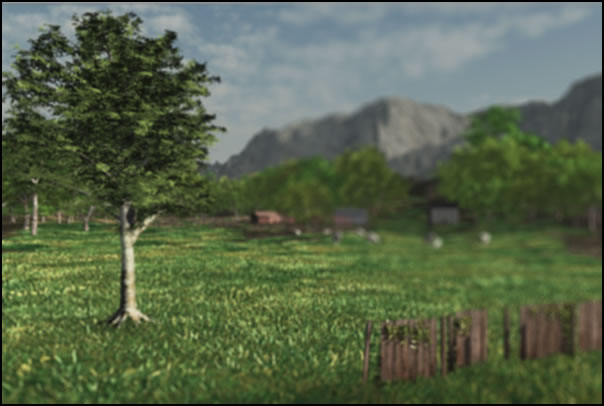
Photoshop CS6 has added new blur tools in the Blur Gallery. These are: Field Blur, Iris Blur, and Tilt-Shift. Also there are new Bokeh controls.
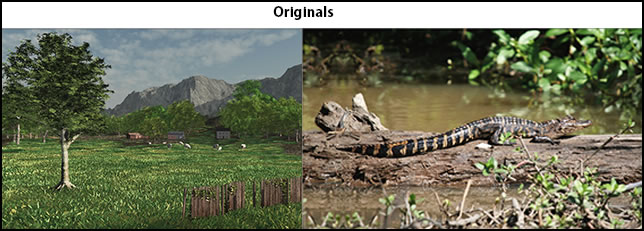
When you access the tools for these new blur options, they will replace your workspace panel until you either click on "OK" or "Cancel." Below are the two original images I used to demonstrate some blur settings.
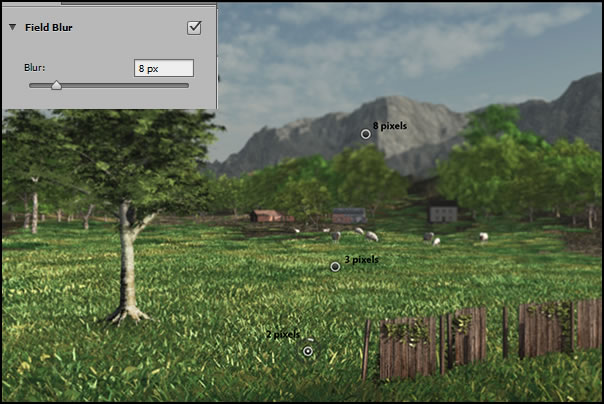
In Field Blur, you can position the pins using different sharpness settings for various parts of your image. Each pin has a different radius and, thus, controls the amount of blur.
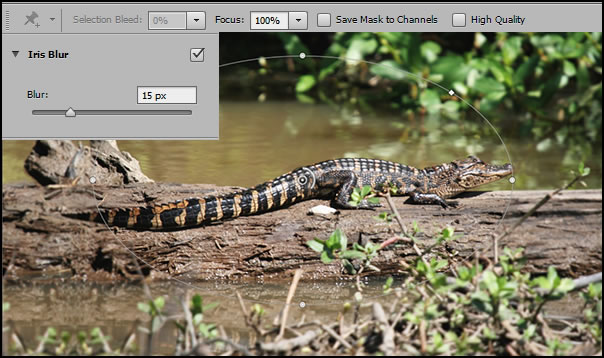
In Iris Blur you are replicating lens based depth-of-field. You adjust the transition between sharpness and blur by positioning the 4 white dots. As with the Field Blur, with the Iris Blur you can also add more pins.
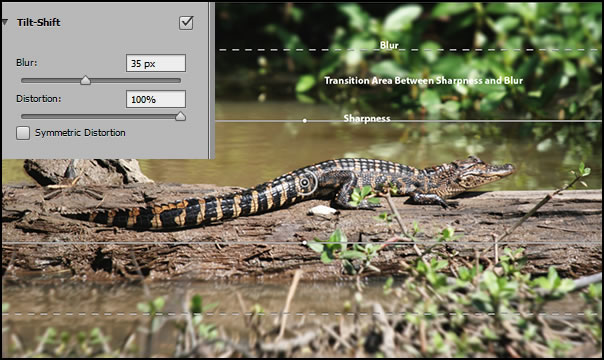
Tilt-Shift lines can be moved further apart or placed at an angle.
Each of these blur controls will give different perspectives to your use of blur. You can, also, combine them and add Bokeh settings to customize your blur even more.
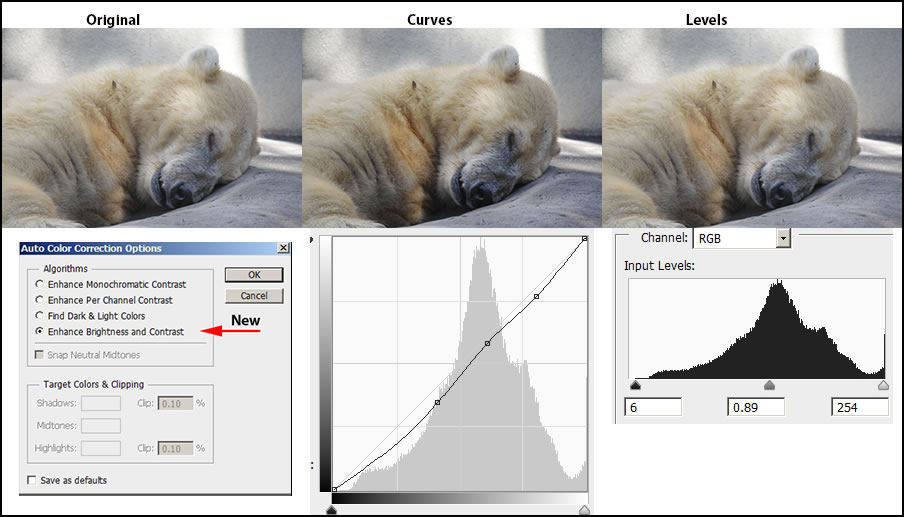
While I rarely use Auto options, I wanted to make note of the new algorithm that can be found in Curves, Levels, and Brightness/Contrast controls The change in Curves and Levels was created when auto was selected using the new to Photoshop CS6 option of Enhance Brightness and Contrast.
On the top toolbar, there is a new heading: Type. There are more innovative type options than what I have shown here such as many types of Warping text, improved panels and much more. This gives you much more flexibility in design and layout.
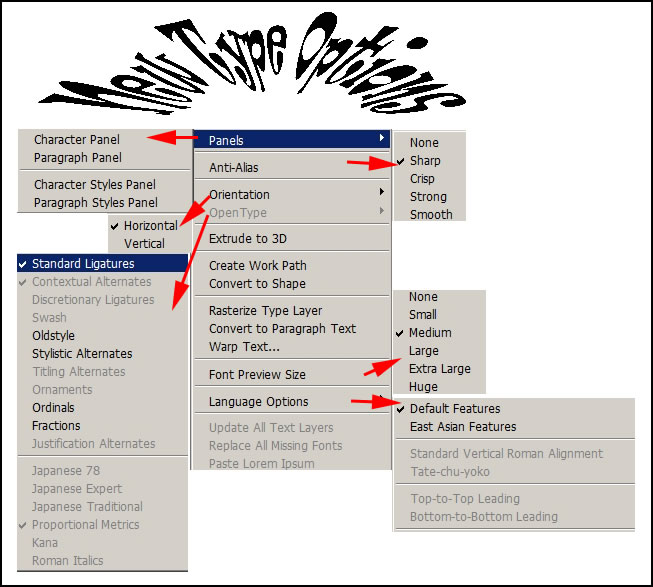
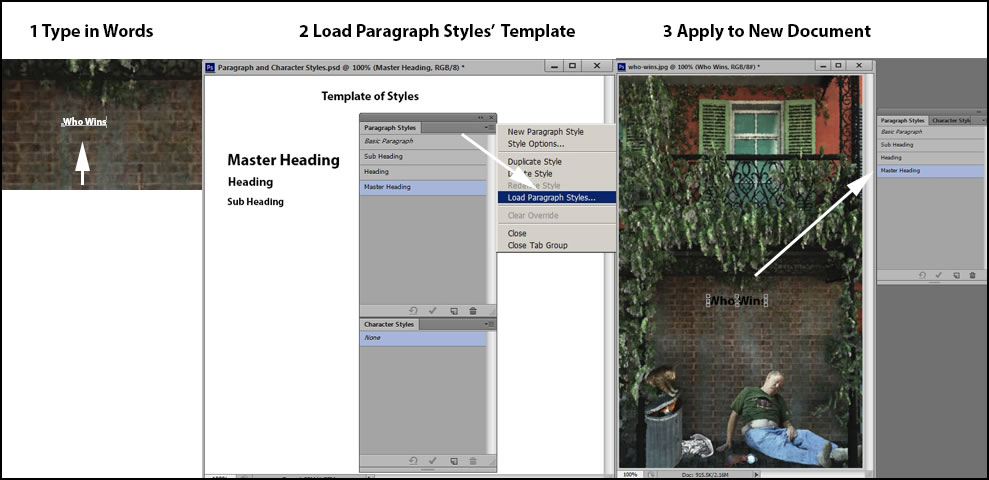
In Photoshop CS6 you can now save Character Styles which apply to individual letters and Paragraph Styles which apply to strings of text.
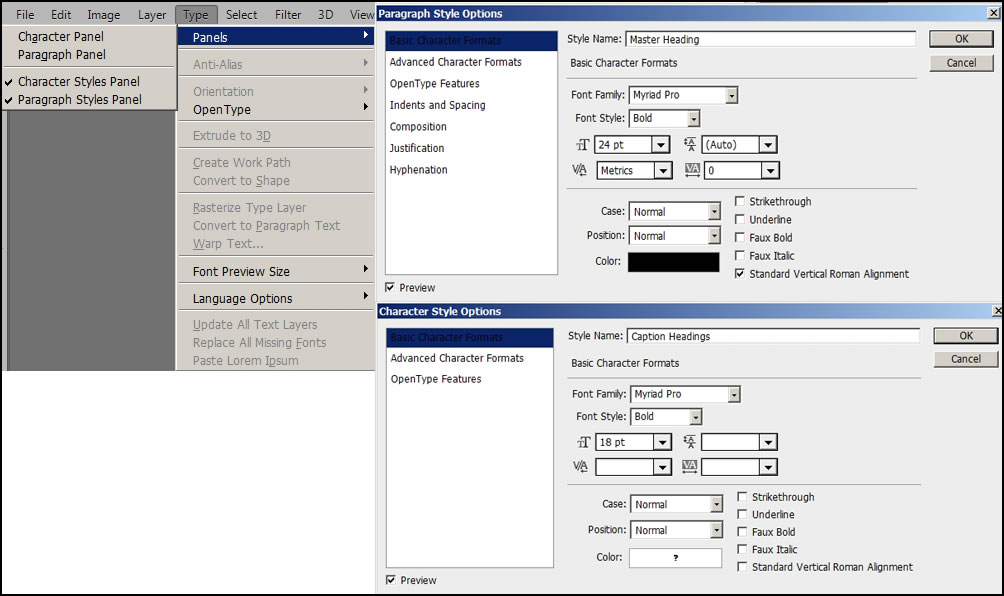
However, these are document specific. They will disappear when the specific document is closed. To avoid that this Adobe TV video suggests that you create a master template of different styles that you can then load. When you load it, the styles will load, also, and you can apply them to another document. Personally, I don't know why Adobe didn't allow them to be saved as brushes can be saved, for example. While this works, I found it cumbersome. The ability to delineate Paragraph Styles and Character Styles is time saving and really nice. On the Fly-out menu, the "Load Styles" refers to loading a PSD file such as my template file I created. Since the paragraph styles are inherent, they can be applied to other documents. Theoretically, you can create a number of different templates with styles for specific purposes.
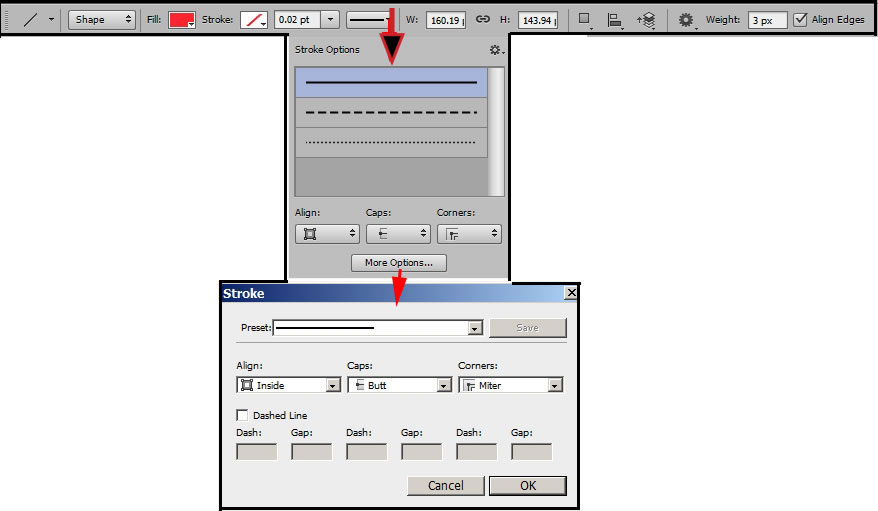
The Shapes tool has many more options than before including dotted lines. Initially, I couldn't find where all my settings were since I use the line and arrow whenever I write reviews. But in a short time, I felt at home with my new options and the greater possibilities available. I like the way I can use a different fill from the stroke and have a two-toned arrow.
After you create a vector shape, when you right click on it or on more than one shape, you get many options new to Photoshop CS6. [The image of the menu below is a composite.] Notice the number of new commands available.
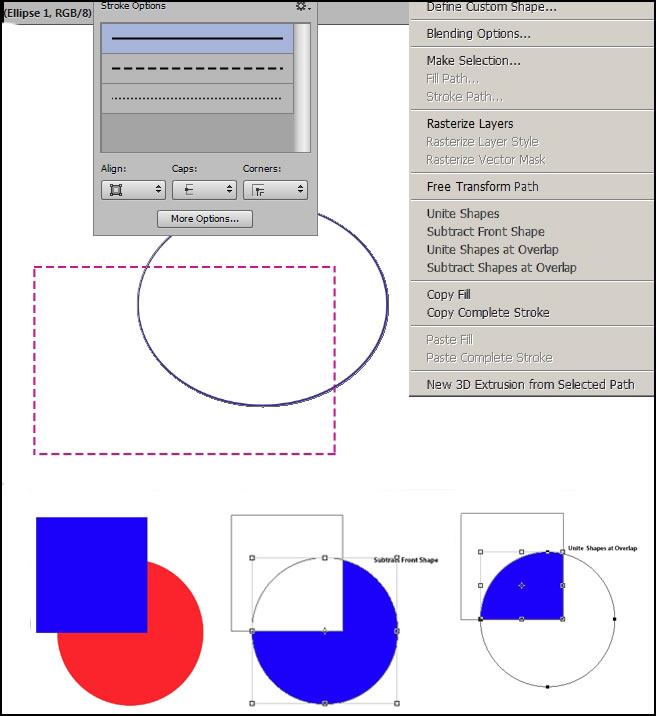
Locating layers quickly is a new feature of Photoshop CS6. You will find this option on the Layer panel. These are basically filters. In files with many layers, they can help you locate specific types of layers such as shape layers, text layers, etc. Most of the drop down properties have corresponding properties.

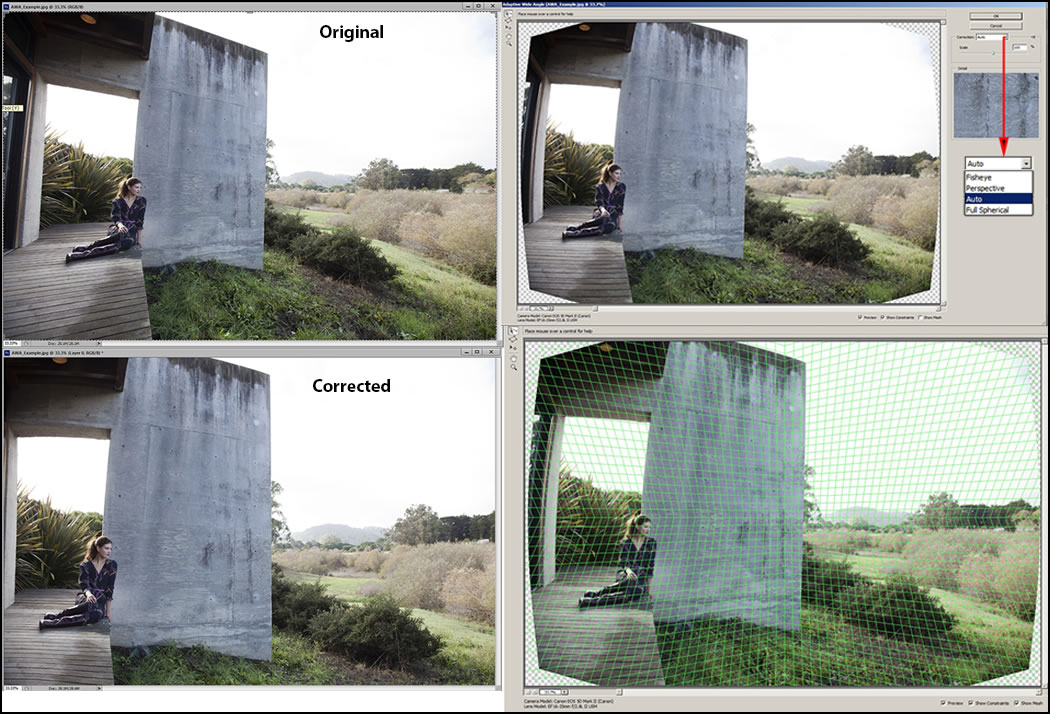
If you use a very wide angle, you possibly have experienced distortion. Since I do not have an extreme wide angle for my digital SLR camera, I am using an image provided by Adobe. To obtain the tools to fix this type of image, go to Filters on the main toolbar. There are five tools on the upper left frame: Constraint tool, polygon constraint tool, move tool, hand tool, and zoom tool. The commands on the bottom right are: Preview, show constraints, and show mesh. It does take practice to accurately correct an image. I can still see the mistakes in my attempt, but I got better each time.
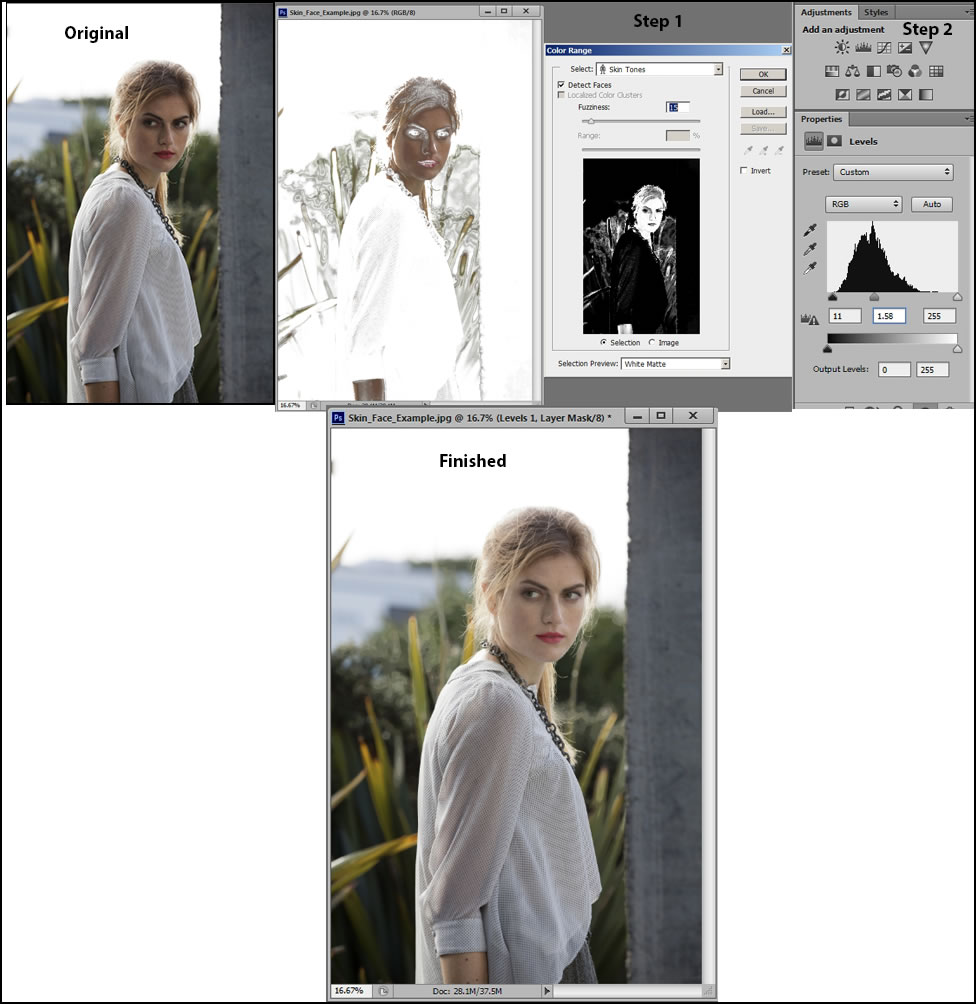
For those who use Photoshop to correct or enhance portraits, the skin tone-awareness and face detection should be very useful. Again, I used one of Adobe's images to test this feature. Underlined is a link to an Adobe tutorial on this feature. I suggest you look at it the first time you use this process because it is not intuitive. However, once understood it is very easy and gives good results.
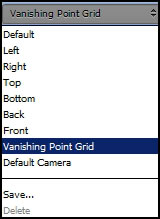
The interface for 3D has been recreated to make working with 3D easier for new users. As you select elements on the 3D panel, the Properties panel will change accordingly, so you are always updated. For example, you can change the position of a light and its intensity easily.
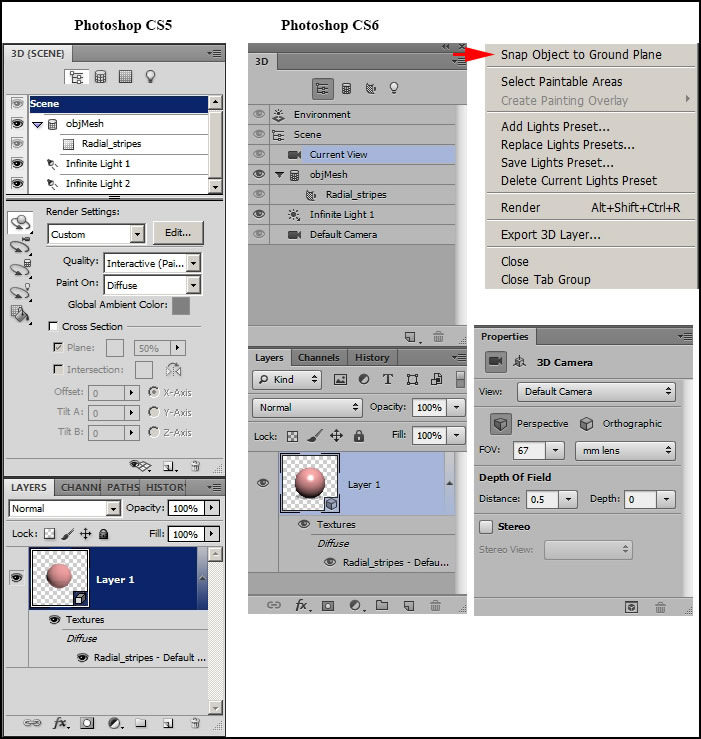
You can access the tools such as camera, create a vanishing grid, etc. from many areas in the interface.
Below is just one aspect of the 3D capabilities in Photoshop CS6 Extended - working with text. It was really easy to get this caption for an image.

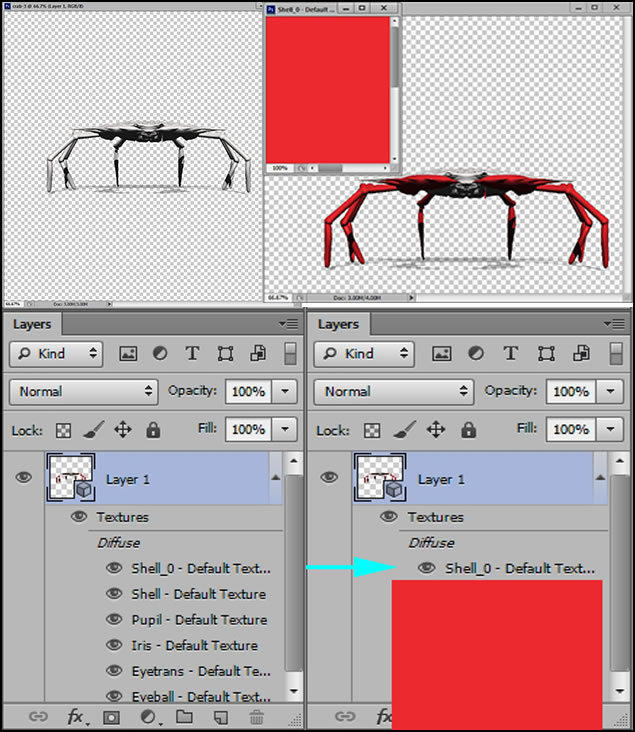
Some objects come in with textures attached while others have the textures delineated, but the colors are not there. In this example, I brought in a 3D figure, but the textures did not show up. While the textures were delineated here, there was no color. So you add the texture. Again, it is very easy. Here I brought in a crab. I clicked on the top texture layer and a window opened. I selected red and used the bucket tool. That color was now on the shell. If I click on the "Shell_0-....", the red square will show below.
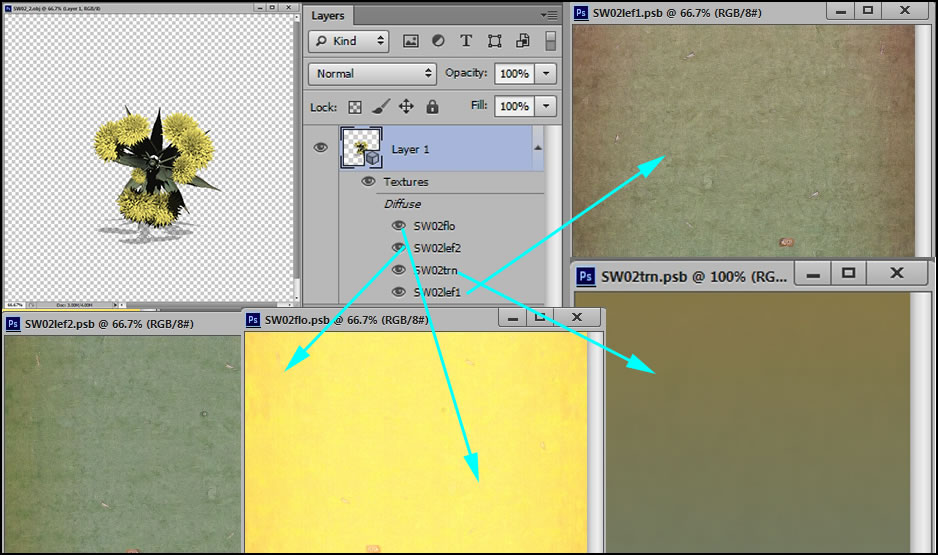
Some files will open with the textures attached. Such was an Xfrog Obj file. These textures can be changed in Photoshop CS6 Extended.
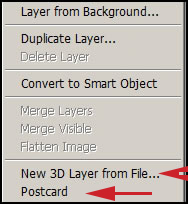
When you right click on a layer to access the layers menu, you will see two new choices. These take you to the 3D part of Photoshop CS6 Extended.
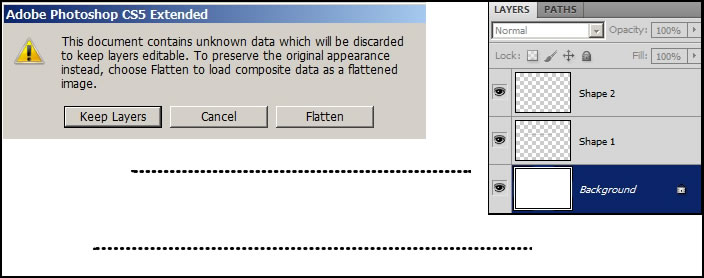
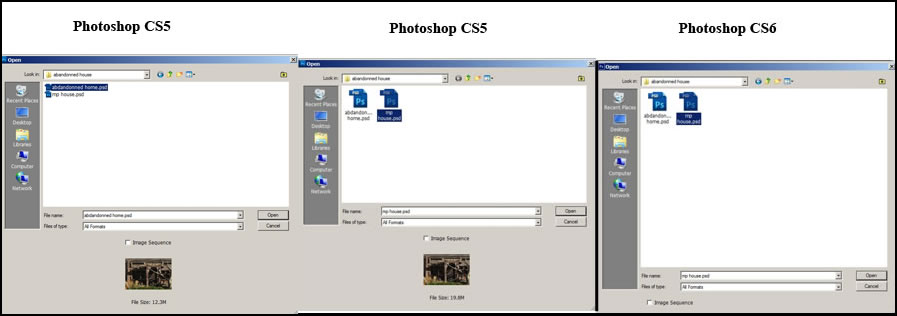
I decided to check on the backwards compatibility of Photoshop CS5 and CS6. I first tried two things - I used the Content Aware Move tool to move a tree and the new Perspective Crop tool. I did this in Photoshop CS6 Extended 64-bit version. I, then, opened it in Photoshop CS5 Extended 32-bit version. Both files opened correctly. I, also, added two new line layers using two of the new lines. These became shape layers in Photoshop CS6. When I opened the image in Photoshop CS5, it asked me whether I wanted to flatten it or keep the layers. I first chose flatten and it worked. I, then, reopened it and decided to keep the layers. This screen capture is a compilation of a few different screen captures all done in Photoshop CS5.
Adobe has modified some tools and settings. An example is the Move Tool. The changes in this tool will speed up layout workflow because the Move Tool can now be used as a Scaling tool as well and has the ability to place the selection within certain parameters. While this will save time and work, I don't like handles being around my selection. I find, when working small, they get in the way. I would rather got to Edit>Transform......But for people where time is critical, this new modification is very useful. However, by clicking on Ctrl H, you can hide the marquee and it will resemble the tool in former versions.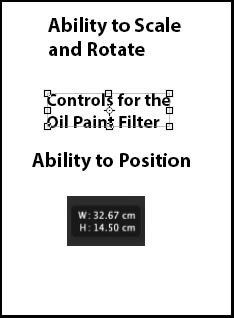
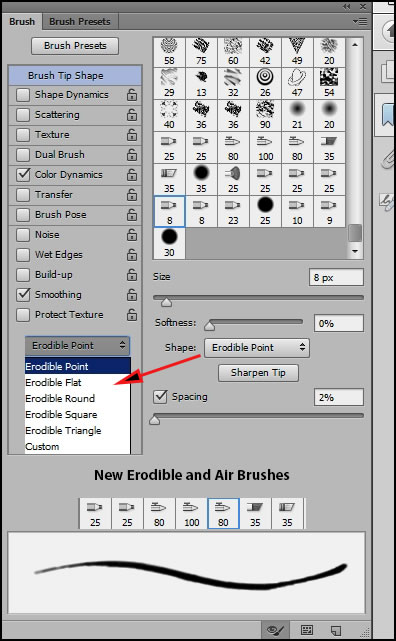
Two new choices have been added to the Brush presets. They are specific to certain brushes.
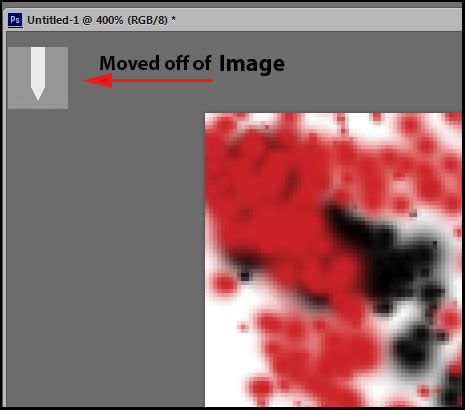
When these brushes are used, a dynamic icon of the brush is positioned near the top of the page as you are working. You can move it off the image by enlarging the canvas.
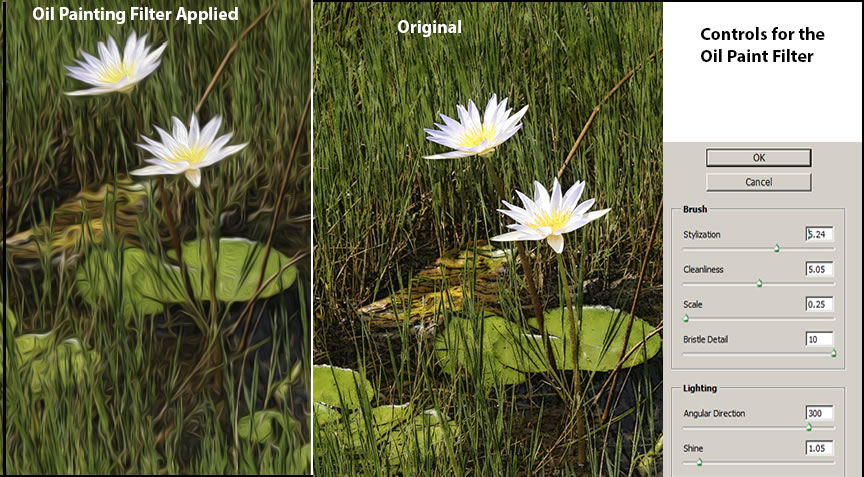
Below is a part of an image created by the Oil Painting Filter. It does not have as many parameters as do many of the third party "natural media" plugins. What would have been useful would have been a group of natural media filters such as Impasto, acrylic, pen and ink, etc. if they were going to add one at all.
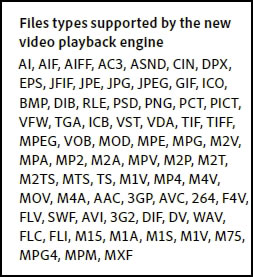
Video Editing is now in both Photoshop CS6 and Photoshop CS6 Extended. The file types supported by the new video engine are impressive.
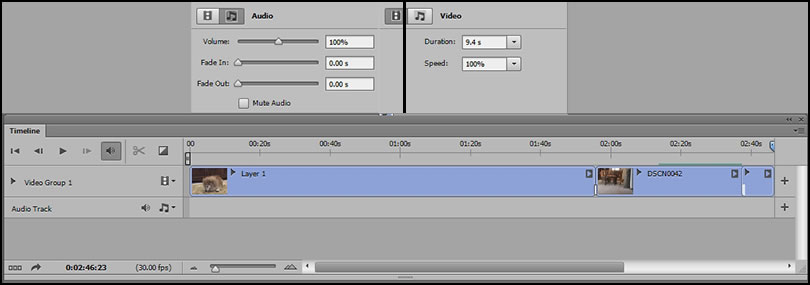
Creating and editing videos is very straight forward. You can even add filters once you make the layer a Smart Object. The timeline is standard. It allows for multiple tracks, splicing, adding a few transitions, controlling video speed, and audio volume and more. Below are a few screen captures of some of the controls. I created a short video from three clips of my dog. I will not show it. I'm the amateur at that; the program is not. Right clicking opens a number of options. Below are options for both video and audio.
This screen capture shows Transition Effects between three clips.
![]()
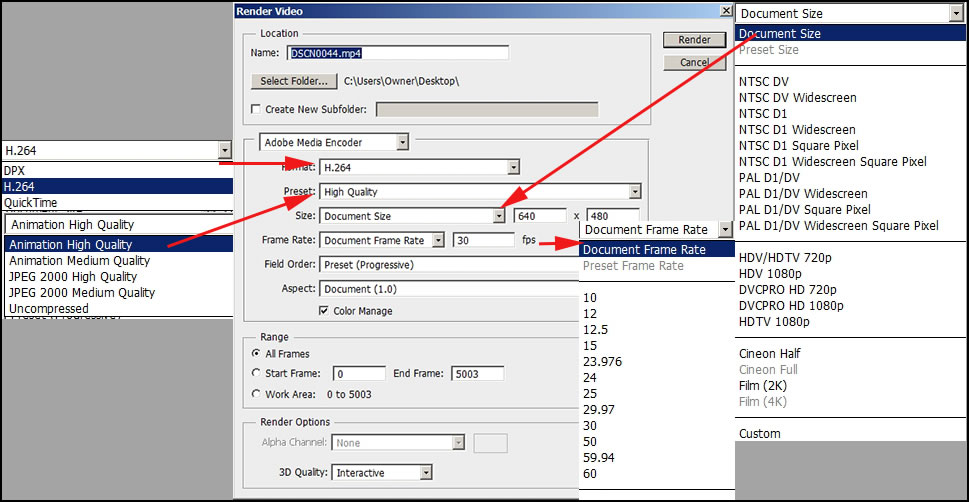
There are a huge number of render options available.
I did find one new aspect in Photoshop CS6 that I really don't like. I like to work in list mode. In Photoshop CS5, when I opened a folder and clicked on an image, the image and size appeared at the bottom of the menu. In Photoshop CS6 it does not.
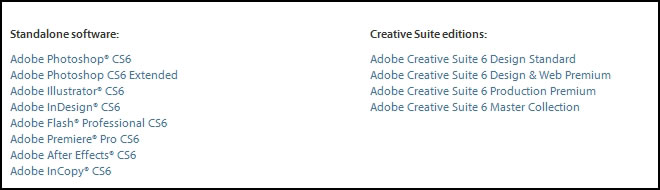
In order to choose your images in that manner, you must use Bridge CS6. It comes with a membership to the Creative Cloud and with the following standalone and suite products.
 Twain drivers are not automatically installed in Photoshop and have not been for a few versions. I always seem to forget this. From what I have gathered 64-bit does not support them although the directions for installing them do mention using them in 64-bit. However, I did not try but installed the twain plug-in in my 32-bit version of Photoshop CS6 Extended. If you like scanning with Twain drivers, click on the link Twain and it will take you to a discussion of Twain drivers and the appropriate downloading site. It discusses Photoshop CS4-CS6.
System requirements
Windows
- Intel® Pentium® 4 or AMD Athlon® 64 processor
- Microsoft® Windows® XP* with Service Pack 3 or Windows 7 with Service Pack 1
- 1GB of RAM
- 1GB of available hard-disk space for installation; additional free space required during installation (cannot install on removable flash storage devices)
- 1024x768 display (1280x800 recommended) with 16-bit color and 512MB of VRAM
- OpenGL 2.0–capable system
- DVD-ROM drive
- This software will not operate without activation. Broadband Internet connection and registration are required for software activation, validation of subscriptions, and access to online services.† Phone activation is not available.
Mac OS
- Multicore Intel processor with 64-bit support
- Mac OS X v10.6.8 or v10.7
- 1GB of RAM
- 2GB of available hard-disk space for installation; additional free space required during installation (cannot install on a volume that uses a case-sensitive file system or on removable flash storage devices)
- 1024x768 (1280x800 recommended) resolution display with 16-bit color and 512MB of VRAM
- OpenGL 2.0–capable system
- DVD-ROM drive
- This software will not operate without activation. Broadband Internet connection and registration are required for software activation, validation of subscriptions, and access to online services.† Phone activation is not available.
* 3D features and some GPU-enabled features are not supported on Windows XP.
† Adobe online services, including Adobe CS Live Services, are available only to users 13 and older and require agreement to additional terms and Adobe's online privacy policy. Online services are not available in all countries or languages, may require user registration and may be subject to change or discontinuation without notice. Additional fees or subscription charges may apply.
If you had a question or a problem, you used to be able to contact tech support or search a PDF help document. In the last number of years, you type in a question and search endlessly through reader's files, support files, etc. and hope to find an answer. It has become a lot more frustrating and time consuming. I did find this from Adobe, though,on a Help page. "PDF and offline versions of product help for Creative Suite 6 products will be available for download in June".
I use Photoshop daily and have been for over 20 years. I mainly use it for still 2D images. I have to admit when I first heard the new features of Photoshop CS6 Extended I was not very excited. That is until I started to use it. I totally agree that this is a dynamic and dynamite version. The new Camera Raw 7 is awesome in its ability to take an overexposed image and save it. While I don't mind cutting, pasting, and using the rubber stamp, the new Content-Aware tools are not just time savers but often produce better images. The Perspective Crop tool was pretty amazing and while the new crop tools did more than those in previous version, the Perspective Crop tool is my favorite cropping addition. I am not sure whether I will stop using Gaussian Blur to soften distant mountains, but the new Blur Gallery offers me a number of choices. I am truly excited about Photoshop CS6 Extended.
Adobe states that the Mercury Graphic Engine is much faster than predecessors. I took it for a comparison test using an image and the Liquify filter in Photoshop CS5 Extended and Photoshop CS6 Extended. In Photoshop CS5, the large 1000 pixel brush hung up and created strokes that were rough. In Photoshop CS6 using the same parameters, I could have turned the image into liquid butter if I had allowed it. The strokes were smooth and there was absolutely no hesitation. Both programs are on the same machine.
You can always download a free trial of Photoshop CS6 Extended. To try it click on TRY, and if you want to compare the versions of Photoshop, click on the link.
Photoshop CS6 costs from US $199.00 as an upgrade with the full price of US $699.00. Photoshop CS6 Extended costs from US $399.00 as an upgrade with the full price of US $999.00. CS6 Design and Web Premium costs from US $375.00 as an upgrade with the full price of US $1,899.00. For more pricing information, check the Adobe website.
What I found interesting about this new version is that some of the new features will be used by most users while others are more specialized and will appeal to a smaller group of users. These are, for example in my opinion, the new Skin tone-aware selections and masking techniques and some of the new text placement and manipulation techniques, location of specific types of layers,etc. Others such as Camera Raw 7, Content-Awareness have a much broader range. I like the way Adobe is reaching out to people who need specialized tools as well as to a broader audience. This is really a great new version.
For more information on Photoshop CS6 Extended other Adobe products, go to: http://www.adobe.com.