Modifying Trees - Tutorial # 5
One can do a lot with the trees and plants in Vue 5 Easel and Vue 5 Esprit by just manipulating their proportions in the view ports, turning them, and changing the materials that comprise them.
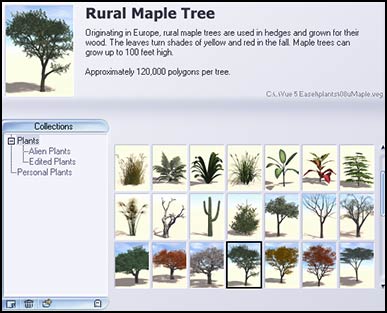
Step 1 - Go to Objects>Create>Load Plant Species. For this tutorial, I chose the Rural Maple tree.
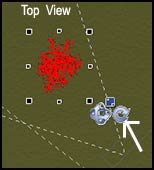
Step 2 - The simplest method of changing how a tree looks is by turning it. It is easiest to turn it by moving the blue "almost circle" icon in the Top View. (The arrow is pointing at it.)
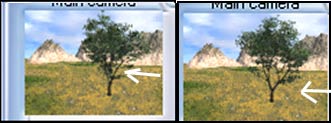
Below is an image of a tree and the same tree that was turned just a little.
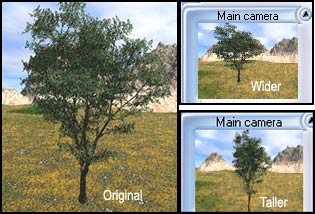
Step 3 - You can also make a tree wider or taller by manipulating the smaller squares, not the ones that make the tree grow or shrink uniformly. I find it is easiest to do this in the side view. If you look at the image in step 2, you will see two sizes of squares. The smaller squares move the image in one direction; while the larger squares move it uniformly in all directions as if its proportions were locked together. This is true in all views.
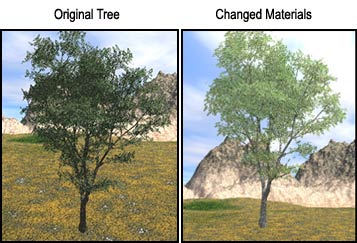
Step 4 - You can change the material of the leaves and the bark very easily in the same manner as you did for the water or the terrains. Just click on the material and open the Material Editor.
Notice how different the two trees now look.
Step 5 - You can also load completely different leaves onto the tree in a similar manner as you would in the Botanica module, in Vue 5 Pro Studio, or in Vue 5 Infinite. The leaves in much of the vegetation are made using alpha planes which can be made in Vue 5 Easel. Since tutorial 6 is on on how to make Alpha Planes and tutorial 7 is on how to use them in Vue 5 products, the following is a quick introduction on how you can create new leaves. You might want to come back to it after doing the above mentioned tutorials.
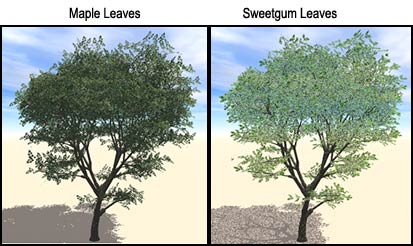
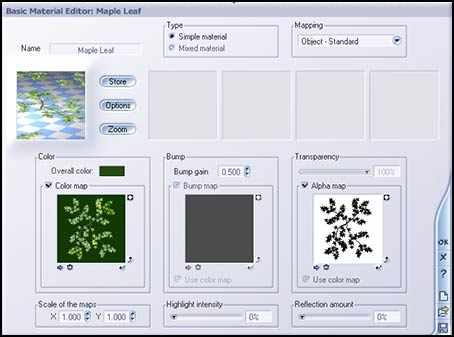
Step 6 - Double clicked on the leaf material to open up the Material Editor. Below is the image you would see. It consists of two maps: a Color map and an Alpha map. Ignore the Bump map. You don't need it for what you are doing now. You will replace the Maple leaf Color map and the Maple leaf Alpha map with the new ones you will have made. I used Sweetgum leaves.

Basically, you will replace the Color Map with your image and the Alpha map with one you have created. Once you have created the new maps,
the tree will look like the image below on the right.