Using Spot Lights as Fill Lights - Tutorial #10
Lighting is tricky in many 3D programs. I have found that if I cannot place the lights visually, I use Numerics. It might be a good idea to refer to the first tutorial again.
Since Vue 5 Easel does not give one the ability to include or exclude objects to receive light nor can one see what the light is striking other than by rendering, it does make the placement of lights harder than in Vue 5 Infinite, for example. However, lighting can certainly be done successfully.
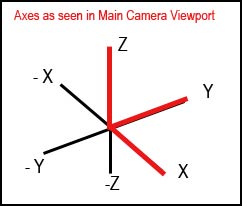
First, remember the diagram of the axes in the perspective viewport. We will return to it later.
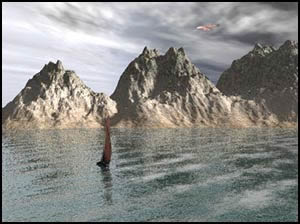
This scene is a rather dull scene that is lit only with the sun. Even though the weather is stormy, a little detail in the bird and the boat, would be useful. This can be gotten with the addition of "fill" lights. I usually add spot lights for this purpose.
Step 1 - Got to Objects>Add lights>Spot light on the top tool bar.
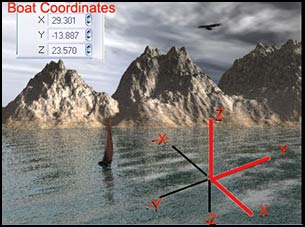
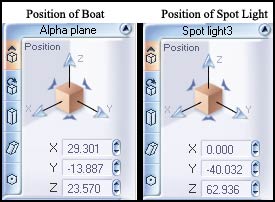
Step 2 - I have found that the easiest way to place the lights is by using the X, Y, and Z coordinates in the Numerics tab. Select the boat, which in this case is the first Alpha Plane. Then, look at the coordinates in the Numerics tab. We will want the light to face toward the visible part of the sail.
Step 3 - Looking at the axes pictured above. I know that the coordinates for the light have to have a smaller Y value since it has to shine toward the sail. Therefore the negative value will be larger. Also, the Z value will be greater than the boat and the X value will be less than that of the boat.
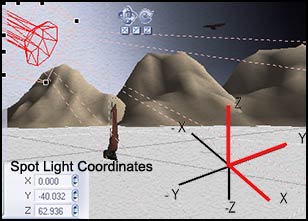
Understanding the coordinates gave me a starting point for placing the light. Then, I moved it until the sail showed red. Below are the coordinates for the boat and the spot lights pictured side by side.
Step 4 - Next I placed a spot light to shine on (the Alpha plane of) the bird. I followed the same steps as I did for the boat.
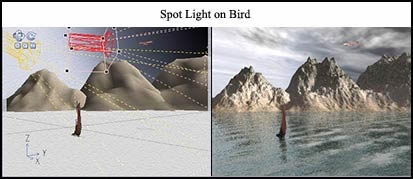
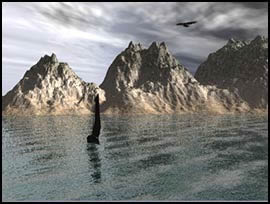
While the day is still stormy, the boat and the bird have some detail to them and, thus, are more interesting.