Creating Atmospheres - Tutorial # 9
In Vue 5 Easel, as in the other Vue 5 line of products, one can create atmospheres from presets and, then, modify them.
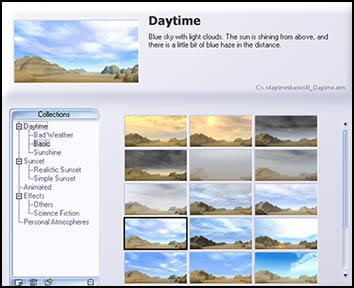
In Vue 5 Easel there are four categories for modification.
![]()
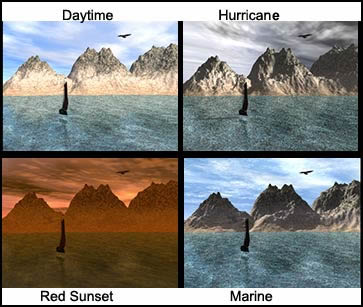
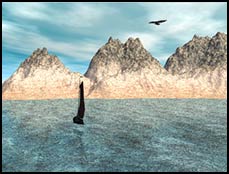
Atmospheres are one of the main controlling forces in a scene because, if it is an outdoor scene, it sets the whole mood with the quality of the light. Notice the same scene with different lighting presets.
Also, the type of lighting will affect the scene. Vue 5 Easel has three types: Standard, Global Ambience, and Global Illumination (GI). Standard illumination renders the fastest while Global Illumination takes the longest.
Vue 5 Easel defines these three types of light in their help menu. In brief:
- Using the Standard model, light from the environment is approximated to ambient light. The ambient light is from two sources, the sky and from all directions.
- Global ambience takes into account how the different colors of the sky affect the scene. Blue sky gives the part of the scene facing it a bluish tinge, etc.
- Global Illumination refines Global ambience by stating that every part of the sky dome is a source of light with rays traced toward each of these lights resulting in shadows. This form needs more ambient light than the others.
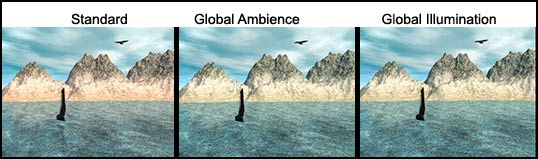
It is hard at the size above to see the difference between Global ambience and Global Illumination.
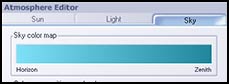
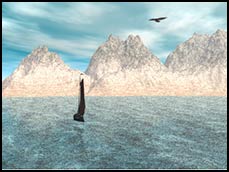
Step 1 - Take a scene and choose an atmosphere that contains sunshine. The default one is acceptable. Atmosphere>Load Atmosphere. Then, go to Atmosphere>Atmosphere Editor to open it up to look at the settings for that atmosphere. Notice, in the scene, the disparity in color between the water and the sky. The objective or exercise here will be to make them more similar. Also, notice the gradient for the color of the sky. It is lighter on the horizon (near the lowest part of the mountains) than at the zenith (the top of the picture).

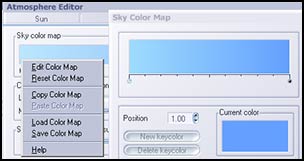
Step 2 - Right click on the Sky color map, and choose Edit Color Map to open up the Atmosphere Editor. Notice the two circles or tiny spheres at the bottom of the gradient. The selected one has a black dot in the middle. Notice the color above is the same as the Current Color.
Step 3 - Right click on the Current Color to open the Select Color and choose a darkish blue-green similar to the water. Click OK.
Step 4 - Then, click on the left dot under the gradient to select the lightest color. It will appear in the Current Color. Right Click on it to open Select Color and choose a lighter blue-green. The gradient should look similar to the one below.
Now the sky will mirror the water. Remember, this was just an exercise. I am not recommending that sky should necessarily be the same color as the water.
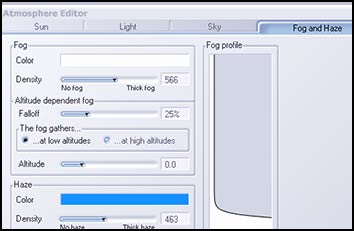
Step 5 - Now we will add fog to the seascape. Click the Fog and Haze tab. At this point we have been working with the default setting which called for no fog.
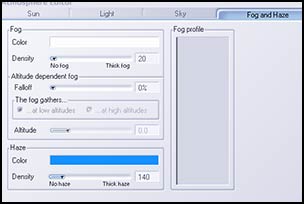
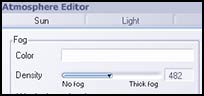
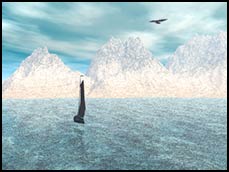
Step 6 - Add some fog by moving the No fog slider toward Thick fog. The default color is white. You can change it if you like. For this exercise, I will leave it white.
Notice how the colors of the distant mountains have appeared to fade.
Step 7 - Next change the falloff of the fog just to see what will happen. One needs to experiment with as many controls as possible to see what they will do.
Once again, notice the different effect.
These are just some of the effects that can be accomplished by changing the colors and the settings of the different components in the Atmosphere Editor as well as by using the different atmosphere presets.
In the next tutorial, we will show how we can change these even more by adding additional lights to the outdoor scenes.
Go to Lighting - Tutorial #10