Creating Basic Alpha Planes - Tutorial #6
This tutorial will address creating an alpha plane in the form of a flying bird. The sequel will apply this technique to Vue 5 Easel and other Vue 5 products as well as discussing creating different leaves for trees in Vue 5 Easel and Vue 5 Esprit and using the same technique within another context.
There are different ways to create both the Image map and the Alpha plane. Some tiff files contain an alpha channel. For this tutorial, we will build both the Image map and Alpha map from one image
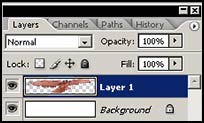
Step 1 - Take an image and using what ever method you like select it and cut and paste it so it is on a transparent layer with a white layer beneath it.
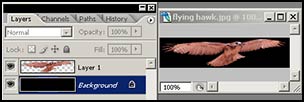
Step 2 - Since the hawk is on the top layer, fill the bottom layer with black and do a save as and call the new file Image map. Since you did a save as, you still have your initial 2 layer image. Then, flatten the two Image map layers together.
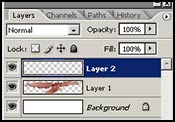
Step 3 - Now you will create your Alpha map. Fill the bottom layer with white again. Go to the top layer and create a layer on top of it so you have 3 layers. In Photoshop, it is just new layer.
Step 4 - Go to the layer with the bird on it and do a load selection or whatever you have to do to have the bird selected.
Step 5 - Now with the bird selected on the bird layer, highlight the top EMPTY layer. The bird is still selected. With the paint bucket or fill tool fill the top layer with black. It will fill in the image of the bird on that layer.

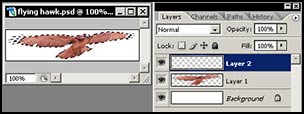
Step 6 - Flatten the layers to create the Alpha map or Alpha image.

This method will work for creating all images for an Alpha plane or any place image and alpha maps are used.