|
In this Hints # 3, I'll be dealing with various aspects
of creating free-flowing hair with a side part. Along the
way, I found out a lot more about a number of the tools and
techniques of the Hair Room. The more I use it, the more I
see its amazing power and the more fun it is.
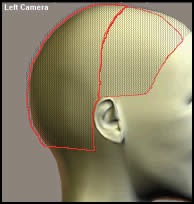
Hint #7 In this hint, I'll describe how I set up the
hair. This is a short hint. I used this template for the three
styles I'll show in this Hints Tutorial. Again, I broke
up the hair into 7 parts. However, this template differed
from the first 7 part template.
|
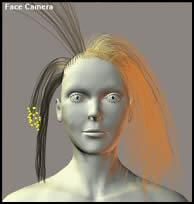
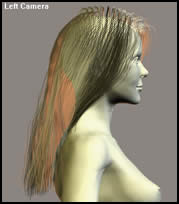
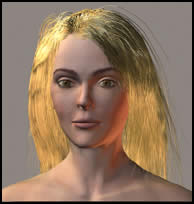
There are two hair groups in the
front separated by a side part.
|
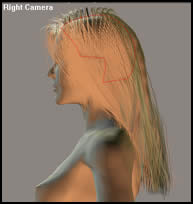
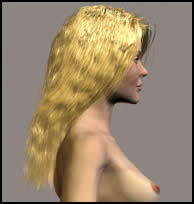
The side also has two hair groups.
One is above the ears and starts where the front hair
group left off. You can see a little of the front area
in this illustration.
|
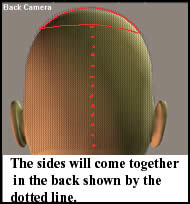
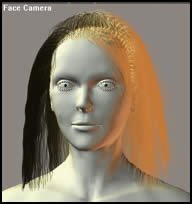
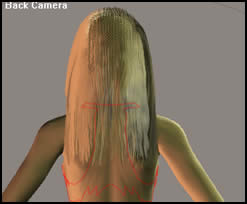
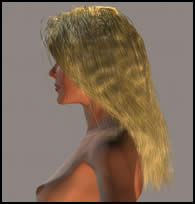
The two side groups come together
in the back. I have included a hair group on the top.
This group is optional, but I have found it smooths
out the back and can hide problems.
|
|
|
|
|
Hint # 8 Initially I decided to style this hair without
changing any of the Growth Controls except for Hair
Length. I immediately started to use the Styling Tools,
but when I went to supplement them by changing a setting in
the Growth Controls, instead of complementing what
I had done, Ierradicated what I had done using the Styling
Tools. One can use them together, but one must be aware
that the styling one has accomplished with the Styling
Tools will change and not in the expected manner. For
example, I had bent down some hair with the Translate Tool.
I went to bend it more with the Pull Down Growth Control.
Instead of bending down further, it resumed the
position it had had before I had used the Translate
Tool. I will list those numbers I eventually changed from
their default settings in the Growth Controls.
|
Growth Controls
|
Sides Above the Ears
|
Sides Meeting at the Back
|
Back Top
|
|
Hair Length
|
0.6500 |
0.6500 |
0.6500 |
|
Pull Back
|
0.00070 |
0.00500 |
0.00500 |
|
Pull Down
|
0.00175 |
0.00500 |
0.00500 |
Now I was ready to just use the Styling Tools. I mainly
used the Translate Tool in conjunction with the Falloff
Slider and the Constrain Length. (These pictures
below do not show any changes made in the Growth Control
Tools.)
Row one shows the hair being bent with the Translate Tool.
It is important in this stage to keep the hair at a constant
length and move it from near to the roots. If you do not keep
the hair at a constant length, it will not have the nice wave
at the top. You want to section it off in small sections from
bottom to top as shown in the pictures.
The bottom row shows Hair Group with the Yellow
nodes. Now is the time to remove the Constrain Length
and with the Lengthen Dial bring the hair to the
same length as the rest of the hair. I used the Lengthen
Dial instead of increasing the hair length with the Translate
Tool so I could keep the waves on top. Otherwise I could
have affected them by flattening them out since I would have
been basically pulling on the hair.
I, then, took the Curl Hairs Tool and bent the ends
under as I had done in an earlier tutorial. See Hint #6
in the proceeding tutorial. This section involves two hair
styles because before I curled it, I added some kink to it.
I didn't change the Kink Strength from the default,
only the Kink Scale. I think it gave it a little more
body and ability to curl under better without appearing too
kinky.
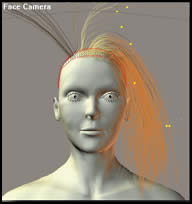
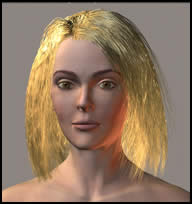
This last free flowing long haired style will involve a few
Hint sections. To lengthen the hair, I used the Lengthen
Slider in the Style Tools Menu. I highlighted each
Hair Group, and then with the Lengthen Slider pulled
downward until I had a length I was satisfied with.
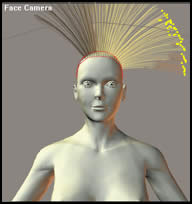
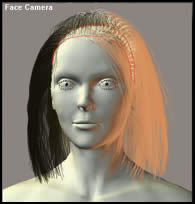
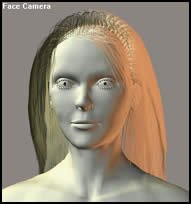
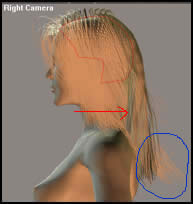
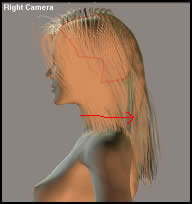
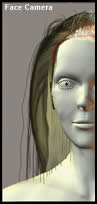
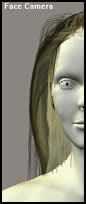
Hint # 9 This hint will explain how I was able to
smoothly draw back the hair so it would fall over her shoulders.
The tool I used was the Translate Tool. Using a side
view, I selected the hairs I needed, in this case the two
Hair Groups nearest her face on either side. These
were the front group and the group above the ears on each
side respectively. I pulled the hair back following the red
arrows. (See below).The Falloff Slider was set so that
the action started near the root of the hair. However,
notice the hair circled in blue. All the hair will go straight
back. To correct this, I changed the Falloff Slider
so that it was near the tip and then the hair strands bent
into place. See step 2.
Hint #10 When I got ready to try a render, I set the
number of hairs in each Hair Group to be 1,000. However,
I noticed many "stray hairs." I found a number of
the Guide Hairs and fixed them, but I was still left
with too many stray hairs. So, with some of the Hair Groups,
I cut the number of hairs to 800.
I then did a quick render. Once again, this would not be
a final product and I did not take it into the material room.
To Hints
on Creating Hair in Poser #4
For more Poser 5 tutorials, click the Articles button below. |