|
This is the second Hints Tutorial Each time I finish
one I can actually measure how much I have learnt. Yes, I
can even see where I could have done previous things differently
and better. But, if I waited until I was "Perfect"
Ha! Ha! I would wait forever. So here goes four more hints.
These are based on the Straight Haired Template I created
in the first Hints on
Creating Hair in Poser 5. These three styles are somewhat
different. I have "cut" one of the hair groups,
and I will describe the differences in shortening or lengthening
hair; and I have curled other sections of hair by varying
amounts.
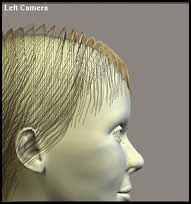
Hint #3 How To or Not To "Cut Hair" There
are various ways to lengthen or shorten hair in Poser 5. Some
work better than others. I will describe two ways here. For
the first hair style I wanted to shorten the two hair groups
over the ears. The first method I tried was just changing
the length of the Grow Hairs of the whole group. I
changed the Hair Length from 0.8000 to 0.2000. Notice
the hairs at the top, marqueed by the red box. Before I did
this, the "roundish hills" were of uniform height.
When rendered the figure, the swatch of hair looked like it
had been mowed shorter than the rest by a run-away mower.
What I found interesting is that the effect was not apparent
until I changed the length of the hair on both sides of the
head.
 |
 |
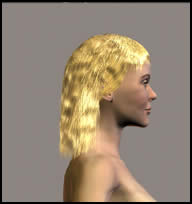
The next method I tried which worked beautifully, except
for a minor problem of two left over hair pieces on one side,
which in this case was not important, was to use the shortening
and lengthening dial in the Styling Tool Menu. I will
be referring to this slider a lot in my next tutorial. Notice
how the hair on the top of her head is uniform.
 |
 |
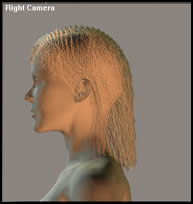
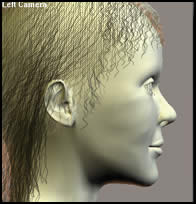
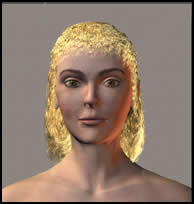
Hint # 4 In this hint, I will show how I took the
straight haired template and, by cutting and styling the hair
a little, made my first straight hair style. I used the Translate
Hairs Tool for the majority of my styling. First, I selected
the hair (group 3 on one side and group 4 on the other).Using
the tool, I pushed the hair toward the back of the ear on
both sides of the head. If I missed a stray hair, I turned
the head to the Face Camera position so I could see the yellow
nodes, selected the hair in question, and then with the Hair
Remover Tool eliminated the other nodes before I used
the Translate Hairs Tool to push the stray hairs into
place. Then I Cleared the Selection. Were I to use
this hair style on a model, I would probably curl the bottom
under. But I will do that in hint #6 so I won't repeat myself.
For my test renders, I kept the population of hairs in all
the Hair Growth Sections at about 1,000.
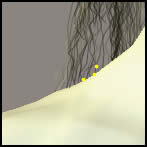
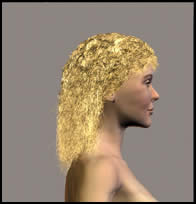
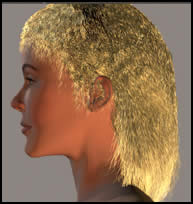
 Hint
# 5 This hint will show how I changed the hair style by
making it slightly curly. This is really simple to do. All
you do is manipulate the Kink Strength dial. I varied
the strength from 20 to 15 on the various parts of the head.
The below illustrations will show how this looked differed
from the above one. The first illustration just shows the
importance of often having to manipulate the position of Guide
Hairs one at a time or a few at a time. Again, here I
used the Translate Hair Tool. Hint
# 5 This hint will show how I changed the hair style by
making it slightly curly. This is really simple to do. All
you do is manipulate the Kink Strength dial. I varied
the strength from 20 to 15 on the various parts of the head.
The below illustrations will show how this looked differed
from the above one. The first illustration just shows the
importance of often having to manipulate the position of Guide
Hairs one at a time or a few at a time. Again, here I
used the Translate Hair Tool.
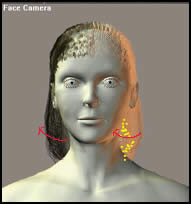
Hint # 6 In this hint I increased the curl as well
as turned under the bottom of the hair using the Curl Hairs
Tool. The first dials I changed were those involved with
setting the Kink parameters. Then with the Translate
Hairs Tool, I separated the hair on the side of her head.
This hair was the hair that had originally been placed over
the ears and then cut. I also elongated, hair by hair some
of the bangs that were nearest to the side of her face. I
used the same tool.
The next step is the newest one. For this I used the Curl
Hairs Tool. What is important to note is the direction
of the red arrows. With the head facing front, I moved the
tool in the specified directions so that the hair would curl
under toward the face. In the back, the direction was
toward the top of the head for the hair to curl under.
To Hints
on Creating Hair in Poser 5 # 3
For more Poser 5 tutorials, click the Articles button below. |