A little while ago, I received a question about how to
create a continuous tone watercolor effect.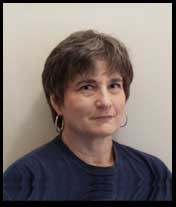 I tried it and could not do it so I began to see if I could
create a brush that would accomplish this end. I created
two cloners which are included in the free downloadable
file called Brushes.zip.
This tutorial shows how to use them.
I tried it and could not do it so I began to see if I could
create a brush that would accomplish this end. I created
two cloners which are included in the free downloadable
file called Brushes.zip.
This tutorial shows how to use them.
Since the gentleman who contacted me was trying to create
this effect on a photographic head shot of his grandson,
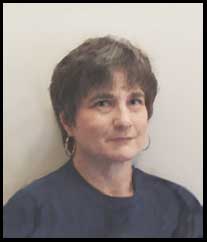
I had my husband take some digital pictures of me. To see
a larger version of the photo on the right, click on it.
The larger version will appear with the two versions of
the final result.
 To
use any program properly, one must know how its tools work
and be willing to spend numerous hours and days experimenting.
Brushes are an integral part of Deep Paint. Thus, constructing
brushes and modifying them are necessary in order to get
desired results. (See
my earlier tutorial on constructing brushes.)
To
use any program properly, one must know how its tools work
and be willing to spend numerous hours and days experimenting.
Brushes are an integral part of Deep Paint. Thus, constructing
brushes and modifying them are necessary in order to get
desired results. (See
my earlier tutorial on constructing brushes.)
This first illustration is one of me taken with my digital
camera and then edited in Photoshop since we took it inside
without a flash and used overhead lighting which caused
it to be too yellow. Also, the coloration was harsh and
too contrasty. However, this image editing is not really
pertinent to the tutorial.
I will describe a very simple way to clone a photograph
and ensure that few brush marks remain using only Deep Paint.
The steps that I took will be described sequentially: I
feel I need to note, though, that this tutorial describes
a simple method only. Usually, I will layer my work and
separate areas so that the layer opacities differ. I, then,
bring the final file into Photoshop and often merge it with
the original file.
1 - Open the paper setting on the Command Panel
and selected "clone source" and set the opacity
to 50%. Add a layer above it and make sure that that layer
is highlighted. I set the background opacity differently
with different images depending on how much I need to see
the background layer. The lower the setting, the easier
it is to initially make sure that all the bottom layer or
clone source has been cloned.
50%. Add a layer above it and make sure that that layer
is highlighted. I set the background opacity differently
with different images depending on how much I need to see
the background layer. The lower the setting, the easier
it is to initially make sure that all the bottom layer or
clone source has been cloned.
2 - Blow the image up with the zoom tool until it is very
large. I work on a small portion at a time so that the details
of the image to be cloned are clear. The size of the image
I used for the tutorial was 400 x 470 pixels at 72 dpi.
I used screen resolution because I did not plan to print
this image.
3  -
Next, select the Watercolor brush that I have created
and included in the download file and make sure that you
have chosen the cloner tool from the menu and that
you are working on the layer above the clone source and
not on the clone source or bottom layer itself.
-
Next, select the Watercolor brush that I have created
and included in the download file and make sure that you
have chosen the cloner tool from the menu and that
you are working on the layer above the clone source and
not on the clone source or bottom layer itself.
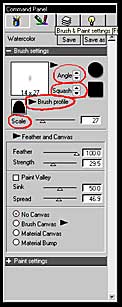
4 - Decide on the shape and size of the brush for the different
areas of the image. Often this is a trial and error procedure
since smaller areas can take a smaller brush size, but don't
necessarily have to. A larger brush softens the color transitions.
Since the brushes are oblong, I will list the settings of
the slider. They varied from 3 to 10 for the face and from
10 to about 30 for the background. These changes are easy
to make. Just move the slider on the Command Panel
as described previously in the tutorial or see
my earlier tutorial on constructing brushes.
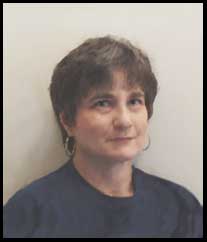
5 - The image can be left as it is or the Blur brush
included in the download can be used. This brush was specifically
designed for this project. This brush is not used
as a cloner but as a brush. Select the brush
from the Tools menu and work on the top layer of
the image softening and blending as desired. The two pictures
below are different in that the Blur brush was only
used on one. However, at this size, it is very difficult
to distinguish one from the other. However, when the size
is larger, the differences can be shown. Click on either
one to see the larger version.
6 - The Blur brush can basically be used as created.
The size does not have to vary much other than to possibly
make it larger for the background and perhaps rounder.
7 - Go to the Paper section of the Command panel
and merge the layers remembering to set the clone source
(bottom layer) at 100% opacity. However, both layers' opacities
do not have to be 100%. Try varying them for effects.
Steps 1- 7 describe the process. The following
are hints on how to work:
1 - Follow the pattern of the design. For example, on the
T-shirt area of the image, I followed the folds of the cloth
with my brush.
2 - To blend a darker area into a lighter one or visa-versa
, either go from the darker area to the lighter or the lighter
to the darker. The results will be different.
3 - For less contrast, use a larger brush; however, details
will be lost.
4 - Vary your stoke from a sweeping long stroke, to a small
stroke.
5 - Make a lot of continuous strokes or many isolated strokes.
To Download the two brushes I used to create the images,
click on the word Brushes