|
This tutorial will outline making texture maps or image maps
using BodyPaint 3D. For information on this program, see my
review of BodyPaint 3D.
I have included some sample figures for this tutorial that
can be downloaded here.
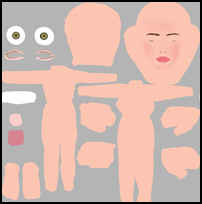
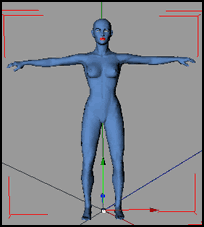
The figures are from Curious Labs Poser 4 and Curious Labs
Pro Pack (service release 3.) The figure I have used here
is the standard P4 nude which I have modified very slightly.
In the downloadable zip file I have included this slightly
modified file and call it "poser template".
I always use a digitizing tablet for all my art work. For
this tutorial, one is necesssary.
Preparing the Figure for Painting
Step 1 - Create a figure in Poser and export is as
an obj without making any changes.
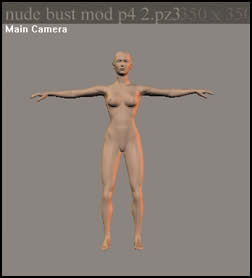
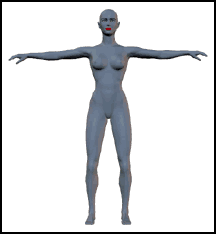
Step 2 - Open the obj file in
BodyPaint 3D. If you are using the one I made, it is called
poser.obj. It will open in BodyPaint 3D facing to the
side. It did not matter how the figure faced in Poser, it
always opened the same way in BodyPaint 3D.
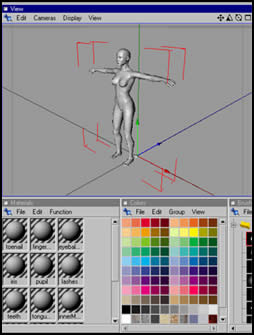
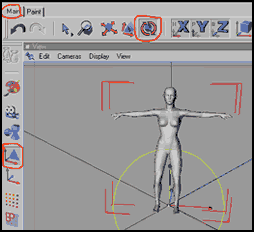
Step 3 - Turn it using the "Object
Tool." Do this slowly since it can spin easily. The "Turning"
symbol is found on the "Main" toolbar (on the top
of the screen.) The "Object" Tool is circled on
the left. Moving an object can be tricky. I experienced it
having a tendency to move off the screen.
Step 4 - In the "Materials"
menu, select file, new material. Drag the new
material onto the figure in the "View" window.
A box will appear. Retitle it if you like. Otherwise don't
change other settings.
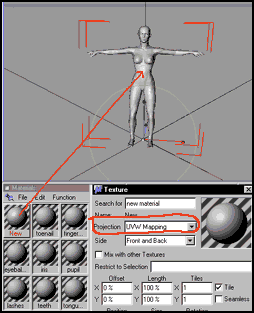
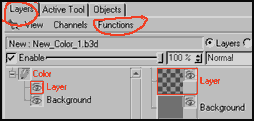
Step 5 - Click on the " New Material"
to activate it. Go to the "Layers" Tab and put a
check mark in the box next to Enable. Click on Channels,
and then Color. A menu will open up. Change the size
of the canvas from height = 600 and width = 600 pixels to
height = 1,000 pixels and width = 1,000. Leave the resolution
to 72 dpi. These dimensions were roughly taken from image
maps from the Poser CD. Then, double click on the colored
box on the lower right and when the color picker opens
up, type in Red=200, Green=200, Blue=200. Then click OK.
The color of the figure should have changed. I have prepared
a figure called poser.c4d in which I have turned it
so it faces front and added the new material.

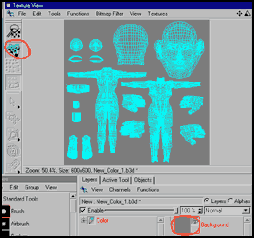
Step 6 - Double click on the "Background"
square (the gray one labeled background. This will put a solid
gray background into the "Texture" window. Click
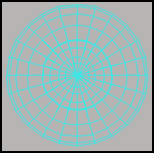
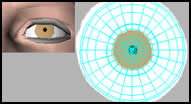
on the UV Mesh icon to activate the mesh.
Step 7 - A good skin color is Red=251,
Green=197, Blue=178, and brightness is 100%. To save this
color as a preset on the color palette:
A) Click on any color square. A dialogue box
will open up.
B) Click on the arrow below the word "brightness"
and select RGB.........255.
C) Go to file and select "add single
channel preset." Enter the name of the color.
D) Click "OK" to close the dialogue
box.
It is important to remember when closing the
program after a change to a preset has been made or a preset
added, to SAVE presets when the question comes up on the screen.
Painting the Figure and Image Map
Step 8 - The first step is to set up
layers. Go to the "Layer" menu and click on Function
and "add new layer." I use layers so if I do not
like something it is easy to delete a whole layer.
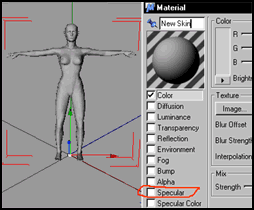
Step 9 - Since I wanted the model to
appear less "shiny", I double clicked on the "new
material" icon. In the dialogue box, I unchecked "specular"
which is a default setting. This will eliminate shiny areas
or highlights from the figure.
Step 10 - Before I worked any more on
this model, I made an image map to see if it would properly
fit. Use a definite color for the skin, such as blue. Paint
in the details of the mouth, fingernails, or any other other
body part that might be important. Once it is known that this
basic map will work, it can be saved as a template if desired
(without the color, obviously.) The map can be saved as a
tif or jpg file. Both work the same in Poser and the rendered
file size is not different. (This surprised me.)
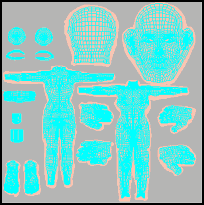
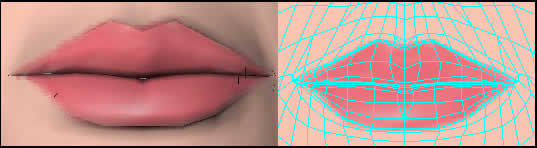
| Figure Created in
BodyPaint |
Map Created in Body
Paint |
Figure Rendered in
Poser 4 |
 |
 |
 |
Step 11 - Since the painting of the image
map can extend beyond the lines of the map, the rough work
can be painted on the map itself. This is easier because then
the figure does not have to be turned so the back or sides
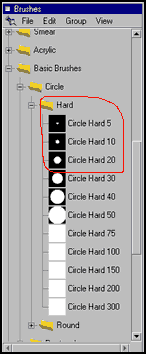
are visible. Choose an appropriate size brush. I found that
for the rough painting of the skin, a hard brush of 10 or
20 pixels worked very well. Remember to work on individual
layers and then merge them when you are finished with the
Image Map through the Function command if the file
you are saving is a TIFF or Jpeg. Any missed areas can be
fixed in a Painting or Image editing program. Remeber, Paint
Shop Pro 7 is included on the CD.
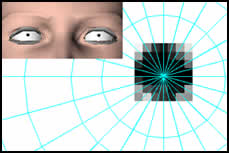
Step 12 - With the Unwrapped UV Mesh
activated, paint around the edges of the meshes. Then, deactivate
the UV Mesh and paint in the rest of the areas. This way it
is much easier not to miss any areas.
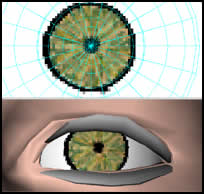
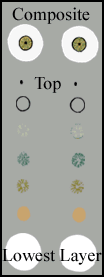
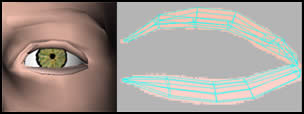
13 - The next area to paint is the eyes.
(A) Add a new layer and with a hard round bush
of 10 pixels, paint in the white of the eyes.
(B) Add another layer and with a brush of only
1 or 2 pixels paint in a dark circle for the pupil. The acrylic
thin brush is a good brush. Just customize it so that it is
only 1 or 2 pixels in size. This layer will be the top most
eye layer.
(C) Next highlight the eye layer which you painted
white and add a layer above that. On this layer you will paint
the basic color of the iris. Use a softer brush (soft round)
and paint it tan (for example).
(D) Next add a layer above this one. For the
next few steps you will add as many layers as you like. On
each layer use an acrylic brush of 1 pixel and draw lines
as per the illustration. The various layers can be enabled
at different percentages. The lower the percentage, the more
transparent will be the color.
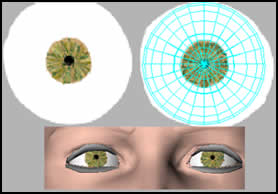
(E) The last step involves coloring the rim
around the iris. When you add this layer, make sure that this
layer resides under the pupil layer. Use the same brush that
you did for the the lines of the iris.
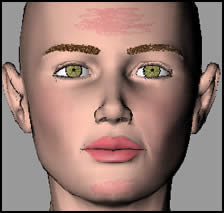
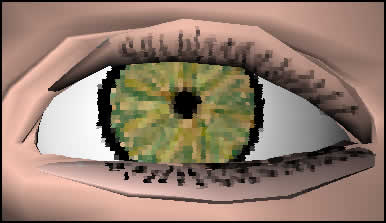
14 - (A) The eyelashes are always a bit of a problem.
It is very hard to feather them so they look natural. The
first thing one needs to do, however is to paint the lids
so they look natural. Paint the lower lid a skin tone that
is slightly pink and the upper lid the regular skin tone.
(B) Take the number 2HB Pencil and make its
size1 pixel. Feather the strokes by changing your hand's pressure
on the stylus. Make their length such that they help give
the appearance of curving.
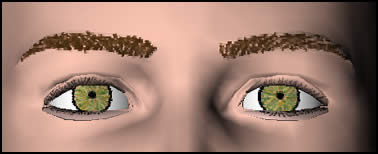
15 - Take the pen tool at a size of 1
pixel and follow the outline of the brow going from the bottom
up. Then darken the color a little and add some more strokes.
16 - (A) For the lips, choose the chalk
square brush and a shade of red or pink. Don't paint it too
evenly so that the lips will look natural. Then choose the
small size smear brush and smear it to soften it and blend
it. Again, lip color is not perfectly defined; so again, leave
it slightly uneven.
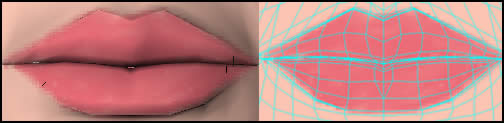
(B) Add a streak of white to the lower lip and
blend it with the medium smear brush to add a highlight.
17 - (A) Take the same color as the lips
or any color desired and spread it on the cheeks according
to the illustraion. Use the square chalk brush at the default
setting.

(B) Use the medium smear brush. First stroke
from the cheek color toward the skin color. The blend in the
oppposite direction. The more you go over an area, the more
transparent it gets.
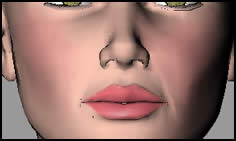
(C) Then enable the layer to 62%.
18 - Lastly, to finish the face add color
to the chin an nostrils. I chose a light pink for the chin
and forehead and a very dark brown for the nostrils. Then
smear it with a medium smear brush to blend it and enable
the layer at whaterver percent looks good.
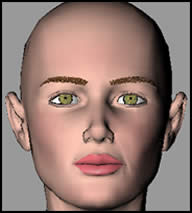
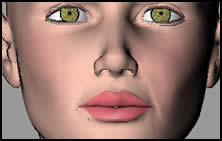
Before and After
 |
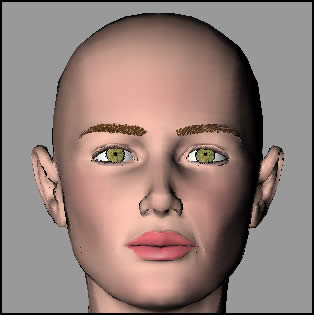 |
Troubleshooting Runaway Objects - The
"Runaway Object" problem occurred when I exported
a figure in the obj format from Poser and opened it
in Body Paint 3D. If I tried to move the figure, it flew off
of the screen. I could rotate it but had to do it very slowly.
It happened when I used my mouse as well as when I used my
digitizing tablet. Each computer is different and each operating
system is, too. Thus, I am only writing this footnote so that
people don't think something is wrong with their computer
should this happen. This problem happened with both my Pentium
III's under windows 98 second edition and with Poser Pro Pack
SR 3 on the machines. It only happened if I exported obj
objects from Poser directly into BodyPaint 3D. I do not believe
it to be a function of BodyPaint 3D because if I exported
a 3ds (3D Studio Max) from Poser and brought it into
that program and changed it to an obj, the problem
did not happen; but the figure was not satisfactory. This
problem did not occur if I brought the Poser obj file
into another program. It only happened with obj's exported
from Poser into BodyPaint 3D.
The work-around is to use the magnifying glass.
Bring the figure or map into the window so it fits the
window. Then, magnify each area by making a marquee with
the magnifier around the area to be painted until it is large
enough. While this was cumbersome at first, after a while,
I got used to it and picked up speed in manipulating the figures
or the texture map.
After the tutorial was
up on Renderosity's web site, I received a message from Curious
Labs telling me that I could not use any objects from Poser
so I am having to delete a template and an obj figure from
my extra's file. (The one that can be downloaded). I hope
the instructions in this tutorial will be sufficient for creating
them on your own. I am sorry for this problem since it was
my intent to only instruct Poser users and give them a head
start on creating a texture image.
|