|
I came to the computer as a photographer. Initially, I did
black and white photography and did many portraits using three
lights. Below is a basic lights setup. There are no lights
turned on nor are the lights regulated for height or angle.
The larger light (M) represents the main light, the smaller
square light is the fill (F) light, and the conical shaped
light is the hair(H) light. The shapes are only being used
for convenience.
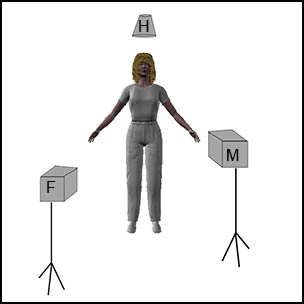
Initially, the main light is set up to light
up the figure and the distance from the figure is used to
soften as well as to regulate where the light falls. Other
devices such as diffusers and barn doors are also used, but
this is not a tutorial on photographic lighting for a photographer.
Next the fill light is set up. Usually it is used to remove
harsh shadows. Lastly, a hair light is used to accent and
add life to the hair.
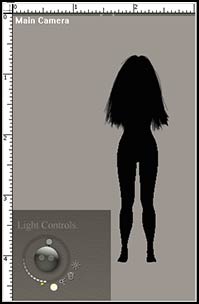
Knowing this, I still had trouble with Poser
because I could not understand their Light Controls
represented by the globe and the lights. This was especially
true because one light could appear to be in the same position
in reference to the globe but actually light different parts
of a body. Unless one learns how to position the actual lights,
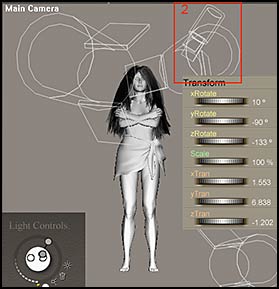
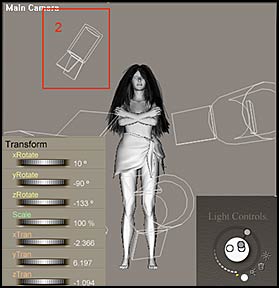
using the globe simulation can be confusing. Look at the images
below. Both are front views. While the lights in the Light
Controls are very similar, they are actually positioned very
differently.
Even though the first image is of basic photographic lighting,
you cannot use it in the same manner in Poser 5. Try as I
might I could not get a hair light to light up the hair and
not spill over onto the forehead in a horrible highlight.
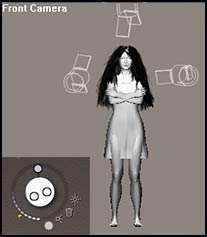
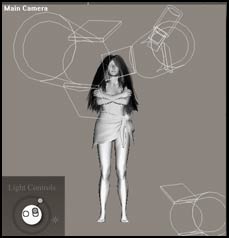
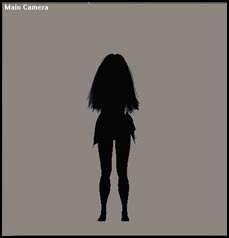
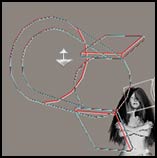
When you are lighting a figure, for example, and I am lighting
one figure, (see the illustrations below) its magnification
must be very small initially to see the lights for they first
appear on the edge of the screen. Also notice that the lights
appear in the Light Controls to be in a similar position,
as also in the above examples, but they are dark which means
they will not light the figure. The lights need to be pulled
from the edge of the screen and arranged around the figure
in the front or on the sides of it but not from the back unless
you are trying to backlight it.
| Regular Figure |
Decreased Magnification |
 |
 |
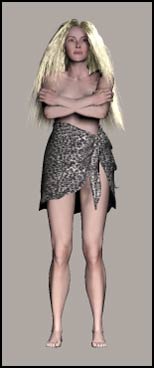
The first example will comprise lighting a full body. Normally,
for me, this body would be nude. For this example, I am using
4 spot lights. I will admit I am not totally happy with the
lighting and within the context of a scene or upon post processing,
I would adjust it a little. The tools I will use are the standard
manipulating tools used in Poser 5.
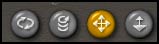
left to right - rotate, twist, translate/pull, translate/in-out
There are three ways to adjust lights: use tools, dials ,
or a combination. I use a combination. Initially, I bring
the lights into position using the translatel/pull tool. I
use this tool the most. To pull the light in front of the
figure so it faces the figure, I use the translate/ in-out
tool. It is pictured below as if it is pulling the light away
from the figure and making the light appear larger.
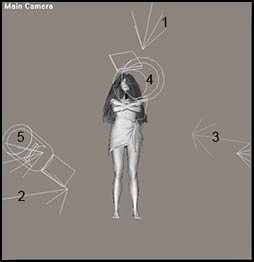
The layout for the lights for this full length
figure was set up accordingly: We will call her Clara 1.
Her light setup consists of 4 spot lights, as stated.
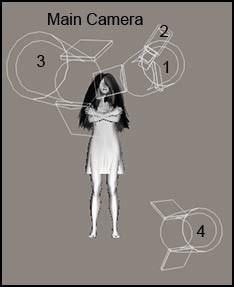
|
Light 1
|
Light 2
|
Light 3
|
Light 4
|
Clara 1 |
|
|
|
|
|
 |
The next lighting I did was a mix of infinites and spots.
We will call her Clara 2. I set the infinites first.
I always set up the lights one by one and render the figure
to make sure when I combine them I will not have too much
light. That is especially important if you are dealing with
light hair that can be easily washed out.
| Clara 2 |
 |
The first lights I set were the infinite lights.
I found that if the light was almost bright enough, then it
would be all right. I, then, set the brightness of that light
to zero and put on the second one, and then the third. Then
I lit all three. What I was looking for was an ambient light.
In this instance, everything was well lit but the face and
the lower body. The hair was almost bright enough and I had
to be careful with how I placed my spots to light the face
so as not to lighten the hair too much. The spot on the face
was the first spot I added and I used the translate/pull
tool to center it on her face and the translate/pull
tool to pull it out in front After doing all of the above,
I found that the lower limbs needed some light, so I placed
another spot.
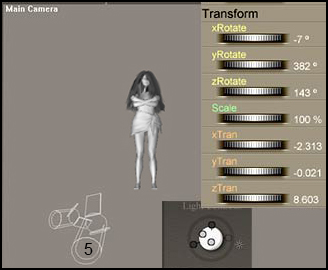
The following were the settings that I used:
Once again, I used a combination of the translate, rotating,
and twist tools along with the dials. I used the translate/pull
and the rotate tool probably the most.
Everything looks like it makes sense. Wait!!!!!!!!! While
what I am going to do works, what happens does not make sense
to me. But perhaps it will to a someone else.
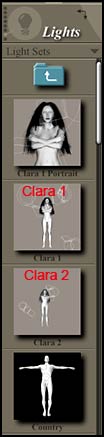
I decided to save my lights as Light Sets so I could
use them with similar figures. I named the one made up of
4 spot lights Clara 1 (after the figure with the 4 spot lights)
and the one made up of 3 infinite lights plus 2 spot lights
Clara 2. What I actually did is take my Clara 1 figure who
had only the spot lights and remove the lights.
| Clara with 1 with Clara 2 Light Preset
Used |
Original 5 Light Setup with Clara 2 |
 |
 |
Here is the strange part. If you remember, in the beginning
of this tutorial, I demonstrated how two Light Controls could
look the same and yet the lights be set up totally differently.
Well, I, also, discovered the reverse.
Notice while the Light Controls look the same, light 2 is
in a different place, and the position IS numerically different.
In this case the lights on the right were physically dragged
on the screen and the Light Control did not move while doing
it. Even after I saved the file, closed it, and reopened it,
the Light Controls stayed in the same place. I never expected
this confusion; however, it doesn't change the fact that the
lights can be manipulated well and good results achieved.
What is important is knowing what to look for and expect.
To sum up my findings: Use the numerical controls and the
tools to move the lights. If you save a Light Preset and use
it on another image that is in the same postion as the original,
check with the numerical controls to make sure they are the
same. Do a test render to see if the lighting looks OK, and
then make any necessary changes. The two light sets I created
can be downloaded and used, but you need to make sure that
the dials are the same as in the tutorial when you are fnished.
The Light Sets, along with a portrait set, are in a file called
Lights.zip. It consists
of three light sets: Clara 1, Clara 2, and Clara 1 Portrait.
© Paula Sanders 2004 |