|
Rhinoceros version 2 by Robert McNeel and Associates is a
powerful NURBS based 3D modeling program. NURBS stands for
Non-Uniform Rational B-Splines. They are mathematical
representations of 3D geometry and can describe shapes from
simple 2-D lines to complex solids. Rhino shares many features
with AutoCad, and I imagine, that if you are familiar with
AutoCad, learning Rhino will be relatively easy. I'll start
out describing Rhino with a left handed compliment. It has
too many options. For the person not very familiar with 3D
modeling programs, but who has used some, and not at all familiar
with AutoCad, there are too many choices. This, of course,
gives the experienced person unlimited freedom. That is why
I call it a left handed compliment. While I have used other
3D programs with comfort, I found the learning curve for Rhino
very steep.
I will try to describe this program through illustrations,
and I will also show the basic command structure. Also, a
demo of Rhino can be downloaded
from the website whose URL is http://www.rhino3d.com. It will
save the first 25 times, and after that it will not; but it
will still be functional. This is always great!
The system requirements for Rhino are:
- A Pentium, Celeron, or higher processor
- Windows 95/98/NT/ME/2000/XP for Intel or AMD. It will
not run on Apple Macs with Virtual PC
- 40 MB disk space
- 64 MB RAM. More is recommended
- IntelliMouse recommended
- 3-D digitizer optional
The cost for the various Rhino bundles is listed below:
Buy Rhino/Flamingo Bundle
• Commercial users US$1,195
• Students and teachers $295.
• School lab license $1,650.
Buy Rhino alone
• Commercial users US$895
• Students and teachers $195.
• School lab license $975.
Other purchase bundles are also available, for example Rhino
and Alibre Design. And Robert McNeel and Associates are
constantly offering new plugins that can be purchased separately
Rhino comes with two manuals that total over 650 pages. They
cover all versions of Rhino and coordinate with the online
help menu. The Flamingo bundle, also, comes with a good manual
that describes the Flamingo plugin that is tightly integrated
with Rhino.
Rhino can construct, edit, analyze, and transform curves,
surfaces, and solids. Rhino can also be used to construct
 Polygon
meshes and even has a plugin to enable it to go directly to
Right Hemisphere's Deep UV. While Rhino has the ability to
construct freeform models, it can also be used to create very
technically accurate models as well. Rhino is very customizable.
Its viewports can be edited, maximized, changed, etc. Its
tool bars can also be expanded, placed in different locations,
deleted or added through the Tools>Toolbar Layout. Click
on the image to the right to see a default layout of the Viewports
and Tool bars. Polygon
meshes and even has a plugin to enable it to go directly to
Right Hemisphere's Deep UV. While Rhino has the ability to
construct freeform models, it can also be used to create very
technically accurate models as well. Rhino is very customizable.
Its viewports can be edited, maximized, changed, etc. Its
tool bars can also be expanded, placed in different locations,
deleted or added through the Tools>Toolbar Layout. Click
on the image to the right to see a default layout of the Viewports
and Tool bars.
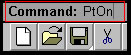
Commands can be done in a number of manners. Take the Command,
for example, Control Points On. It can be executed
in at least three ways. It can be done 1) on the Command line
or 2) by left clicking a button or 3) by going to the tool
bar and choosing Edit>Point Editing>Control Points
On. The first two ways are illustrated below.
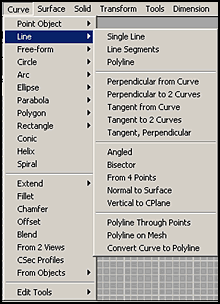
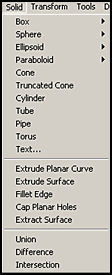
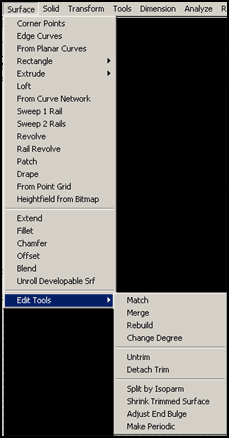
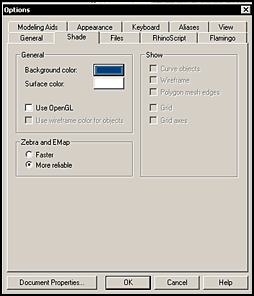
Since all 3D programs have a different approach, a closer
look at some of the tool bars and the menus and sub-menus,
I believe, gives a good indication of the strengths of a programs
and its parameter of operation. Usually one will start out
by creating curves or solids and will access the following
two menus:
One, then, will probably work on the surface:
These three menus with their sub-menus should
give an example of the number of easily accessible commands
and how logically they are setup and organized. As can be
seen, this interface is easy to navigate.
The major toolbars are also set up to be easily
accessible and to have fly-out sections. The little white
triangles in the corner of the individual visible tools show
those buttons with fly-outs.

The upper toolbar tools are used for the basic
maneuvers. Rhino allows for easy panning as well as zooming
in and out. One can look at objects in wireframe, shaded mode
and combinations. It is very easy to quickly render an object,
and this as well, has its own options, especially if Flamingo
- a ray tracing and/or photorealistic rendering engine - is
included. This plugin will be discussed later in the review.
The lower toolbar, which by default sits on the left side
of the screen, is more for specific "manipulative"
commands, such as I described earlier using the example,
Control points on.
In addition to all of these toolbars, menus,
command lines, etc., the right mouse button also can perform
various functions. In some instances, it has specific controls
such as Control points off; in other instances it will
bring up a context sensitive menu, and it has still other
functions depending on the circumstances when it is clicked.
Unfortunately, here is a good example of where I tended to
get confused by too much input. This, however, is not even
the end of the options. Below are two more screenshots of
menus. In my opinion, this is one of the great strengths of
the program, but if you are learning the program and trying
to follow tutorials, you can get lost with so many options
unless I am an exception.
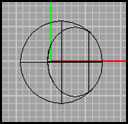
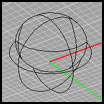
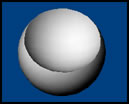
I find it interesting that some programs handle Boolean functions
easily and some with difficulty. In Rhino, it is a snap to
hollow out a bowl, for example.
|
Using Osnap to Position 2nd Sphere
|
Front View After Boolian Operation
|
Shaded Front View
|
Shaded Perspective View
|
Wireframe Perspective View
|
|
|
|
|
 |
|
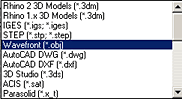
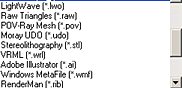
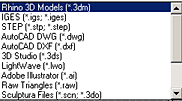
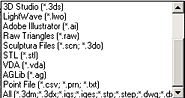
One of the strengths of Rhino is the number of file formats
it will handle. One can edit and work with almost any format
as well as export in almost any format.
|
Open
|
 |
 |
In addition, in the extensive Help Menu, if you click
on file formats, you can see a detailed explanation
of all the options available when you are saving the file
in many of these formats.
Since I had not used Rhino 1, I had to go by the list on
their website of the major differences between version 1 and
version 2. They state that "The main focus of version
2.0 is the ability to add plugin applications to Rhino."
However, this is not all. New lights have been added, VBScript
and JScript Support, Flamingo, new import/export formats,
etc. For a complete list, click on the underlined word New.
It is also, obvious, that I cannot list all the features.
In addition, we all look at important features from our own
perspective. For a list from the Rhino website click on the
word Features.
The program comes with a number of tutorials as well as online
tutorials from the Rhino site that can be downloaded. While
the tutorials describe Rhino for a newcomer and lead one through
basic steps to learn the program, in many of them they leave
out critical steps and, thus, lead to confusion. Obviously,
to whomever wrote them, the steps were second nature and thus
easy to leave out. Thus, after a while, I just put them aside.
Once one is familiar with Rhino, there are a wealth of tutorials
on the web. There are also many forums in Renderosity (www.renderosity.com)
in RuntimeDNA (www.runtimedna.com) and in other graphic online
communities. There is also a 3rd party book by Ron K. C. Cheng
entitled Inside Rhinoceros. It is published by Onword
Press.
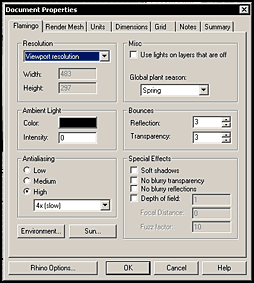
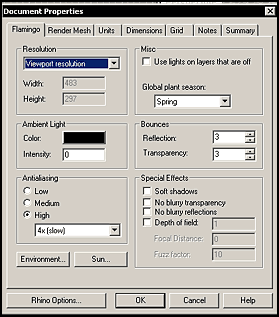
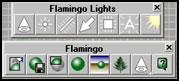
If you want to purchase the Rhino/Flaming bundle, Flamingo
integrates flawlessly with Rhino. If you look on the screenshot
of the Option's Menu above, you will notice a Flamingo
section. Flamingo, also has its own toolbar which can be added
to the interface. For those not familiar with Flamingo; Flamingo
is a plugin whose purpose is to create lifelike images from
Rhino models through raytrace and radiosity rendering technology.
Flamingo comes with its own material editor, its own lights
to give the impression of daylight, and other realistic options.
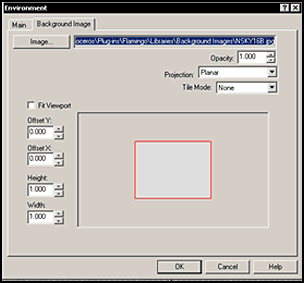
It also includes certain environmental additions such as clouds,
sky, plants to give more naturalistic settings to models,
and it contains two rendering modes - Raytrace Render and
Photometric Render.
The Flamingo manual suggests that Raytrace Rendering be used
for product shots where lighting is controlled and does not
necessarily have to look realistic. A product might be highlighted,
for example.
Photometric lighting is used when a scene is needed to look
realistic and there is a wide range of lighting conditions.
Here, according to the manual, the intensity of the lights
is measured in watts and exposure adjustment is possible after
the image is created.
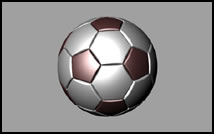
The following table shows the sample soccer file from Rhino
against a Flamingo background. All settings, including lights,
are default as are the rendering settings. I am really not
sure the table shows much since one never leaves these settings
default, especially lighting; however, it does show gross
differences. The Two Flamingo renderings show the soccer ball
against a background from the Flamingo plugin as described
in the next paragraph under the "rendering" screen
captures.
|
Rhino
|
Flamingo Raytrace
|
Flamingo Photometric
|
|
|
|
|
In addition, one can copy Flamingo images into Adobe Photoshop
and other similar programs as well as use them in word processing
documents. Below are pictured some of the features Flamingo
adds to Rhino other than its Rendering capabilities. Notice
the number of options.
As does Rhino, Flamingo, also, has other ways to access its
various options.
For a more detailed list of features, click on the word Flamingo.
Thus, one can see Flamingo can be used to complement a scene
in more ways than through just rendering.
Before purchasing an expensive program, I always suggest
downloading the demo and trying it out as well as lurking
on the forums that deal with Rhino paying special attention
to the questions of newbies.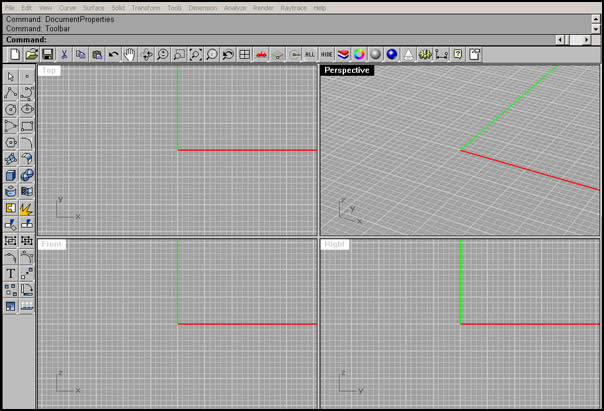
|